
Tired of store-bought eggnog that tastes like liquid sugar with an artificial aftertaste? This Easy Homemade Eggnog Recipe transforms simple ingredients into a creamy, luxurious holiday beverage that tastes like Christmas in a glass. No store-bought version can compete with the rich, velvety texture and authentic flavor you’ll achieve in your own kitchen.
Hi there, I’m Simon, and I’ll never forget the December evening that changed my eggnog perspective forever. I was skeptical about making it from scratch until Megan Carter, my pastry genius, challenged me during our annual holiday recipe testing. “Store-bought is convenient,” she said, “but have you actually tasted real eggnog?” After one sip of her homemade version, I was converted. The difference is staggering – fresh nutmeg, real cream, and eggs that haven’t been over-processed create something genuinely special.
What started as Megan’s experiment became our most-shared holiday recipe. Even Jackson Reed, our grill master who normally sticks to savory dishes, requests a batch every December. This Easy Homemade Eggnog Recipe has graced our holiday tables for years, and I’m excited to share every tip, trick, and variation we’ve perfected.
In this comprehensive guide, you’ll discover how to select quality ingredients, achieve the perfect creamy consistency, customize flavors to your preferences, and safely prepare this holiday classic. Plus, I’ll share make-ahead strategies and answers to every eggnog question you’ve ever had.
Why This Easy Homemade Eggnog Recipe Works
This Easy Homemade Eggnog Recipe delivers authentic flavor without intimidation or complexity. Here’s why it belongs in your holiday repertoire:
- Simple ingredient list – Uses pantry staples and fresh eggs you likely have on hand
- Ready in 15 minutes – Active prep time is minimal, though chilling improves flavor
- Customizable richness – Adjust cream ratios to match your texture preferences
- No artificial additives – Pure ingredients mean clean flavor and better nutrition
- Make-ahead convenience – Actually improves over 2-3 days as flavors meld
- Crowd-pleasing versatility – Serve as a beverage, dessert topping, or cocktail base
Choosing the Right Ingredients for Easy Homemade Eggnog Recipe
Quality ingredients make the difference between good and extraordinary eggnog. Let me share what our testing revealed.
Best Eggs for This Recipe
Fresh, organic eggs create the richest flavor and most vibrant color. The yolks should be deep golden orange, indicating a nutrient-dense egg. Free-range or pasture-raised eggs deliver superior taste compared to conventional options. Since eggs are the foundation of this recipe, quality matters significantly.
Pasteurized eggs offer a safer alternative if you’re concerned about consuming raw or lightly cooked eggs. Davidson’s Safest Choice eggs are widely available and work perfectly in this recipe without compromising texture.
Buying Tips
Look for eggs with firm, unblemished shells. Check the carton date – fresher eggs (within 7-10 days of packaging) perform best. For cream, choose heavy whipping cream with at least 36% milk fat. Avoid ultra-pasteurized cream if possible; it doesn’t whip as well and has a slightly cooked taste.
Whole milk creates the ideal base don’t substitute low-fat options, which result in thin, watery eggnog. The fat content is essential for that signature velvety mouthfeel.
Substitutions
Can’t find whole nutmeg for fresh grating? Pre-ground nutmeg works in a pinch, but use half the amount (it’s more concentrated). For dairy-free versions, full-fat coconut milk combined with cashew cream approximates traditional richness. Sugar alternatives like maple syrup or honey change the flavor profile but create delicious variations.
Ingredients & Prep for Easy Homemade Eggnog Recipe
Core Eggnog Essentials
The foundation requires surprisingly few components:
- 6 large eggs, separated (room temperature works best)
- 3/4 cup granulated sugar, divided
- 2 cups whole milk
- 1 cup heavy cream
- 1 teaspoon vanilla extract
- 1 teaspoon freshly grated nutmeg, plus extra for garnish
- 1/4 teaspoon ground cinnamon
- Pinch of salt
Optional Flavor Enhancers
Elevate your eggnog with these additions:
- 1/4 teaspoon almond extract for depth
- 1 tablespoon maple syrup alongside sugar
- 1/2 teaspoon ground cardamom for exotic warmth
- Orange zest for citrus brightness
- Whipped cream for serving
Pantry Staples
Keep these on hand for consistent results:
- Quality vanilla extract (not imitation)
- Whole nutmeg and a microplane grater
- Fine sea salt (enhances sweetness)
- Extra sugar for adjusting sweetness to taste
Step-by-Step Cooking Instructions for Easy Homemade Eggnog Recipe

Pre-Cooking Prep for Easy Homemade Eggnog Recipe
Separate eggs while cold (easier to separate cleanly), then let whites and yolks reach room temperature for 20-30 minutes. This ensures maximum volume when beating and smoother incorporation. Have all ingredients measured and ready eggnog comes together quickly once you start.
Chill your serving pitcher or glasses ahead of time. Cold vessels keep eggnog at the perfect temperature for immediate serving.
Cooking Method for Easy Homemade Eggnog Recipe
Step 1 – Prepare the Egg Base: In a large bowl, beat egg yolks with 1/2 cup sugar until thick and pale yellow (about 3-4 minutes). The mixture should fall in ribbons from the whisk. This step incorporates air and dissolves sugar completely.
Step 2 – Heat the Milk Mixture: In a medium saucepan, combine whole milk, heavy cream, and remaining 1/4 cup sugar. Heat over medium low until steaming and sugar dissolves (about 5 minutes). Don’t let it boil you want it around 160-170°F.
Step 3 – Temper the Eggs: Slowly pour 1 cup of the hot milk mixture into the beaten egg yolks while whisking constantly. This gradually raises the egg temperature without scrambling. Pour the tempered egg mixture back into the saucepan with remaining milk.
Step 4 – Cook Gently: Cook over low heat, stirring constantly, until the mixture slightly thickens and reaches 160°F on an instant-read thermometer (about 3-4 minutes). It should coat the back of a spoon. Don’t overcook or eggs will curdle.
Step 5 – Flavor and Chill: Remove from heat immediately. Stir in vanilla extract, nutmeg, cinnamon, and salt. Strain through a fine-mesh sieve into a pitcher to ensure silky smoothness. Cover and refrigerate at least 4 hours or overnight.
Final Touches for Easy Homemade Eggnog Recipe
Before serving, whisk the chilled eggnog to reincorporate any settled spices. Taste and adjust sweetness if needed. The cold temperature mutes sweetness slightly, so you may want to add 1-2 tablespoons more sugar.
For an extra-luxurious version, fold in 1/2 cup freshly whipped cream just before serving. This creates an even more decadent texture.
Resting for Easy Homemade Eggnog Recipe
Proper chilling is crucial. Refrigerate for at least 4 hours, but overnight rest produces the best flavor as the spices bloom and meld with the dairy base. The texture also thickens slightly during refrigeration, creating that classic eggnog consistency.
Eggnog actually improves over 2-3 days in the refrigerator – the flavors deepen and become more harmonious. Just give it a good whisk before each serving.
Pro Tips for Perfect Easy Homemade Eggnog Recipe
Avoiding Curdled or Lumpy Eggnog
Temperature control prevents disaster. Always temper eggs gradually – rushing this step causes scrambled bits. Use a thermometer to monitor the cooking temperature precisely. If you see any signs of curdling, immediately remove from heat and strain through a fine-mesh sieve.
Never let the mixture boil. Low, gentle heat is your friend. Constant stirring ensures even heating and prevents hot spots that cook eggs too quickly.
Tool Recommendations for Easy Homemade Eggnog Recipe
An instant-read thermometer eliminates guesswork and ensures safe consumption temperature (160°F kills potential bacteria). A wire whisk incorporates ingredients smoothly without over-aerating. Use a heavy-bottomed saucepan for even heat distribution.
A fine-mesh strainer guarantees silky texture by catching any cooked egg bits or nutmeg chunks. For serving, a ladle and festive glasses or mugs enhance the holiday experience.
Storage & Reheating for Easy Homemade Eggnog Recipe
Store in an airtight container or pitcher with a tight lid for up to 3 days in the refrigerator. Always check for freshness before consuming it should smell sweet and creamy, not sour.
Don’t freeze traditional eggnog the texture separates and becomes grainy upon thawing. However, you can use leftover eggnog in French toast batter, pancake mix, or baked goods where texture changes don’t matter.
Serve cold, never reheated. For warm eggnog, gently heat individual servings in the microwave (30-second intervals, stirring between) without boiling.
Flavor Variations for Easy Homemade Eggnog Recipe
Spicy Twist
Add 1/4 teaspoon cayenne pepper or a pinch of white pepper for subtle heat that enhances the spices without overwhelming. Mexican chocolate eggnog incorporates 2 tablespoons cocoa powder and 1/2 teaspoon cinnamon for a Abuelita chocolate vibe.
Keto/Low-Carb Option
Replace sugar with erythritol or monk fruit sweetener (use 1/2 cup instead of 3/4 cup as these are sweeter). Use heavy cream exclusively instead of mixing milk and cream. This creates a richer, lower-carb version with only 4g net carbs per serving.
Global Flavors
Italian Zabaglione Style: Reduce milk, increase cream, add lemon zest and marsala flavoring for an elegant twist.
Puerto Rican Coquito Inspired: Add 1 cup coconut milk, reduce regular milk, include cinnamon stick during heating, and garnish with toasted coconut.
British Custard Approach: Increase eggs to 8 yolks (no whites), cook until very thick, serve warm over holiday puddings.
Scandinavian Spice: Add 1/4 teaspoon ground cardamom, reduce nutmeg slightly, include a split vanilla bean during heating.
| Variation | Key Ingredient Change | Flavor Profile | Best Occasion |
|---|---|---|---|
| Classic Traditional | As written | Warm spices, creamy | All holiday gatherings |
| Chocolate Nog | Add 1/4 cup cocoa powder | Rich, dessert-like | Kids’ parties, brunches |
| Maple Pecan | Replace sugar with maple syrup | Autumn-inspired | Thanksgiving, fall events |
| Pumpkin Spice | Add 1/2 cup pumpkin puree | Seasonal favorite | October-December |
| Peppermint | Add peppermint extract | Fresh, cooling | Christmas specifically |
| Chai-Spiced | Add chai spice blend | Exotic, aromatic | Sophisticated gatherings |
| Coffee Nog | Add 2 tbsp espresso powder | Morning-friendly | Brunch, daytime parties |
Serving Suggestions for Easy Homemade Eggnog Recipe
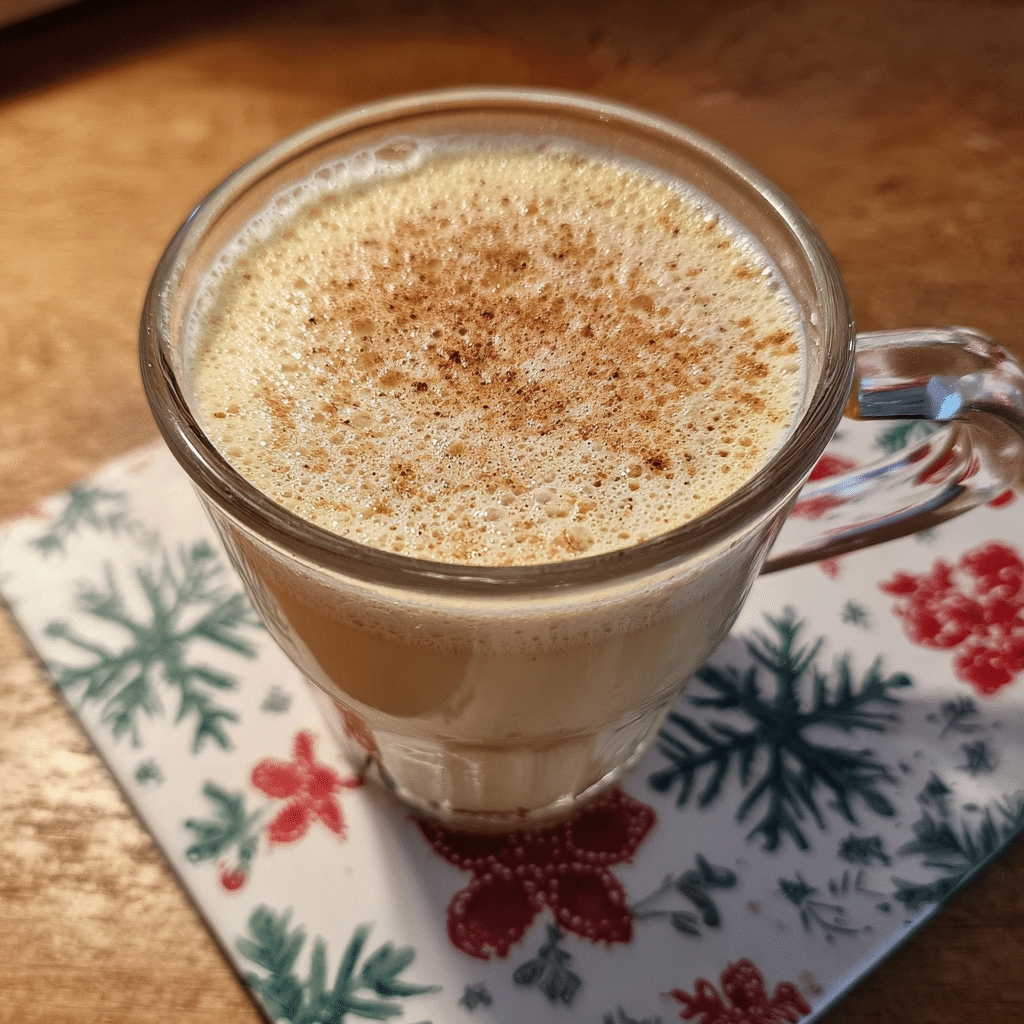
Presentation elevates this already special beverage. Serve in clear glass mugs or vintage punch cups to showcase the beautiful golden color. Garnish each serving with freshly grated nutmeg, a cinnamon stick, or whipped cream rosettes.
Create an eggnog bar for parties: offer toppings like chocolate shavings, caramel drizzle, crushed candy canes, and whipped cream. Provide cinnamon sticks as stirrers for both flavor and visual appeal.
This Easy Homemade Eggnog Recipe pairs beautifully with holiday cookies, gingerbread, fruit cake, or cinnamon rolls. The richness complements both sweet and spiced baked goods.
For brunches, use eggnog in French toast batter or as a base for holiday pancakes. As a dessert, pour over warm bread pudding or apple pie. The versatility extends far beyond drinking it straight.
Temperature matters – serve very cold (35-40°F) for best flavor. Some prefer it slightly chilled rather than ice-cold to appreciate the spice notes more fully.
FAQs About Easy Homemade Eggnog Recipe
Is this easy homemade eggnog recipe safe to drink with raw eggs?
This recipe heats eggs to 160°F, which pasteurizes them and eliminates safety concerns. If you prefer extra caution, use pasteurized eggs from the start. The cooking step makes this safe for most people, though pregnant women and immunocompromised individuals should consult their doctor.
Can I make this without cooking the eggs?
For raw eggnog, you must use pasteurized eggs to ensure safety. The texture will be lighter and less custard-like, but still delicious. Increase the cream slightly (to 1.5 cups) to compensate for the thinner consistency.
Why did my eggnog turn lumpy or grainy?
This happens when eggs cook too quickly or the mixture gets too hot. Always temper eggs gradually and never exceed 170°F during cooking. Strain through a fine-mesh sieve if you notice any texture issues.
How long does homemade eggnog last?
Properly stored in the refrigerator, this eggnog stays fresh for 3-4 days. The cooked eggs extend shelf life compared to raw versions. Always smell and taste before serving – it should smell sweet and fresh, never sour or off.
Can I make this dairy-free?
Yes! Use full-fat coconut milk and coconut cream in place of milk and heavy cream. The flavor will have coconut notes, but it’s delicious in its own right. Ensure all other ingredients are dairy-free.
What’s the difference between homemade and store-bought eggnog?
Homemade uses fresh eggs, real cream, and no stabilizers or preservatives. The flavor is cleaner, less sweet, and more complex. Store-bought is ultra-pasteurized for long shelf life, which affects taste and texture. The difference is remarkable once you try homemade.
Is this recipe safe during pregnancy?
Since this recipe heats eggs to 160°F, it’s generally safe. However, pregnant women should consult their healthcare provider, as recommendations vary. Using pasteurized eggs adds an extra safety layer.
Conclusion
This Easy Homemade Eggnog Recipe proves that holiday magic doesn’t come from a carton. With simple ingredients, gentle technique, and a little patience, you’ll create a beverage that becomes a cherished tradition. The creamy texture, warm spices, and authentic flavor will make you wonder why you ever bought store-bought.
If you found this recipe helpful, we encourage you to share it with your network or save it for future use.
We’d be delighted to see your unique creations feel free to share your photos with us pinterest
Print
Easy Homemade Eggnog Recipe 6 Simple Steps to Irresistible Holiday Magic
- Total Time: 4 hours 23 minutes (including chilling)
- Yield: 8 servings 1x
- Diet: Vegetarian
Description
This Easy Homemade Eggnog Recipe creates a creamy, luxurious holiday beverage with fresh eggs, real cream, and warm spices. Ready in just 15 minutes of active prep, it tastes infinitely better than store-bought and becomes even more flavorful after chilling overnight.
Ingredients
6 large eggs, separated and at room temperature
3/4 cup granulated sugar, divided
2 cups whole milk
1 cup heavy cream
1 teaspoon vanilla extract
1 teaspoon freshly grated nutmeg, plus extra for garnish
1/4 teaspoon ground cinnamon
Pinch of salt
Optional: 1/4 teaspoon almond extract
Optional: Whipped cream for serving
Optional: Cinnamon sticks for garnish
Instructions
1. Separate eggs while cold, then let reach room temperature for 20-30 minutes.
2. Beat egg yolks with 1/2 cup sugar in a large bowl until thick and pale yellow (3-4 minutes). Mixture should fall in ribbons from whisk.
3. In medium saucepan, combine whole milk, heavy cream, and remaining 1/4 cup sugar. Heat over medium-low until steaming and sugar dissolves (about 5 minutes, 160-170°F). Do not boil.
4. Slowly pour 1 cup of hot milk mixture into beaten egg yolks while whisking constantly to temper.
5. Pour tempered egg mixture back into saucepan with remaining milk mixture.
6. Cook over low heat, stirring constantly, until mixture slightly thickens and reaches 160°F (3-4 minutes). Should coat the back of a spoon.
7. Remove from heat immediately. Stir in vanilla extract, nutmeg, cinnamon, and salt.
8. Strain through fine-mesh sieve into a pitcher for silky smoothness.
9. Cover and refrigerate at least 4 hours or overnight for best flavor.
10. Before serving, whisk to reincorporate spices. Garnish with freshly grated nutmeg and whipped cream if desired.
Notes
Use room temperature eggs for easier incorporation and smoother texture.
Always temper eggs gradually to prevent scrambling – don’t rush this step.
Heat to exactly 160°F using instant-read thermometer for food safety and best texture.
Eggnog actually improves over 2-3 days as flavors meld and deepen.
Store in airtight container in refrigerator up to 3-4 days.
For extra safety during pregnancy, use pasteurized eggs from the start.
Don’t freeze – texture separates and becomes grainy when thawed.
Use leftover eggnog in French toast, pancakes, or holiday baking.
For richer texture, fold in 1/2 cup fresh whipped cream before serving.
- Prep Time: 15 minutes
- Cook Time: 8 minutes
- Category: Beverage
- Method: Stovetop
- Cuisine: American
Nutrition
- Serving Size: 1 cup (8 oz)
- Calories: 245
- Sugar: 24g
- Sodium: 95mg
- Fat: 14g
- Saturated Fat: 8g
- Unsaturated Fat: 5g
- Trans Fat: 0g
- Carbohydrates: 25g
- Fiber: 0g
- Protein: 7g
- Cholesterol: 185mg
Keywords: homemade eggnog, easy eggnog recipe, holiday drinks, Christmas beverages, eggnog from scratch