Halloween Pancakes are the perfect solution for creating spooky breakfast magic without the stress of complicated recipes or hours in the kitchen. Hi there! I’m Lisa, the heart and soul behind Recipesrealm, and I’m thrilled to share this fun, festive pancake recipe that’s become our family’s October tradition. Are you tired of plain, boring breakfasts that don’t capture the Halloween spirit? Struggling to make holiday-themed foods that actually taste good and don’t require professional decorating skills?
These Halloween Pancakes promise fluffy, delicious pancakes with creative spooky designs that kids and adults alike will devour think jack-o’-lantern faces, ghost shapes, and spider web patterns that are surprisingly easy to create. As someone who’s been perfecting recipes for years at Recipesrealm, I’ve learned that the best holiday recipes balance festive fun with incredible flavor. These Halloween Pancakes deliver exactly that they’re simple enough for busy mornings yet special enough to create lasting Halloween memories.
In this comprehensive guide, you’ll discover why these Halloween Pancakes work so brilliantly for October celebrations, how to choose the right ingredients for fluffy texture, detailed decoration techniques that anyone can master, step-by-step cooking instructions with design tips, pro tricks for achieving perfectly spooky shapes, exciting flavor variations to customize your pancakes, ideal topping suggestions and serving ideas, and answers to all your burning questions about making these festive Halloween Pancakes.
Why This Halloween Pancakes Recipe Works
At Recipesrealm, we believe that food isn’t just about taste it’s about creating memories and sharing moments, and these Halloween Pancakes embody that celebration philosophy perfectly. Here’s why this recipe has become a beloved October favorite:
- Uses basic pantry staples you likely already have no specialty ingredients or food coloring required for delicious Halloween Pancakes (though food coloring adds extra fun)
- Ready in 30 minutes from mixing to plating, making these Halloween Pancakes perfect for busy school mornings or weekend Halloween brunches
- Kid-friendly and interactive since children love helping create spooky designs, making these Halloween Pancakes a wonderful family activity
- Naturally fluffy and delicious with the perfect texture that would be amazing even without Halloween decorations these Halloween Pancakes taste incredible
- Versatile for creativity allowing you to make jack-o’-lanterns, ghosts, bats, spiders, monsters, or any spooky design your imagination conjures for these Halloween Pancakes
- Freezer-friendly so you can make these Halloween Pancakes ahead and simply reheat on busy Halloween morning for stress-free celebrations
- Budget-conscious using affordable ingredients that don’t break the bank while still creating Instagram-worthy Halloween Pancakes
Choosing the Right Ingredients for Your Halloween Pancakes
The magic of exceptional Halloween Pancakes lies in selecting quality ingredients and understanding how each component contributes to both flavor and that perfect fluffy texture.
Best Flour for These Halloween Pancakes
The foundation of great Halloween Pancakes starts with choosing the right flour. All-purpose flour creates the ideal texture light and fluffy with just enough structure to hold fun shapes. Bread flour has too much protein and makes dense, chewy pancakes rather than tender ones. Cake flour makes them too delicate and fragile for your Halloween Pancakes designs.
For whole grain options in your Halloween Pancakes, use a 50/50 blend of whole wheat and all-purpose flour this adds nutrition while maintaining fluffiness. White whole wheat flour offers a milder flavor than regular whole wheat. Gluten-free all-purpose flour blends work beautifully too; just ensure they contain xanthan gum for proper binding in your Halloween Pancakes.
Buying Tips for Your Halloween Pancakes
When shopping for ingredients for your Halloween Pancakes, choose fresh baking powder and baking soda these leavening agents lose potency over time. Check expiration dates and replace if they’re more than 6 months old. Fresh eggs at room temperature incorporate better into batter. Buy whole milk rather than skim for the richest, most tender Halloween Pancakes.
For creating spooky designs, invest in squeeze bottles (like condiment bottles) or piping bags for detailed chocolate designs on your Halloween Pancakes. Orange and black food coloring (gel versions work best) create classic Halloween colors. Natural alternatives include pumpkin puree for orange color and activated charcoal or black cocoa powder for gray/black shades in your festive Halloween Pancakes.
Substitutions for Your Halloween Pancakes
These Halloween Pancakes are wonderfully adaptable to dietary needs. Swap regular milk for any plant-based milk (almond, oat, soy, or coconut) for dairy-free versions. Replace butter with melted coconut oil or vegetable oil. Use flax eggs (1 tablespoon ground flaxseed + 3 tablespoons water per egg, let sit 5 minutes) for vegan Halloween Pancakes.
For sugar substitutions in your Halloween Pancakes, use coconut sugar, maple syrup (reduce liquid slightly), or sugar alternatives like monk fruit sweetener. Replace vanilla extract with almond extract for different flavor, or add pumpkin pie spice for autumn warmth. Buttermilk can substitute regular milk for extra tang and tenderness in your Halloween Pancakes.
Ingredients & Prep for Your Halloween Pancakes
Essential Ingredient List for These Halloween Pancakes
For the Basic Batter:
- 2 cups all-purpose flour
- 2 tablespoons granulated sugar
- 2 teaspoons baking powder
- 1/2 teaspoon baking soda
- 1/2 teaspoon salt
- 2 large eggs
- 1 3/4 cups whole milk
- 1/4 cup melted butter (plus extra for cooking)
- 1 teaspoon vanilla extract
For Halloween Designs:
- 1/4 cup chocolate chips (melted for drawing)
- Orange food coloring (gel preferred)
- Black food coloring or black cocoa powder
- Squeeze bottles or piping bags
For Toppings:
- Maple syrup or honey
- Whipped cream (for ghost decorations)
- Fresh strawberries or raspberries (for blood effect)
- Chocolate chips (for spider eyes)
- Powdered sugar (for dusting)
Batter Prep Essentials for Your Halloween Pancakes
Begin your Halloween Pancakes by gathering all ingredients and bringing eggs and milk to room temperature cold ingredients create lumpy batter and less fluffy pancakes. In a large bowl, whisk together all dry ingredients (flour, sugar, baking powder, baking soda, and salt) until evenly combined. This distributes leavening agents throughout your Halloween Pancakes batter.
In a separate bowl, whisk together wet ingredients (eggs, milk, melted butter, and vanilla) until smooth. Create a well in the center of dry ingredients and pour in wet mixture. Stir gently with a wooden spoon or spatula just until combined—lumps are okay and actually preferred for your Halloween Pancakes. Over-mixing develops gluten and creates tough, flat pancakes instead of fluffy ones.
Design Prep for Your Halloween Pancakes
Divide batter into separate bowls if making colored Halloween Pancakes—one bowl for orange (add orange food coloring), one for black/gray (add black coloring or cocoa), and keep some plain. For chocolate designs, melt chocolate chips in microwave in 20-second intervals, stirring between, until smooth. Transfer to squeeze bottles or piping bags with small tips.
Sketch your designs on paper first if you’re creating specific shapes for your Halloween Pancakes— -o’-lantern faces, ghost outlines, spider webs, or bat silhouettes. Have all design tools ready before you start cooking so you can work quickly while the griddle is hot. Remember that designs need to be drawn in reverse since they’ll flip when you add batter on top of your Halloween Pancakes.
Pantry Staples for Your Halloween Pancakes
Essential pantry items for your Halloween Pancakes include all-purpose flour, baking powder and baking soda (fresh for maximum rise), granulated sugar, salt, vanilla extract, and butter for cooking. Keep chocolate chips on hand for decoration. Stock up on food coloring during October for festive colors in your Halloween Pancakes. Have maple syrup, whipped cream, and fun toppings ready for serving.
Step-by-Step Cooking Instructions for Your Halloween Pancakes
Pre-Cooking Prep for Your Halloween Pancakes
Preheat your griddle or large non-stick skillet over medium heat (about 350°F) while your batter rests for 5-10 minutes—resting allows gluten to relax and flour to hydrate fully, creating fluffier Halloween Pancakes. Test griddle temperature by flicking a drop of water on the surface—it should sizzle and evaporate immediately, not sit and boil slowly.
Lightly grease the griddle with butter or cooking spray before cooking your first batch of Halloween Pancakes. Have a spatula ready for flipping, and prepare a warm oven (200°F) with a baking sheet inside if you want to keep finished pancakes warm while cooking remaining batches. Set up your decoration station with colored batters, chocolate, and squeeze bottles within easy reach for creating designs on your Halloween Pancakes.
Cooking Method for Your Halloween Pancakes
For Basic Round Pancakes: Pour 1/4 cup batter onto the preheated, greased griddle for each pancake. Cook until bubbles form on the surface and edges look set (about 2-3 minutes). Flip carefully with a spatula and cook another 1-2 minutes until golden brown. The first pancake is often imperfect adjust heat if needed for your Halloween Pancakes.
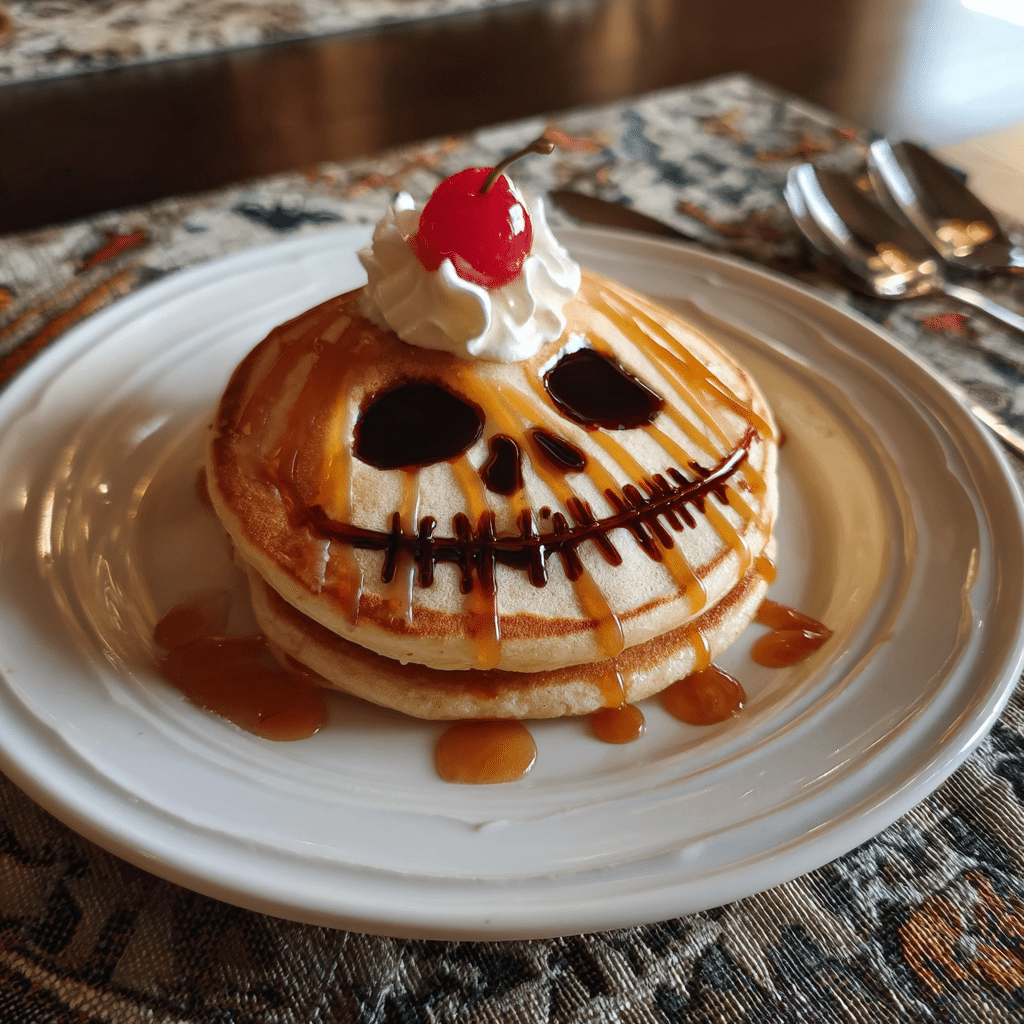
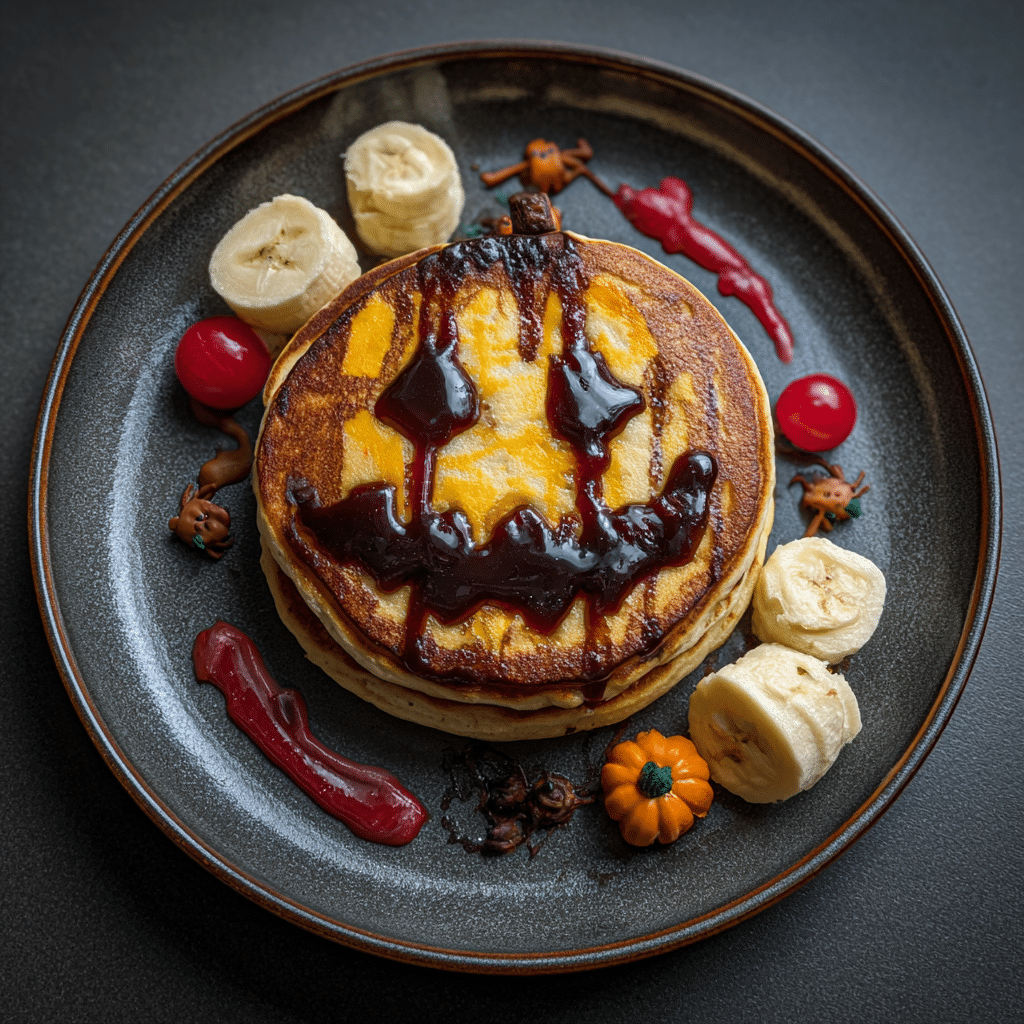
For Jack-o’-Lantern Halloween Pancakes: Pour orange-tinted batter into round circles. While cooking on first side, use melted chocolate in squeeze bottle to draw jack-o’-lantern faces triangle eyes, triangle nose, and jagged smile. When you flip the pancake, the design will be on top. Cook until both sides are golden.
For Ghost Halloween Pancakes: Pour white batter into oval shapes with a slightly irregular bottom edge. After flipping, add chocolate chip eyes and mouth. Serve topped with whipped cream for extra “ghostly” effect on your spooky Halloween Pancakes.
For Spider Web Halloween Pancakes: Start by drawing a spiral with chocolate on the griddle (starting from center, spiral outward). Immediately drag a toothpick from center to edge in 8 directions like wheel spokes this creates the web pattern. Pour plain batter over the design. When flipped, your Halloween Pancakes will have spooky spider web designs.
Doneness Check for Your Halloween Pancakes
Perfect Halloween Pancakes are done when bubbles form across the entire surface and pop, leaving tiny holes, edges look dry and slightly matte rather than shiny and wet, and the underside is golden brown (peek with your spatula). When you flip, the second side cooks much faster usually just 1-2 minutes compared to 2-3 minutes for the first side.
Avoid pressing down on pancakes with the spatula while cooking this squishes out air bubbles and creates dense, flat Halloween Pancakes instead of fluffy ones. The pancakes should feel springy when gently pressed and bounce back. Internal temperature should reach about 200°F for fully cooked centers on your Halloween Pancakes.
Keeping Warm for Your Halloween Pancakes
As you finish each batch of Halloween Pancakes, transfer them to a baking sheet in a 200°F oven to keep warm while you cook remaining batter. Don’t stack them directly on top of each other or they’ll steam and become soggy arrange in a single layer or with parchment paper between layers. This technique ensures all your Halloween Pancakes stay warm and fluffy until serving time.
Alternatively, if feeding a crowd, set up a pancake bar where people can watch you cook and receive their Halloween Pancakes fresh off the griddle. This interactive approach makes breakfast more fun and ensures everyone gets piping hot pancakes.
Pro Tips for Perfect Halloween Pancakes
Avoiding Flat or Dense Halloween Pancakes
The most common issue when making Halloween Pancakes is dense, flat pancakes instead of fluffy ones. Prevent this by checking that baking powder and baking soda are fresh (test by adding a pinch to vinegar it should bubble vigorously). Don’t over-mix batter stir just until dry ingredients disappear even if lumps remain. Over-mixing develops gluten and creates tough, flat Halloween Pancakes.
Let batter rest 5-10 minutes before cooking to allow leavening agents to activate and flour to hydrate. Cook at proper temperature too hot and outside burns before inside cooks; too cool and pancakes don’t rise properly. Medium heat (350°F) is ideal for your Halloween Pancakes. Don’t flip too early; wait for bubbles and dry edges as indicators.
Tool Recommendations for Your Halloween Pancakes
A non-stick electric griddle with temperature control makes cooking Halloween Pancakes foolproof with even heat across a large surface. A heavy-bottomed skillet or cast iron pan works beautifully too. Squeeze bottles (like condiment bottles) are essential for detailed chocolate designs and creating specific shapes in your Halloween Pancakes.
A flexible spatula (metal for metal pans, silicone for non-stick) makes flipping easy without tearing delicate pancakes. Measuring cups and spoons ensure consistency. Cookie cutters can create specific shapes pour batter into greased cookie cutters on the griddle for perfectly shaped Halloween Pancakes like bats, cats, or pumpkins. A ladle provides consistent portion sizes for uniform pancakes.
Storage & Reheating for Your Halloween Pancakes
Store cooled Halloween Pancakes in airtight containers or resealable bags in the refrigerator for up to 5 days, with parchment paper between layers to prevent sticking. For longer storage, freeze Halloween Pancakes for up to 3 months arrange in single layer on baking sheet, freeze until solid, then transfer to freezer bags with parchment between each pancake for easy separation.
Reheat refrigerated Halloween Pancakes in the microwave for 20-30 seconds, in a toaster on low setting for crispy edges, or in a 350°F oven for 5-10 minutes until warmed through. For frozen pancakes, thaw overnight in refrigerator then reheat, or microwave straight from frozen for 45-60 seconds. Proper storage means you can make these Halloween Pancakes days ahead for stress-free Halloween morning!
Flavor Variations for Your Halloween Pancakes
Pumpkin Spice Halloween Pancakes
Embrace autumn flavors in your Halloween Pancakes by adding 1/2 cup pumpkin puree to the wet ingredients, stirring in 1 teaspoon pumpkin pie spice (or combination of cinnamon, nutmeg, ginger, and cloves), and reducing milk by 1/4 cup to compensate for pumpkin moisture. The natural orange color from pumpkin makes these perfect for jack-o’-lantern designs. Top with cream cheese glaze and pecans for ultimate fall flavor in these Halloween Pancakes.
Chocolate Monster Halloween Pancakes
Create decadent chocolate Halloween Pancakes by replacing 1/4 cup flour with unsweetened cocoa powder, increasing sugar by 1 tablespoon, and adding mini chocolate chips to the batter. Use white chocolate chips or candy eyes for monster eyes, and create wild hair with whipped cream. Kids love these chocolatey Halloween Pancakes that taste like dessert for breakfast.
Orange Creamsicle Halloween Pancakes
Make dreamy orange-flavored Halloween Pancakes by adding 1 tablespoon orange zest to the batter, replacing 1/4 cup milk with fresh orange juice, and tinting batter orange. Serve with vanilla whipped cream or cream cheese topping that mimics the classic creamsicle flavor. These bright, citrusy Halloween Pancakes are refreshingly different from traditional breakfast flavors.
Red Velvet Halloween Pancakes
Create dramatic red Halloween Pancakes by adding 2 tablespoons cocoa powder and red food coloring to achieve deep red color. Add 1 teaspoon vanilla extract for classic red velvet flavor. Serve with cream cheese frosting as topping. These elegant Halloween Pancakes can be decorated as vampire-themed treats or simply enjoyed for their stunning color.
Gluten-Free Halloween Pancakes
Adapt these Halloween Pancakes for gluten-free needs by replacing all-purpose flour with gluten-free all-purpose flour blend (one containing xanthan gum). Add an extra tablespoon of milk as gluten free flours absorb more liquid. Let batter rest 10 minutes for flour to hydrate fully. The texture will be slightly different but still delicious and fluffy. All the design techniques work perfectly with gluten-free Halloween Pancakes.
Halloween Pancakes Variations Comparison Table
| Variation | Key Addition | Flavor Profile | Best Design | Dietary Note |
|---|---|---|---|---|
| Classic | None | Buttery, vanilla | Any spooky shape | Vegetarian |
| Pumpkin Spice | Pumpkin puree, spices | Autumn, spiced | Jack-o’-lanterns | Vegetarian |
| Chocolate Monster | Cocoa powder, chocolate chips | Rich, chocolatey | Monster faces | Vegetarian |
| Orange Creamsicle | Orange zest, juice | Citrus, creamy | Pumpkins, ghosts | Vegetarian |
| Red Velvet | Cocoa, red coloring | Subtle chocolate | Vampires, blood | Vegetarian |
| Gluten-Free | GF flour blend | Similar to classic | Any design | GF, Vegetarian |
| Banana Nut | Mashed banana, walnuts | Sweet, nutty | Basic rounds | Vegetarian |
| Blueberry | Fresh blueberries | Berry, sweet | Ghost with purple | Vegetarian |
Serving Suggestions for Your Halloween Pancakes
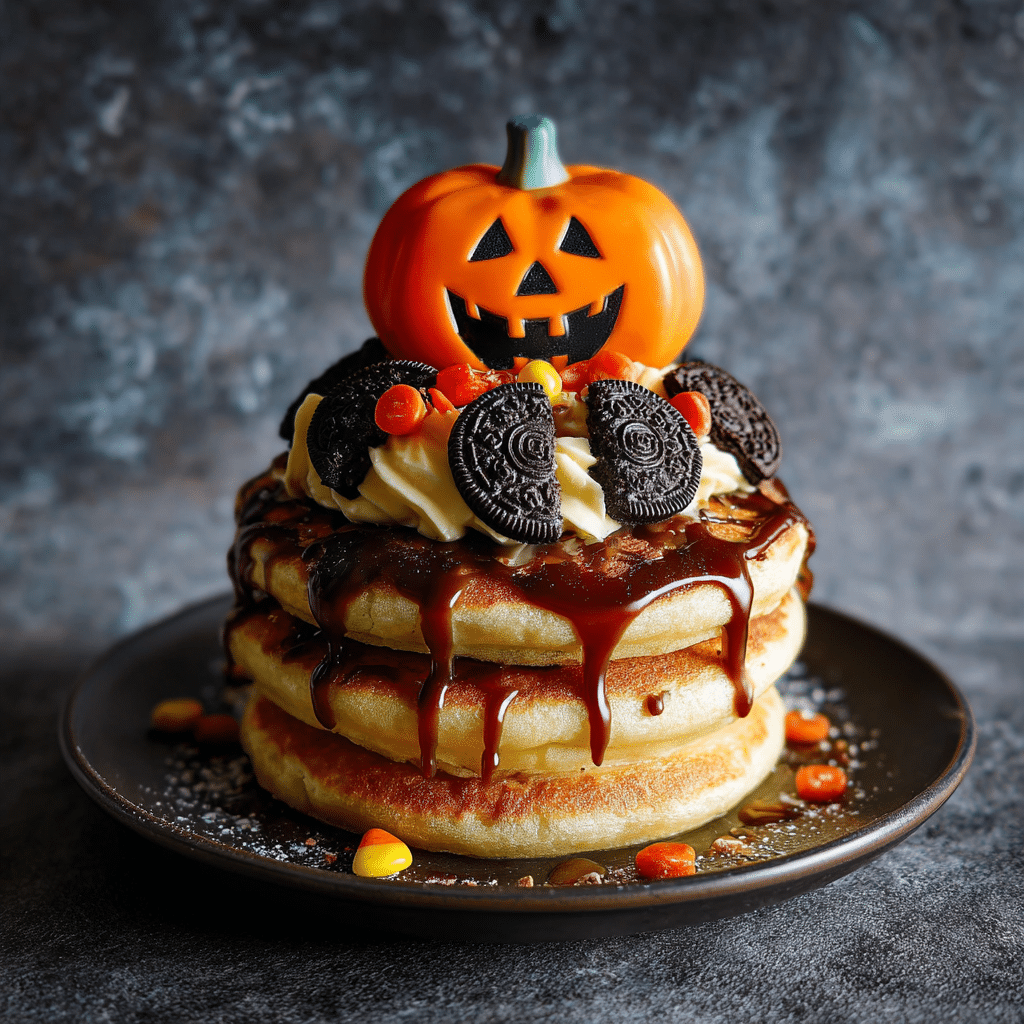
Your Halloween Pancakes deserve to be presented in a way that maximizes the spooky fun factor and creates memorable breakfast experiences. Stack pancakes on Halloween-themed plates with different designs maybe a jack-o’-lantern on bottom, ghost in middle, and spider web on top. The variety makes each plate unique and Instagram-worthy with your creative Halloween Pancakes.
Create a Halloween pancake bar with multiple topping options so everyone customizes their breakfast: maple syrup, honey, chocolate sauce (looks like spooky slime), strawberry or raspberry sauce (blood effect), whipped cream (ghost topping), chocolate chips (spider eyes), candy eyes, gummy worms, and powdered sugar for dusting. This interactive approach makes serving Halloween Pancakes more fun for gatherings.
Pair your Halloween Pancakes with complementary sides that don’t compete with the festive main attraction: crispy turkey sausages (avoiding restricted ingredients), fresh fruit cut into spooky shapes (use small cookie cutters), scrambled eggs, orange juice in fun cups, or hot chocolate with marshmallow ghosts. Keep sides simple so your creative Halloween Pancakes remain the star.
For Halloween parties, serve mini Halloween Pancakes (use just 2 tablespoons batter per pancake) as finger food on skewers alternating with fruit pieces. These bite-sized versions are perfect for crowds and easier for kids to eat. Present on tiered platters with dry ice underneath for spooky fog effects (keep ice away from food) when serving your Halloween Pancakes.
FAQs About Halloween Pancakes
Can I make Halloween Pancakes batter the night before?
Yes, but with some considerations. Mix dry ingredients the night before and store covered at room temperature. Mix wet ingredients and refrigerate separately. Combine them in the morning right before cooking for fluffiest Halloween Pancakes. If you must mix complete batter ahead, refrigerate up to 24 hours, but know that leavening agents begin working immediately, so pancakes won’t be quite as fluffy. Stir gently before using and don’t expect the same rise as fresh batter in your Halloween Pancakes.
Why are my Halloween Pancakes not fluffy?
Several factors cause flat Halloween Pancakes: old baking powder/soda (replace if over 6 months old), over-mixing batter (stir just until combined, lumps are fine), using cold ingredients (bring eggs and milk to room temperature), cooking temperature too low (pancakes should sizzle when batter hits griddle), or flipping too early (wait for bubbles and dry edges). Also, don’t press down on pancakes while cooking this squeezes out air bubbles that create fluffiness in your Halloween Pancakes.
Can I freeze Halloween Pancakes?
Absolutely! Halloween Pancakes freeze beautifully for up to 3 months. Cool completely, arrange in single layer on baking sheet, and freeze until solid (prevents sticking together). Transfer to freezer bags with parchment paper between each pancake. Reheat straight from frozen in microwave (45-60 seconds), toaster (low setting), or oven (350°F for 10 minutes). This make-ahead option means you can enjoy special Halloween Pancakes even on busy school mornings!
How do I create detailed designs on Halloween Pancakes?
The key to detailed designs is working quickly and using proper tools. Method 1: Draw design with melted chocolate on the griddle first, let it set slightly (10-15 seconds), then pour batter over it design appears on top when flipped. Method 2: Pour batter first, then add chocolate details while cooking on first side. Method 3: Use colored batters in squeeze bottles to create multi-color designs. Practice makes perfect with your Halloween Pancakes designs!
Are these Halloween Pancakes safe for pregnant women?
Yes! These Halloween Pancakes are completely safe for pregnant women. All ingredients are cooked to safe temperatures (internal temp about 200°F), eggs are fully cooked, and there are no raw components. Food coloring (especially gel versions) is generally recognized as safe, though you can skip it and use natural alternatives like pumpkin puree for orange or beet juice for red if you prefer. These Halloween Pancakes provide good nutrition with protein, carbs, and calcium.
Can kids help make Halloween Pancakes?
Absolutely! Halloween Pancakes are perfect for involving kids in the kitchen. Age-appropriate tasks: young children (3-5) can measure ingredients, stir batter gently, and add toppings; older children (6-10) can crack eggs (with supervision), pour batter onto griddle (with supervision), and create designs with squeeze bottles; tweens and teens can handle most of the process with supervision. Making these Halloween Pancakes together creates wonderful holiday memories and teaches valuable cooking skills.
What’s the best griddle temperature for Halloween Pancakes?
The ideal temperature for Halloween Pancakes is medium heat, around 350-375°F. Test by sprinkling a few drops of water on the surface they should sizzle and evaporate quickly, not sit and slowly boil. If pancakes brown too quickly (less than 2 minutes on first side), reduce heat. If they cook slowly without browning (more than 4 minutes), increase heat. Electric griddles with temperature controls take the guesswork out of perfect Halloween Pancakes.
Can I make Halloween Pancakes without food coloring?
Definitely! Create natural colors for your Halloween Pancakes: orange from pumpkin puree or mashed sweet potato, purple/blue from mashed blueberries, pink/red from beet juice or strawberry puree, and light brown from cocoa powder. While colors won’t be as vibrant as gel food coloring, they’re completely natural. Focus on fun shapes and chocolate designs rather than colors for beautiful Halloween Pancakes without artificial dyes.
Conclusion
Get your griddle ready and make these magical Halloween Pancakes this October your family will love starting Halloween with this festive, fun breakfast! From cozy family breakfasts to vibrant Halloween parties, this recipe is crafted to make every meal feel like a special occasion. Whether you’re an experienced cook or just getting started, these easy-to-follow Halloween Pancakes help you enjoy the process and savor every bite.
Print
Halloween Pancakes 7 Amazing Spooky Designs Kids Will Devour
- Total Time: 30
- Yield: 12 pancakes (6 servings) 1x
- Diet: Vegetarian
Description
These fun Halloween Pancakes are fluffy, delicious, and feature spooky designs like jack-o’-lanterns, ghosts, and spider webs! Ready in 30 minutes with simple techniques anyone can master. Perfect for Halloween morning!
Ingredients
**For the Basic Batter:**
2 cups all-purpose flour
2 tablespoons granulated sugar
2 teaspoons baking powder
1/2 teaspoon baking soda
1/2 teaspoon salt
2 large eggs
1 3/4 cups whole milk
1/4 cup melted butter (plus extra for cooking)
1 teaspoon vanilla extract
**For Halloween Designs:**
1/4 cup chocolate chips (melted for drawing)
Orange food coloring (gel preferred)
Black food coloring or black cocoa powder
Squeeze bottles or piping bags
**For Toppings:**
Maple syrup or honey
Whipped cream
Fresh strawberries or raspberries
Chocolate chips (for eyes)
Powdered sugar for dusting
Instructions
1. In a large bowl, whisk together flour, sugar, baking powder, baking soda, and salt until evenly combined.
2. In a separate bowl, whisk together eggs, milk, melted butter, and vanilla extract until smooth.
3. Create a well in center of dry ingredients and pour in wet mixture. Stir gently just until combined—lumps are okay. Don’t over-mix.
4. Let batter rest for 5-10 minutes while preheating griddle to medium heat (350°F).
5. If making colored pancakes, divide batter into separate bowls and stir in food coloring.
6. Melt chocolate chips in microwave in 20-second intervals, stirring between, until smooth. Transfer to squeeze bottle.
7. Lightly grease preheated griddle with butter or cooking spray.
8. For basic round pancakes: Pour 1/4 cup batter onto griddle. Cook 2-3 minutes until bubbles form and edges look set. Flip and cook 1-2 minutes more until golden.
9. For jack-o’-lantern pancakes: Pour orange-tinted batter into rounds. Draw triangle eyes, nose, and jagged smile with chocolate while cooking on first side. Flip to reveal design.
10. For ghost pancakes: Pour white batter into oval shapes. After flipping, add chocolate chip eyes and mouth.
11. For spider web pancakes: Draw chocolate spiral on griddle starting from center. Drag toothpick from center to edge in 8 directions. Pour batter over design. Flip to reveal web.
12. Transfer finished pancakes to 200°F oven to keep warm while cooking remaining batches.
13. Serve hot with desired toppings—maple syrup, whipped cream, fresh berries, and extra chocolate decorations.
Notes
Bring eggs and milk to room temperature for fluffiest pancakes.
Don’t over-mix batter—lumps are okay and create fluffier texture.
Let batter rest 5-10 minutes before cooking for best results.
Medium heat (350°F) is ideal—too hot burns outside, too cool makes flat pancakes.
Don’t press down on pancakes while cooking—this squeezes out air bubbles.
First pancake is often imperfect—adjust heat as needed.
Store cooled pancakes in airtight container refrigerated up to 5 days or frozen up to 3 months with parchment between layers.
Reheat in microwave (20-30 seconds), toaster, or 350°F oven (5-10 minutes).
For gluten-free: use GF all-purpose flour blend with xanthan gum and add 1 extra tablespoon milk.
For dairy-free: use plant-based milk and replace butter with coconut oil.
For vegan: use flax eggs (1 T ground flaxseed + 3 T water per egg, let sit 5 minutes) and plant-based milk.
Natural color alternatives: pumpkin puree for orange, beet juice for red/pink, blueberries for purple.
Practice designs on paper first before attempting on griddle.
- Prep Time: 15
- Cook Time: 15
- Category: Breakfast
- Method: Griddle/Pan-Frying
- Cuisine: American
Nutrition
- Serving Size: 2 pancakes
- Calories: 285
- Sugar: 8g
- Sodium: 420mg
- Fat: 10g
- Saturated Fat: 6g
- Unsaturated Fat: 3.5g
- Trans Fat: 0g
- Carbohydrates: 40g
- Fiber: 1g
- Protein: 8g
- Cholesterol: 78mg
Keywords: halloween pancakes, spooky pancakes, jack-o-lantern pancakes, halloween breakfast, festive pancakes, kid-friendly halloween recipe