
Hawaiian Roll Garlic Bread Everyone craves at potlucks, game days, and family dinners has become the most-requested recipe in my kitchen, and for good reason. Tired of bland, dry garlic bread that tastes more like cardboard than comfort food? Or frustrated with complicated recipes that require too many steps and specialty ingredients you’ll never use again?
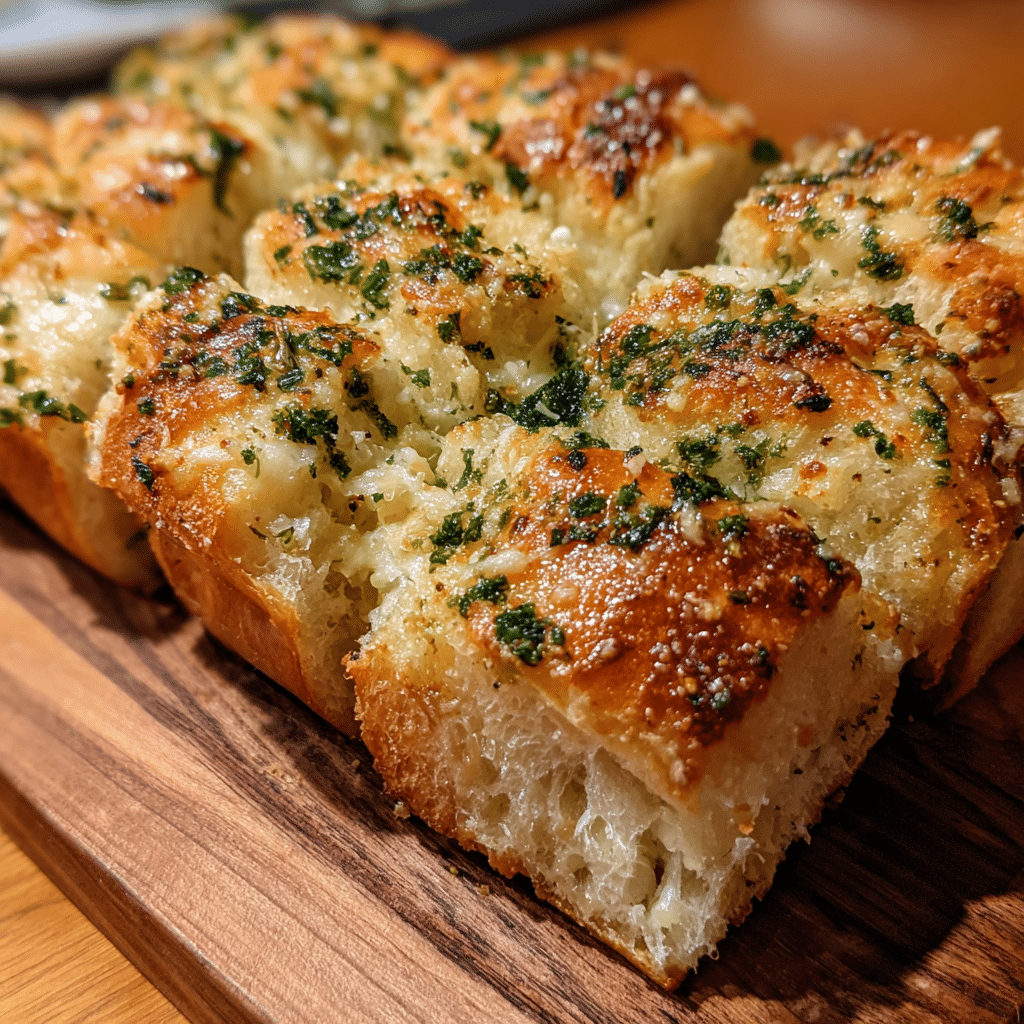
This recipe transforms sweet, pillowy Hawaiian rolls into the most addictive garlic bread you’ll ever taste buttery, garlicky, perfectly golden, and so easy it almost feels like cheating. I’m Simon, and I’ll never forget the first time I served this at a backyard gathering. Within minutes, the entire tray disappeared, and I spent the rest of the evening fielding requests for the recipe. My team Megan Carter, who perfected the butter-to-garlic ratio; Jackson Reed, whose timing precision ensures perfect golden edges; and Olivia Brooks, who makes each pull-apart piece look magazine-worthy has helped me refine this recipe to absolute perfection.
What makes Hawaiian Roll Garlic Bread Everyone loves so special isn’t just the incredible flavor it’s the genius technique of keeping the rolls connected while slicing, creating pull-apart perfection that’s both fun to eat and visually stunning. The sweet Hawaiian rolls provide the perfect canvas for garlicky herb butter, and baking them as one connected unit creates crispy tops with soft, buttery centers.
In this comprehensive guide, I’ll walk you through selecting the best Hawaiian rolls, creating the ultimate garlic butter, mastering the slicing technique, troubleshooting common issues, exploring creative variations, and serving suggestions that will make this your signature dish. Whether you’re feeding a crowd, need a last-minute side dish, or simply want to elevate any meal, this Hawaiian Roll Garlic Bread Everyone can’t resist will become your secret weapon in the kitchen.
Why This Hawaiian Roll Garlic Bread Everyone Loves Recipe Works
This recipe has gone viral in home kitchens across the country, and it’s not hard to see why. Here’s what makes this Hawaiian Roll Garlic Bread Everyone keeps making so reliably delicious:
- Sweet meets savory perfection: The subtle sweetness of Hawaiian rolls creates an unexpected and addictive contrast with rich, garlicky butter a flavor combination that keeps people reaching for just one more piece
- Foolproof pull-apart technique: Slicing the rolls while keeping them attached in their original pan creates Instagram-worthy presentation and makes serving effortless—no separating, no mess
- Ready in 20 minutes flat: From prep to table, this recipe takes less time than ordering takeout, making it perfect for busy weeknights or last-minute entertaining
- Uses just 6 basic ingredients: Butter, garlic, parsley, Parmesan, and Hawaiian rolls that’s it. No specialty items, no complicated techniques, just simple ingredients that create extraordinary results
- Scales effortlessly for any crowd: Need to feed 6 people or 60? Simply multiply the recipe the technique stays exactly the same, making it ideal for potlucks and parties
- Make-ahead friendly: Prepare completely up to 24 hours in advance, refrigerate, then bake when ready the flavors actually improve as the butter soaks into the bread
- Budget-friendly brilliance: At around $8-10 for a full tray that serves 12, this is one of the most affordable crowd-pleasers you can make
- Universally loved: From picky toddlers to discerning adults, Hawaiian Roll Garlic Bread Everyone enjoys transcends age groups and dietary preferences
Choosing the Right Rolls for Hawaiian Roll Garlic Bread Everyone Makes
Not all rolls are created equal, and selecting the right foundation determines whether your Hawaiian Roll Garlic Bread Everyone raves about succeeds or disappoints.
Best Hawaiian Roll Brands for This Recipe
King’s Hawaiian Original Hawaiian Sweet Rolls are the gold standard and what this recipe was developed with. Here’s why they work so perfectly:
The signature sweet, fluffy texture comes from their unique recipe that includes pineapple juice and a hint of honey. These rolls have the ideal structure soft enough to absorb butter beautifully yet sturdy enough to hold their shape during baking. The 12-count package fits perfectly in a 9×13-inch baking dish and serves a hungry crowd.
Texture matters most: King’s Hawaiian rolls have that signature pull-apart quality even before you slice them. The tender crumb soaks up garlic butter like a sponge while maintaining structural integrity. Cheaper alternatives often turn mushy or fall apart.
Size consistency: The 12-pack dinner rolls (not the slider buns) are ideal for this recipe. Each roll is approximately 2 inches across the perfect single-serving size that bakes evenly and creates satisfying pull-apart portions.
Freshness check: Squeeze the package gently. The rolls should feel soft and springy, never hard or dried out. Check the best-by date and choose the freshest package available—older rolls don’t absorb butter as well and can taste stale after baking.
Buying Tips for Perfect Results
When shopping for your Hawaiian Roll Garlic Bread Everyone will devour, follow these guidelines:
Package integrity: Choose packages without tears or openings. Exposed rolls dry out quickly and won’t deliver the pillowy texture you want.
Package configuration: Look for the 12-count original dinner rolls in the connected tray. They come in a foil pan that you can bake them in directly (though I transfer to a proper baking dish for better results). Avoid the individual slider packs they’re not connected and won’t create that signature pull-apart effect.
Storage location: Hawaiian rolls are usually found in the bakery section, not the bread aisle. Some stores keep them near the deli. Ask if you can’t locate them they’re a staple item at most grocery stores.
Check for mold: While rare with packaged rolls, always inspect for any signs of mold or discoloration before purchasing.
Buy extra: At their affordable price point, it’s smart to grab two packages. Once people taste this Hawaiian Roll Garlic Bread Everyone loves, you’ll wish you’d made more.
Hawaiian Roll Substitutions
While King’s Hawaiian is ideal, these alternatives work if you can’t find them:
- Store-brand Hawaiian sweet rolls: Brands like Kroger, Safeway, and Walmart make their own versions. They work fine, though the flavor is slightly less distinctive. Look for similar sweetness and soft texture.
- Sister Schubert’s Parker House Rolls: Not as sweet but similarly soft and buttery. The pull-apart format works perfectly with this technique. Reduce sugar in the butter mixture slightly.
- Pillsbury dinner rolls: The refrigerated kind can work in a pinch. Bake according to package directions first, then add garlic butter and broil briefly. Results differ from the original but taste good.
- Homemade sweet dinner rolls: If you’re an ambitious baker, homemade enriched dough rolls work beautifully. Shape 12 rolls and arrange in a 9×13 pan before the final rise.
- Brioche rolls: The French enriched bread makes an excellent substitute. Similar sweetness and butter content create comparable results with slightly denser texture.
- Portuguese sweet rolls: If you have a Portuguese bakery nearby, their sweet rolls work wonderfully and add interesting cultural flavor.
What NOT to use: Regular dinner rolls, hard rolls, or crusty bread won’t work. This recipe specifically relies on the soft, sweet, tender texture that Hawaiian rolls provide.
Ingredients & Prep for Hawaiian Roll Garlic Bread Everyone Requests
Simplicity is the beauty of this recipe. With just a handful of ingredients and minimal prep, you’ll create something extraordinary.
Bread Prep Essentials
Proper roll preparation sets you up for pull-apart perfection:
Keep rolls connected: This is the signature technique. The rolls come attached in their package—don’t separate them. You’ll slice through them horizontally while keeping them connected at the base, creating top and bottom halves that stay together.
Room temperature matters: Remove rolls from packaging and let them sit at room temperature for 15-20 minutes before slicing. Cold rolls are harder to slice cleanly and don’t absorb butter as readily.
The perfect slice: Use a long, sharp serrated knife. Place the connected roll slab on a cutting board. Place one hand gently on top to stabilize, then carefully slice horizontally through all the rolls at once, keeping the bottom layer intact. You want to cut almost all the way through but leave the bottom connected by about 1/4 inch.
Transfer carefully: After slicing, carefully transfer both halves (still connected) to your baking dish. A large spatula or two hands work well. The goal is maintaining that connection.
Garlic Butter Ingredients
For the Ultimate Garlic Butter:
- 1/2 cup (1 stick or 113g) unsalted butter, melted
- 4 cloves garlic, minced (or 1 1/2 teaspoons garlic powder)
- 2 tablespoons fresh parsley, finely chopped (or 2 teaspoons dried parsley)
- 1/2 cup grated Parmesan cheese
- 1/2 teaspoon garlic salt
- 1/4 teaspoon black pepper
- Optional: 1/4 teaspoon red pepper flakes for heat
For the Rolls:
- 1 package (12-count) King’s Hawaiian Original Sweet Rolls
For Enhanced Flavor (Optional):
- 1 teaspoon Italian seasoning
- 1/2 teaspoon onion powder
- 1 tablespoon fresh basil, chopped
Pantry Staples and Kitchen Tools
Having these items ready streamlines the process:
Quality butter: Use real butter, not margarine. The rich butter flavor is essential to this recipe’s success. Unsalted butter lets you control the salt level, but salted works fine—just reduce or omit the garlic salt.
Fresh vs. jarred garlic: Fresh garlic, minced finely, delivers the best flavor. However, jarred minced garlic works well for convenience. Garlic powder is acceptable in a pinch but provides less intense flavor—you’ll need about 1 1/2 teaspoons to replace 4 cloves.
Parmesan cheese: Use real grated Parmesan, not the shelf-stable stuff in the green can (though that works in a pinch). Freshly grated from a block tastes best, but pre-grated from the refrigerated section works perfectly.
Fresh herbs upgrade: Fresh parsley adds bright color and flavor that dried can’t quite match. If you have fresh basil or chives, they’re excellent additions. That said, dried parsley works fine this recipe is forgiving.
Essential equipment:
- Long serrated bread knife (for slicing)
- 9×13-inch baking dish (metal, glass, or ceramic)
- Small mixing bowl (for garlic butter)
- Pastry brush or spoon (for spreading butter)
- Aluminum foil (for covering during baking)
- Cutting board (for slicing rolls)
Step-by-Step Instructions for Hawaiian Roll Garlic Bread Everyone Craves
Follow these detailed steps for perfect results every single time. This recipe is beginner-friendly and virtually foolproof.
Pre-Baking Prep for Hawaiian Roll Garlic Bread Everyone Wants
Set yourself up for seamless execution with proper preparation:
- Preheat your oven to 350°F (175°C). Position the rack in the center of the oven for even heat distribution.
- Prepare your baking dish: Lightly grease a 9×13-inch baking dish with butter or cooking spray. This prevents sticking and makes cleanup easier.
- Bring rolls to room temperature: Remove the connected roll slab from packaging. Let sit at room temperature for 15-20 minutes. Room temperature rolls slice more cleanly and absorb butter better than cold ones.
- Make the garlic butter: In a small bowl, combine melted butter, minced garlic, chopped parsley, Parmesan cheese, garlic salt, and black pepper. Whisk until well combined. The mixture should be smooth and aromatic.
- Prepare your workspace: Set out your cutting board, serrated knife, and prepared baking dish. Having everything within reach makes the process smooth and prevents the rolls from drying out.
Slicing Technique for Hawaiian Roll Garlic Bread Everyone Loves
The signature horizontal slice creates that perfect pull-apart effect:
- Position the rolls: Place the connected 12-roll slab on a cutting board with the flat bottom facing down. The rolls should be in their original 3×4 or 4×3 configuration.
- Stabilize with your hand: Place your non-dominant hand flat on top of the roll slab, applying gentle, even pressure. This keeps the rolls stable and helps you slice evenly.
- Make the horizontal cut: Using a long, sharp serrated knife, carefully slice horizontally through all 12 rolls at once. Use a gentle sawing motion rather than pressing down hard. Slice through about 90% of the thickness, leaving the bottom 1/4 inch connected.
- Check your work: Gently lift the top half slightly to verify you’ve cut through cleanly while maintaining that crucial bottom connection. If any rolls didn’t cut through completely, carefully finish the cut.
- Transfer to baking dish: Carefully lift the entire connected unit (both halves still attached) and place in your prepared baking dish. Both halves should sit in the dish with the cut side exposed and facing up.
Butter Application for Hawaiian Roll Garlic Bread Everyone Devours
Even butter distribution ensures every bite is perfect:
- Separate the halves: Gently pull the top and bottom halves apart slightly, creating space between them. Don’t separate completely keep them connected at the base.
- Brush the bottom layer: Using a pastry brush or spoon, generously spread half of the garlic butter mixture over the cut side of the bottom layer of rolls. Get into all the crevices between rolls for maximum flavor.
- Brush the top layer: Flip up or hold the top half and brush the cut side (the inside surface) with a generous portion of the remaining butter mixture. Make sure every surface is coated.
- Brush the exterior: Press the halves back together gently. Brush or drizzle the remaining garlic butter over the top of the rolls, letting it drip down the sides. Don’t skip this step—it creates that golden, crispy top.
- Let it soak: If time allows, let the buttered rolls sit for 5-10 minutes before baking. This allows the butter to soak into the bread, creating even more flavor.
Baking Method for Hawaiian Roll Garlic Bread Everyone Enjoys
Proper baking creates golden tops and buttery, soft interiors:
- Cover with foil: Tent aluminum foil loosely over the baking dish. This prevents the tops from browning too quickly while allowing the interiors to heat through and the butter to penetrate fully.
- Bake covered: Place in preheated 350°F oven and bake for 15 minutes. The rolls should be heated through and the butter should be bubbling around the edges.
- Remove foil: After 15 minutes, carefully remove the foil. The rolls should look puffy and the butter should have soaked in nicely.
- Finish uncovered: Return to the oven uncovered for 5-7 minutes. This step crisps and browns the tops while keeping the interiors soft and buttery.
- Optional broiler finish: For extra-golden, crispy tops, turn on the broiler for the final 1-2 minutes. Watch constantly—broilers work fast and can burn quickly. You want golden brown, not charred.
- Check for doneness: The Hawaiian Roll Garlic Bread Everyone loves is ready when the tops are golden brown, the edges are crispy, the butter is bubbling, and the internal temperature reaches about 180°F.
Resting and Serving Hawaiian Roll Garlic Bread Everyone Requests
Brief resting and proper serving technique maximize enjoyment:
Short cooling period: Remove from oven and let rest in the baking dish for 2-3 minutes. This brief pause allows the butter to settle slightly and makes the bread easier to handle without burning anyone’s mouth.
Serve warm, not hot: These are best enjoyed warm but not scorching hot. The ideal serving temperature is when you can comfortably hold a piece for a few seconds—hot enough to be steamy and aromatic, cool enough to eat immediately.
Pull-apart presentation: Serve directly from the baking dish family-style, letting guests pull apart their own portions. This interactive serving style is part of the fun and ensures everyone gets both crispy top and soft bottom.
Garnish beautifully: Right before serving, sprinkle with additional fresh chopped parsley and a bit more Parmesan cheese. This adds color and fresh flavor.
Keep warm: If holding for a gathering, cover loosely with foil and keep in a 200°F oven for up to 30 minutes. Beyond that, they start to dry out.
Pro Tips for Perfect Hawaiian Roll Garlic Bread Everyone Makes
After making hundreds of batches, these insider tricks guarantee success and take your Hawaiian Roll Garlic Bread Everyone craves to the next level.
Avoiding Common Mistakes
Problem: Rolls falling apart or separating
This defeats the pull-apart purpose and creates a mess:
- Solution: Don’t cut all the way through. Leave at least 1/4 inch of connection at the bottom. This crucial connection keeps everything together while allowing the pull-apart effect.
- Solution: Use a sharp serrated knife and a gentle sawing motion. Dull knives tear the bread instead of slicing cleanly.
- Solution: Support the rolls with your hand while slicing to prevent shifting and uneven cuts.
Problem: Soggy, greasy bread
Too much butter or improper baking creates an unpleasant texture:
- Solution: Don’t double the butter. The recipe’s proportions are carefully calculated. More butter doesn’t mean more flavor—it means soggy bread.
- Solution: Always bake uncovered for the final 5-7 minutes. This step is essential for evaporating excess moisture and crisping the tops.
- Solution: Ensure your oven is fully preheated. Baking at too low a temperature causes butter absorption rather than proper toasting.
Problem: Dry, hard tops
Overbaking or too much direct heat creates tough, unpleasant crust:
- Solution: Don’t skip the foil-covered phase. This protects the rolls from drying out while they heat through.
- Solution: Check at 15 minutes and don’t extend the initial covered baking beyond 17-18 minutes.
- Solution: If using the broiler, watch like a hawk. Broilers vary wildly, and 30 seconds can mean the difference between golden and burnt.
Problem: Uneven browning
Some rolls are golden while others stay pale:
- Solution: Rotate the pan 180 degrees halfway through the uncovered baking phase. Most ovens have hot spots.
- Solution: Ensure butter distribution is even, especially on the tops. Unbrushed spots won’t brown.
- Solution: Use the center oven rack. Top racks brown too quickly; bottom racks leave pale tops.
Essential Tool Recommendations for Hawaiian Roll Garlic Bread Everyone Loves
The right tools make this easy recipe even easier:
Long serrated bread knife: This is crucial for the horizontal slicing technique. A knife at least 10 inches long allows you to slice through all 12 rolls in one smooth motion. Offset serrated knives (bread knives with the handle higher than the blade) make the job even easier. Expect to spend $15-40 for a quality one that lasts years.
Pastry brush: Silicone pastry brushes distribute butter evenly and are easy to clean. The 1.5-2 inch width works perfectly for this application. Alternative: use the back of a spoon if you don’t have a brush.
9×13-inch baking dish: Glass, ceramic, or metal all work fine. Glass lets you see the browning on the sides. Metal conducts heat faster and creates crispier edges. I prefer metal for this recipe, but use whatever you have.
Microplane for garlic: Fresh garlic minced with a Microplane creates smaller, more evenly distributed pieces that blend seamlessly into the butter. Regular mincing with a knife works too, just aim for very fine pieces.
Instant-read thermometer: While not essential, checking that the internal temperature reaches 180°F ensures the centers are fully heated without overbaking.
Storage & Reheating Hawaiian Roll Garlic Bread Everyone Requests
Maximize your batch with proper storage techniques:
Room temperature storage: These are best enjoyed fresh but can be stored at room temperature, covered tightly with foil, for up to 24 hours. Beyond that, refrigeration is necessary.
Refrigerating leftovers: Store cooled garlic bread in an airtight container or wrapped tightly in aluminum foil. Refrigerate for up to 4 days. The butter may solidify, but reheating brings everything back to life.
Best reheating method – oven: Preheat oven to 300°F. Wrap the garlic bread in aluminum foil and bake for 10-12 minutes until warmed through. For crispy tops, unwrap for the final 2-3 minutes.
Microwave in a pinch: Place 2-3 pieces on a microwave-safe plate. Cover with a slightly damp paper towel (this prevents drying). Microwave on 50% power for 20-30 seconds. The texture won’t be as crispy, but flavor remains delicious.
Make-ahead magic: Prepare completely through the butter application step, cover tightly with foil, and refrigerate for up to 24 hours. When ready to serve, bring to room temperature (about 30 minutes), then bake as directed. This make-ahead approach actually improves flavor as the butter soaks in longer.
Freezing considerations: While you can freeze baked garlic bread for up to 1 month, the texture suffers slightly. Wrap very tightly in plastic wrap, then aluminum foil. Thaw overnight in refrigerator and reheat in oven.
Flavor Variations for Hawaiian Roll Garlic Bread Everyone Creates
The basic recipe is perfection, but these variations let you customize Hawaiian Roll Garlic Bread Everyone makes for different occasions and preferences.
Cheesy Hawaiian Roll Garlic Bread Everyone Craves
Take the cheese factor to the next level with these delicious variations:
Triple cheese blend: In addition to Parmesan, add 1/2 cup shredded mozzarella and 1/4 cup shredded sharp cheddar to the butter mixture. After the initial covered baking, sprinkle extra cheese on top and return to the oven uncovered. The result is gooey, stretchy, incredibly indulgent.
Asiago and herb: Replace Parmesan with Asiago cheese and add 1 teaspoon of fresh thyme leaves to the butter. The sharp, nutty Asiago creates sophisticated flavor perfect for dinner parties.
Everything bagel topping: Mix 2 tablespoons of everything bagel seasoning into the butter and sprinkle extra on top before baking. This creates a savory, oniony, sesame-studded crust that’s incredibly addictive.
Jalapeño popper style: Add 3 tablespoons of finely diced pickled jalapeños and 1/4 cup of cream cheese (softened and mixed into the butter) along with extra Parmesan. Spicy, creamy, tangy perfection.
Global-Inspired Variations
Give your Hawaiian Roll Garlic Bread Everyone enjoys international flair:
Italian herb garden: Add 1 tablespoon fresh basil, 1 teaspoon fresh oregano, 1 teaspoon fresh rosemary (finely chopped), and increase Parmesan to 3/4 cup. Brush with extra virgin olive oil instead of butter for authentic Italian flavor. Serve with marinara for dipping.
French garlic bread: Use 6 cloves of garlic (instead of 4) and add 1 tablespoon of Dijon mustard to the butter mixture. Replace parsley with fresh tarragon. The result is more pungent and sophisticated.
Mexican street corn inspired: Add 1 tablespoon of lime juice, 1 teaspoon of chili powder, and 1/2 teaspoon of cumin to the butter. Use cotija cheese instead of Parmesan. Sprinkle with fresh cilantro before serving.
Mediterranean style: Mix 2 tablespoons of sun-dried tomatoes (finely chopped), 1 tablespoon of fresh oregano, and 2 tablespoons of feta cheese into the butter. Add 1 teaspoon of lemon zest for brightness.
Dietary Adaptation Table
| Variation | Key Modifications | Taste & Texture Notes |
|---|---|---|
| Dairy-Free Hawaiian Roll Garlic Bread | Replace butter with vegan butter (Earth Balance). Use nutritional yeast instead of Parmesan. Verify Hawaiian rolls are dairy-free (most aren’t—use dairy-free sweet rolls). | Very similar taste and texture. Nutritional yeast provides cheesy, umami flavor. |
| Low-Carb/Keto Alternative | This recipe doesn’t adapt well to keto. Instead, use fathead dough formed into 12 connected rolls, then apply garlic butter as directed. | Different texture—denser, less sweet—but satisfies garlic bread cravings on keto. |
| Gluten-Free Version | Use gluten-free Hawaiian-style sweet rolls (Canyon Bakehouse or homemade). Same butter mixture and technique. | Texture is slightly denser but flavor is excellent. Ensure all ingredients are certified GF. |
| Reduced-Fat Option | Use 1/4 cup butter instead of 1/2 cup. Replace remaining butter with olive oil. Reduce Parmesan to 1/4 cup. | Less rich but still flavorful. Texture is slightly less indulgent but still delicious. |
| Herb-Loaded Version | Double the fresh herbs—use combination of parsley, basil, chives, and dill. Add 1 tablespoon of fresh rosemary. | Incredibly aromatic and fresh-tasting. Perfect for spring and summer gatherings. |
| Spicy Buffalo Variation | Add 3 tablespoons of buffalo sauce to the butter. Reduce garlic to 2 cloves. Top with blue cheese crumbles. | Tangy, spicy, perfect for game day. Serve with ranch or blue cheese for dipping. |
Serving Suggestions for Hawaiian Roll Garlic Bread Everyone Serves
Transform Hawaiian Roll Garlic Bread Everyone makes from a side dish into the star of your meal with these creative serving ideas.
Perfect Menu Pairings
Italian feast: Serve alongside spaghetti and meatballs, chicken Parmesan, or lasagna. The garlic bread’s buttery richness complements tomato-based sauces beautifully. Add a Caesar salad for a complete Italian-American dinner.
Soup night: This garlic bread pairs exceptionally with hearty soups. Try it with tomato soup (dip the bread directly in), loaded potato soup, minestrone, or creamy broccoli cheddar. The bread’s sweetness balances savory, rich soups.
Barbecue sides: Surprisingly delicious with grilled meats. Serve alongside ribs, grilled chicken, or steak. The sweet-savory combination works wonderfully with smoky, charred flavors. Add coleslaw and baked beans for the ultimate cookout spread.
Breakfast or brunch: Turn this into a sweet-savory breakfast item by serving with scrambled eggs, crispy hashbrowns, and fresh fruit. The Hawaiian rolls’ sweetness makes this transition seamless.
Appetizer spread: Make this the centerpiece of an appetizer table alongside cured meats, cheeses, olives, roasted vegetables, and dips. Cut into smaller pieces for easy finger food.
Game day snacks: Perfect for football Sundays or watch parties. Serve alongside other finger foods like chicken wings, mozzarella sticks, loaded nachos, and vegetable platters.
Dipping Sauce Options
While Hawaiian Roll Garlic Bread Everyone enjoys is perfect on its own, these dipping sauces add extra dimension:
Marinara sauce: Classic pairing. Warm marinara provides tangy, tomato contrast to buttery, garlicky bread. Make homemade or use quality jarred sauce.
Alfredo sauce: Rich, creamy Alfredo creates an ultra-indulgent experience. The double-butter situation is decadent in the best way.
Ranch dressing: Cool, creamy ranch offers refreshing contrast. Both store-bought and homemade versions work beautifully.
Garlic aioli: Double down on garlic with creamy aioli. Mix mayo, minced garlic, lemon juice, and a pinch of salt.
Balsamic reduction: Drizzle thick, sweet-tart balsamic glaze over pieces for an elegant touch perfect for dinner parties.
Cheese sauce: Warm cheddar cheese sauce or beer cheese creates ultimate comfort food. This combination is dangerously addictive.
Beverage Pairings
For casual dinners: Iced tea (sweet or unsweetened), lemonade, or Italian sodas complement without overwhelming. For adults, light beers like pilsners or wheat beers work wonderfully.
For wine lovers: Crisp white wines like Pinot Grigio or Sauvignon Blanc cut through the richness beautifully. Light-bodied reds like Pinot Noir also work well. Avoid heavy, tannic reds that overpower.
For special occasions: Prosecco or champagne adds festive bubbles. The acidity balances the butter perfectly.
FAQs About Hawaiian Roll Garlic Bread Everyone Asks
Can I make Hawaiian Roll Garlic Bread Everyone loves ahead of time?
Absolutely! This is one of the most make-ahead-friendly recipes:
Full day ahead: Prepare completely through the butter application step. Cover tightly with aluminum foil and refrigerate for up to 24 hours. When ready to serve, let sit at room temperature for 20-30 minutes, then bake as directed. The extended butter-soaking time actually enhances flavor.
Morning of: Prepare in the morning for evening serving. Keep covered and refrigerated. Remove from fridge 30 minutes before baking.
Partial prep: Make the garlic butter mixture up to 3 days ahead. Store in an airtight container in the refrigerator. Bring to room temperature and stir before using.
After baking storage: Baked garlic bread keeps at room temperature (covered) for 24 hours or refrigerated for 4 days. Reheat in foil at 300°F for 10-12 minutes.
The make-ahead capability makes this perfect for holiday meals, potlucks, and entertaining—prep when convenient, bake when needed.
Why is my Hawaiian Roll Garlic Bread Everyone makes soggy?
Soggy garlic bread usually results from too much butter or improper baking technique:
Too much butter: Stick to the recipe’s 1/2 cup (1 stick). More butter sounds great in theory but creates greasy, soggy bread. The Hawaiian rolls can only absorb so much.
Skipping the uncovered phase: Always remove the foil for the final 5-7 minutes. This crucial step evaporates excess moisture and crisps the tops.
Not preheating the oven: Baking at too low a temperature causes butter absorption rather than evaporation. Always preheat to full 350°F.
Overcrowding the pan: If rolls are too tightly packed with no air circulation, steam gets trapped. Use a proper 9×13-inch pan with space around the edges.
Fix for soggy bread: If it’s already soggy, remove the foil and return to a 375°F oven for 5-8 minutes to crisp up. You can also finish under the broiler for 1-2 minutes (watch carefully).
Can I use regular dinner rolls instead of Hawaiian rolls?
You can, but results will differ significantly:
The sweetness factor: Hawaiian rolls’ signature sweetness creates the magical sweet-savory contrast that makes this recipe special. Regular dinner rolls work but lack that dimension.
Texture differences: Hawaiian rolls have a uniquely soft, pillowy texture from their enriched dough (eggs, butter, milk). Regular rolls are often denser and less tender.
Better alternatives: If you can’t find Hawaiian rolls, look for brioche rolls (similar richness), Portuguese sweet rolls (comparable sweetness), or Martin’s Potato Rolls (very soft texture). All work better than standard dinner rolls.
Adjusting the recipe: If using regular rolls, consider adding 1 tablespoon of honey to the garlic butter to compensate for lost sweetness.
Bottom line: Hawaiian rolls are worth finding for authentic results, but the recipe is forgiving enough that substitutions still taste good.
How do I keep Hawaiian Roll Garlic Bread Everyone enjoys warm for a party?
Maintaining optimal serving temperature for gatherings requires strategy:
Low oven method: After baking, reduce oven temperature to 200°F. Cover the garlic bread loosely with foil and keep warm for up to 1 hour. Beyond that, it starts drying out.
Warming drawer: If your oven has a warming drawer, this is perfect. Set to 180-200°F and keep covered.
Chafing dish: For buffets or potlucks, transfer to a chafing dish with a warming candle underneath. Line the dish with foil first to prevent sticking.
Insulated carrier: If transporting, wrap the hot baking dish in aluminum foil, then towels, and place in an insulated carrier. It stays warm for 45-60 minutes.
Reheat in batches: For very large gatherings, bake in batches so fresh bread keeps coming out every 20-30 minutes.
Best practice: Serve immediately after baking when possible. If holding is necessary, use the low oven method and plan accordingly.
Is Hawaiian Roll Garlic Bread Everyone makes suitable for people with dietary restrictions?
This depends on the specific restriction:
Vegetarian: Yes, completely vegetarian-friendly using butter and Parmesan cheese.
Vegan: No, contains butter and cheese. However, it’s easy to adapt using vegan butter and nutritional yeast. See the Dietary Adaptation Table in the Flavor Variations section for details.
Gluten-free: Not as written Hawaiian rolls contain wheat. However, gluten-free Hawaiian-style sweet rolls (Canyon Bakehouse makes them) work with the same technique.
Dairy-free: No, heavily relies on butter and cheese. Vegan butter and nutritional yeast substitutions work but verify your Hawaiian rolls are dairy-free (most contain milk).
Nut-free: Yes, this recipe contains no nuts and is safe for nut allergies.
Egg-free: Hawaiian rolls contain eggs, so this isn’t egg-free. Look for egg-free sweet roll alternatives.
Kosher/Halal: Verify all ingredients meet your specific requirements. The recipe itself contains no prohibited ingredients for these diets.
Always check ingredient labels, as formulations can change, and cross-contamination may occur during manufacturing.
Can I double the recipe for Hawaiian Roll Garlic Bread Everyone requests?
Absolutely! This recipe scales beautifully for crowds:
Doubling in one pan: You can fit two 12-count packages of Hawaiian rolls in a large roasting pan (approximately 18×13 inches). Double all ingredients proportionally. Baking time remains the same—just check that centers are hot.
Two separate pans: More common approach. Make the recipe twice using two 9×13-inch pans. You can bake both simultaneously on different oven racks. Rotate pan positions halfway through for even browning.
Tripling or more: For very large gatherings, prepare multiple batches. Assembly-line the process—slice all roll packages first, make one large batch of garlic butter, then apply to all pans. Bake in shifts if needed.
Ingredient scaling: Simply multiply each ingredient by the number of batches. For three batches: 1.5 cups butter, 12 cloves garlic, etc.
Make-ahead advantage: When feeding crowds, prepare all pans the day before, refrigerate covered, then bake as needed. This prevents last-minute stress.
Portion planning: One 12-count package serves 6-8 as a side dish, 4-6 as a main component. Calculate based on your guest count.
Conclusion
This Hawaiian Roll Garlic Bread Everyone can’t stop making has earned its viral status for good reason it’s the perfect marriage of sweet, buttery Hawaiian rolls and savory, garlicky herb butter that creates an irresistibly delicious result greater than the sum of its parts. Whether you’re serving it alongside Italian classics, soups, grilled meats, or presenting it as an appetizer at your next gathering, this recipe delivers consistent, crowd-pleasing results with minimal effort.
Print
Hawaiian Roll Garlic Bread Everyone 6 Secrets to Pull Apart Heaven
- Total Time: 32
- Yield: 12 servings 1x
- Diet: Vegetarian
Description
This viral Hawaiian Roll Garlic Bread transforms sweet, pillowy Hawaiian rolls into the most addictive garlic bread you’ll ever taste. The secret is slicing the connected rolls horizontally, slathering them with garlicky herb butter, and baking until golden and crispy on top while staying soft and buttery inside. Perfect for parties, family dinners, or anytime you need a crowd-pleasing side dish.
Ingredients
1 package (12-count) King’s Hawaiian Original Sweet Rolls
1/2 cup (1 stick) unsalted butter, melted
4 cloves garlic, minced (or 1 1/2 teaspoons garlic powder)
2 tablespoons fresh parsley, finely chopped (or 2 teaspoons dried parsley)
1/2 cup grated Parmesan cheese
1/2 teaspoon garlic salt
1/4 teaspoon black pepper
Optional: 1/4 teaspoon red pepper flakes
Optional: 1 teaspoon Italian seasoning
Instructions
1. Preheat oven to 350°F (175°C). Lightly grease a 9×13-inch baking dish.
2. Remove Hawaiian rolls from packaging and let sit at room temperature for 15-20 minutes.
3. In a small bowl, combine melted butter, minced garlic, chopped parsley, Parmesan cheese, garlic salt, and black pepper. Whisk until well combined.
4. Place the connected roll slab on a cutting board. Using a long serrated knife, carefully slice horizontally through all 12 rolls at once, cutting about 90% through and leaving the bottom 1/4 inch connected.
5. Carefully transfer the sliced roll slab to the prepared baking dish.
6. Gently pull the top and bottom halves apart slightly. Brush half of the garlic butter mixture over the cut side of the bottom layer of rolls.
7. Brush the cut side of the top layer with a generous portion of the remaining butter mixture.
8. Press the halves back together gently. Brush or drizzle the remaining garlic butter over the top of the rolls.
9. Cover loosely with aluminum foil. Bake for 15 minutes.
10. Remove foil and bake uncovered for an additional 5-7 minutes until tops are golden brown.
11. Optional: Turn on broiler for final 1-2 minutes for extra-crispy tops. Watch carefully to prevent burning.
12. Remove from oven and let rest for 2-3 minutes.
13. Garnish with additional fresh parsley and Parmesan cheese if desired.
14. Serve warm, allowing guests to pull apart individual portions.
Notes
For make-ahead convenience, prepare through the butter application step, cover, and refrigerate for up to 24 hours. Let sit at room temperature 30 minutes before baking.
The key to pull-apart success is NOT cutting all the way through—leave bottom 1/4 inch connected.
Don’t double the butter amount—the recipe’s proportions are perfect. More butter creates soggy bread.
Room temperature rolls slice more cleanly and absorb butter better than cold rolls.
Store leftovers covered at room temperature for 24 hours or refrigerated up to 4 days. Reheat wrapped in foil at 300°F for 10-12 minutes.
One package serves 6-8 as a side dish. For larger crowds, prepare multiple batches.
Fresh garlic provides best flavor, but jarred minced garlic or garlic powder works in a pinch.
- Prep Time: 10
- Cook Time: 22
- Category: Side Dish, Appetizer
- Method: Baking
- Cuisine: American
Nutrition
- Serving Size: 1-2 rolls
- Calories: 195
- Sugar: 6g
- Sodium: 340mg
- Fat: 11g
- Saturated Fat: 7g
- Unsaturated Fat: 3.5g
- Trans Fat: 0g
- Carbohydrates: 20g
- Fiber: 0.5g
- Protein: 4g
- Cholesterol: 28mg
Keywords: hawaiian roll garlic bread, pull apart garlic bread, sweet roll garlic bread, easy garlic bread, party bread, viral garlic bread recipe