Tired of complicated holiday desserts that look beautiful but require culinary school expertise? This Easy Layered Christmas Jello transforms simple ingredients into a show-stopping centerpiece that’ll have guests asking for your secret. As someone who’s spent years perfecting festive recipes with my talented team, I’ve mastered the art of creating desserts that look impressive but feel effortless to make.
Hi there, I’m Simon, and I understand the pressure of wanting holiday gatherings to feel special without spending all day in the kitchen. Growing up in America with my grandmother teaching me that food is a language of love, I learned that the most memorable dishes often come from the simplest recipes. This layered jello became a Christmas tradition after Megan Carter, our pastry genius, showed me how patience and precision create those perfect, Instagram-worthy layers. Olivia Brooks captured its beauty so well that it became our most-shared holiday recipe, while Jackson Reed declared it “proof that desserts can be as stunning as they are simple.”
In this complete guide, you’ll discover why this recipe works so beautifully, how to select the perfect jello flavors and colors, foolproof step-by-step instructions for crystal-clear layers, and creative variations to match any holiday theme throughout the year.
Why This Easy Layered Christmas Jello Works
This festive dessert delivers the perfect combination: stunning visual impact, foolproof technique, and crowd-pleasing flavor.
- Budget-friendly elegance: Uses affordable store-bought jello for a gourmet presentation
- Make-ahead miracle: Prepare 1-2 days before your party with no last-minute stress
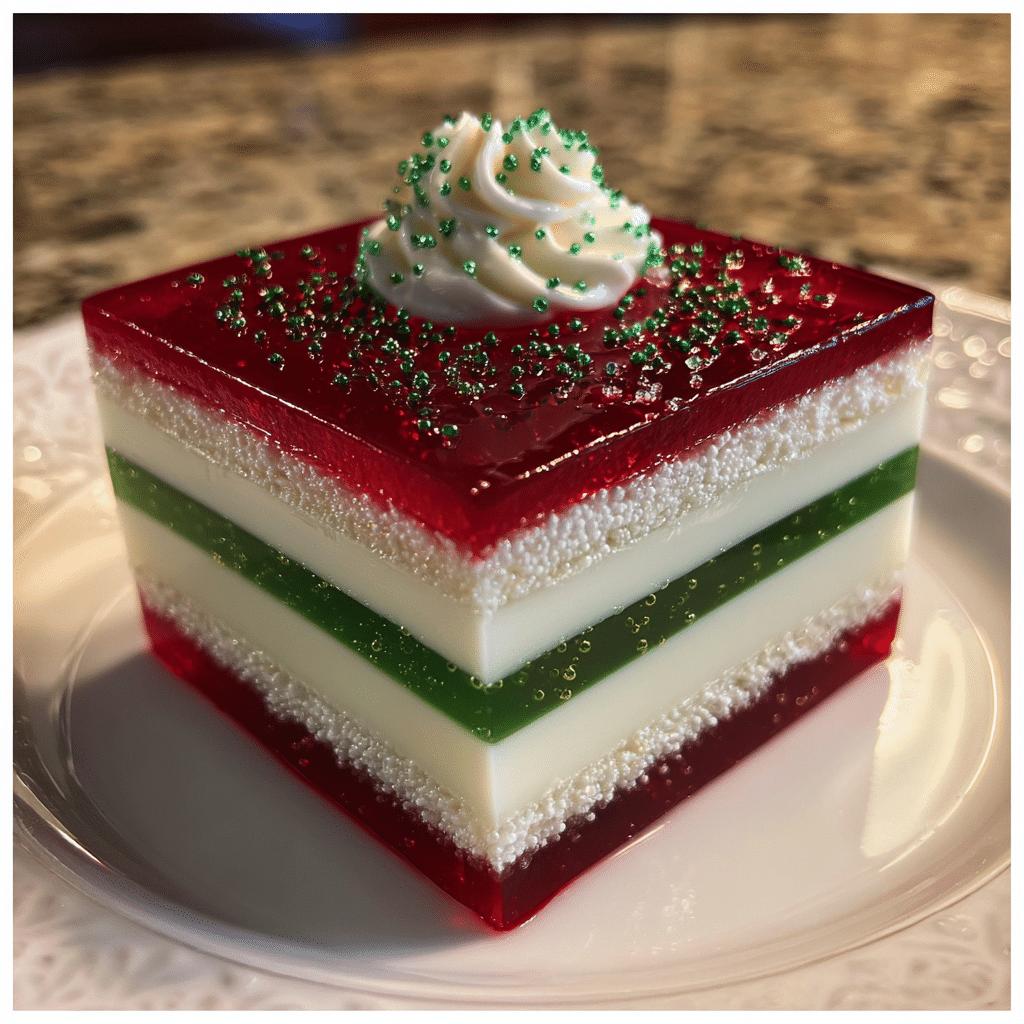
- Customizable colors: Create red and green Christmas layers or adapt for any holiday
- Kid-approved favorite: Fun texture and sweet taste that children absolutely love
- Allergy-friendly option: Naturally gluten-free and can be made dairy-free easily
- Serves a crowd: One pan feeds 12-15 people for ultimate party convenience
Choosing the Right Jello for Layered Christmas Jello
The quality of your jello and technique determine whether your layers are crisp and defined or muddled and blurry.
Best Jello Flavors for This Recipe
Select complementary flavor combinations that taste delicious together while providing vibrant Christmas colors. Traditional combinations include cherry or strawberry (red), lime (green), and vanilla or unflavored gelatin with cream (white). Brand-name jello typically sets more reliably than generic versions. Sugar-free jello works perfectly if you’re watching calories, though it may set slightly softer.
Buying Tips for Jello
Look for jello boxes with clear expiration dates, old gelatin doesn’t set as firmly. Check that packages are sealed and dry, moisture exposure affects setting power. Buy extra boxes so you’re not scrambling if you need to remake a layer. For cream layers, choose full-fat sweetened condensed milk for the richest, most stable results.
Substitutions and Variations
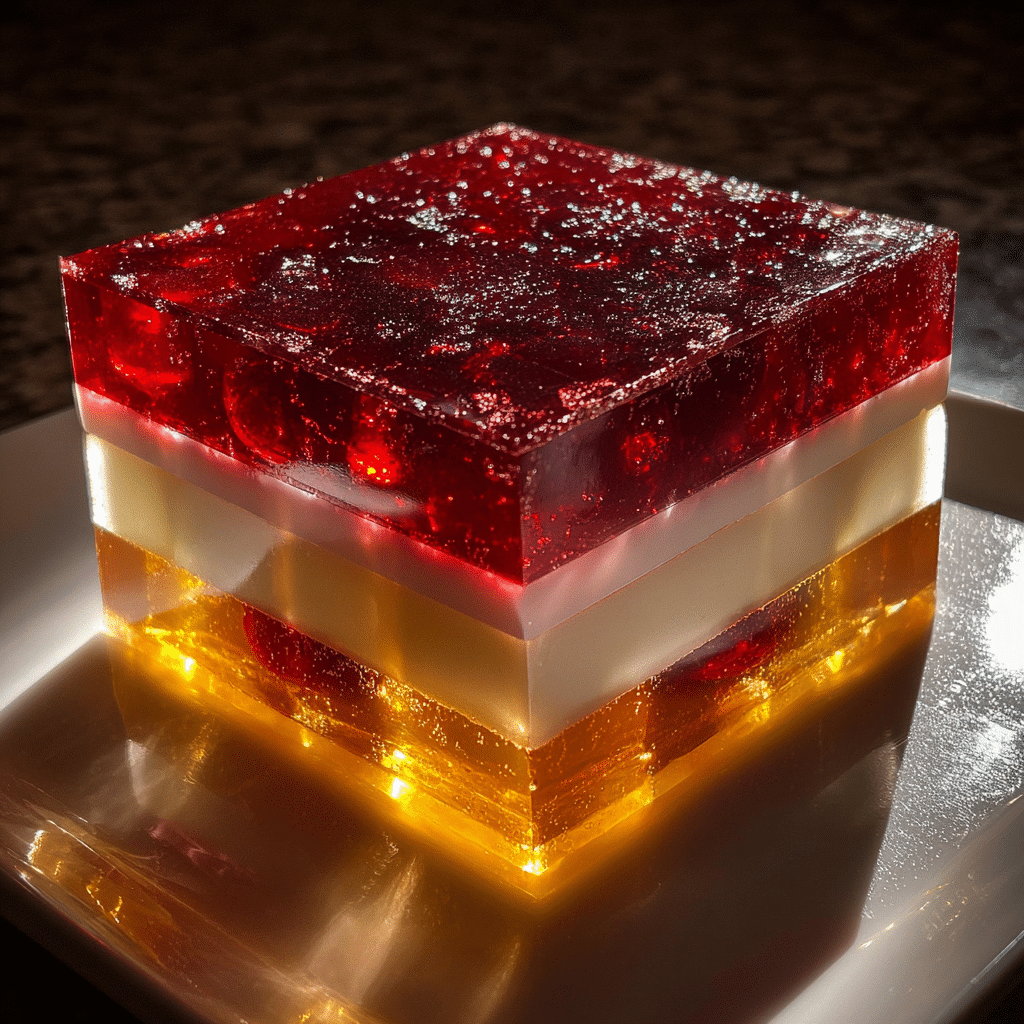
Can’t find lime jello? Use lemon-lime, green apple, or even blue raspberry for different color effects. Replace cherry with raspberry, strawberry, or cranberry flavors. For orange holidays like Halloween or Thanksgiving, add orange and purple layers. Use agar-agar instead of gelatin for a vegetarian/vegan version, following package instructions for proper setting.
Ingredients & Prep for Easy Layered Christmas Jello
Essential Jello Layers
- 2 boxes (3 oz each) cherry or strawberry jello (red layer)
- 2 boxes (3 oz each) lime jello (green layer)
- 2 envelopes unflavored gelatin
- 1 can (14 oz) sweetened condensed milk
- 4 cups boiling water (divided)
- 4 cups cold water (divided)
- 1 cup cold water for cream layers
Cream Layer Components
The creamy white layers between colored jello create that classic Christmas striped effect. Mix unflavored gelatin with cold water first, let it bloom for 5 minutes, then add boiling water and sweetened condensed milk. This creates a stable, sweet cream layer that complements the fruity jello perfectly.
Equipment Essentials
You’ll need a 9×13 inch glass baking dish for best results, clear glass shows off those gorgeous layers. Use measuring cups with spouts for easy pouring. Keep a timer handy since timing is crucial for layer adhesion. Have plastic wrap or aluminum foil ready for covering between layers. A large bowl works perfectly for mixing each layer before pouring.
Pantry Staples
Boiling water is essential for dissolving jello completely. Cold water helps layers set faster. Keep extra boxes of jello on hand in case you need to remake a layer. Cooking spray can help with unmolding if you’re flipping the jello out onto a platter, though most people serve directly from the pan.
Step-by-Step Cooking Instructions for Easy Layered Christmas Jello
Pre-Cooking Prep for Layered Christmas Jello
Start by clearing plenty of refrigerator space, you’ll need room for a 9×13-inch pan to sit flat and undisturbed. Lightly spray your glass baking dish with cooking spray if you plan to unmold later, or skip this step if serving from the pan. Gather all ingredients and organize them by layer sequence. Boil a large kettle of water so it’s ready when needed. This prep prevents rushing and ensures each layer sets properly.
First Layer Method for Layered Christmas Jello
Begin with your red layer for a classic Christmas look. In a large bowl, empty both boxes of cherry jello. Pour 2 cups boiling water over the powder and whisk vigorously for 2 minutes until completely dissolved, no granules should remain. Add 2 cups cold water and stir well. Pour the entire mixture into your prepared 9×13-inch pan. Refrigerate uncovered for 30-45 minutes until the jello is set but still slightly tacky to the touch when gently pressed with your finger. This tackiness is crucial for the next layer to adhere properly.
Cream Layer Technique for Layered Christmas Jello
While your first layer chills, prepare the white cream layer. In a medium bowl, sprinkle 1 envelope of unflavored gelatin over 1 cup cold water and let it bloom for 5 minutes, it will look spongy. Pour 1 cup boiling water over the bloomed gelatin and whisk until completely dissolved. Add half the can of sweetened condensed milk (7 oz) and whisk until smooth and well combined. Let this mixture cool to room temperature for 10-15 minutes, you don’t want hot liquid melting your set jello layer.
Gently pour the cooled cream mixture over the set red layer, pouring slowly over the back of a spoon to prevent creating holes in the first layer. Refrigerate for 30-45 minutes until set but tacky.
Building Subsequent Layers for Layered Christmas Jello
Continue the pattern by preparing your green layer exactly like the red layer: 2 boxes lime jello, 2 cups boiling water, 2 cups cold water. Let it cool to room temperature, then pour gently over the set cream layer. Refrigerate 30-45 minutes until set but tacky.
Repeat with another cream layer using the remaining envelope of gelatin, 1 cup cold water, 1 cup boiling water, and remaining condensed milk. Cool and pour over green layer.
For a classic five-layer look, finish with a final red layer using 1 box cherry jello, 1 cup boiling water, and 1 cup cold water. Pour over the set cream layer and refrigerate for at least 4 hours or overnight until completely firm.
Final Setting Time for Layered Christmas Jello
After all layers are poured, refrigerate the entire dessert for at least 4 hours, but preferably overnight. This final setting time ensures clean cuts and stable layers that won’t slide apart when served. Cover loosely with plastic wrap once the top layer is set to prevent refrigerator odors from affecting the taste.
Pro Tips for Perfect Easy Layered Christmas Jello
Avoiding Blurred Layers in Layered Christmas Jello
Always let each layer set until tacky before adding the next, rushing creates blurred, mixed layers. Cool each new liquid layer to room temperature before pouring, hot liquid melts the previous layer. Pour slowly and gently, using the back of a spoon to diffuse the flow. Never skip refrigeration time between layers. If a layer seems too soft, give it extra time rather than risking muddy colors.
Tool Recommendations
A clear glass 9×13-inch baking dish shows off layers beautifully and allows you to check setting progress from the side. Use a large liquid measuring cup with a spout for controlled pouring. A wire whisk dissolves gelatin better than a spoon. Keep a kitchen timer handy to track layer setting times accurately. Dip your serving knife in hot water between cuts for clean, professional-looking slices.
Storage & Make-Ahead Tips
Make this Easy Layered Christmas Jello up to 2 days before your event for maximum convenience. Store covered in the refrigerator, it stays fresh for up to 5 days. Don’t freeze jello, it becomes grainy and watery when thawed. Cut into squares only when ready to serve to maintain moisture. Store leftovers covered tightly with plastic wrap pressed directly on the surface to prevent drying.
Flavor Variations for Easy Layered Christmas Jello
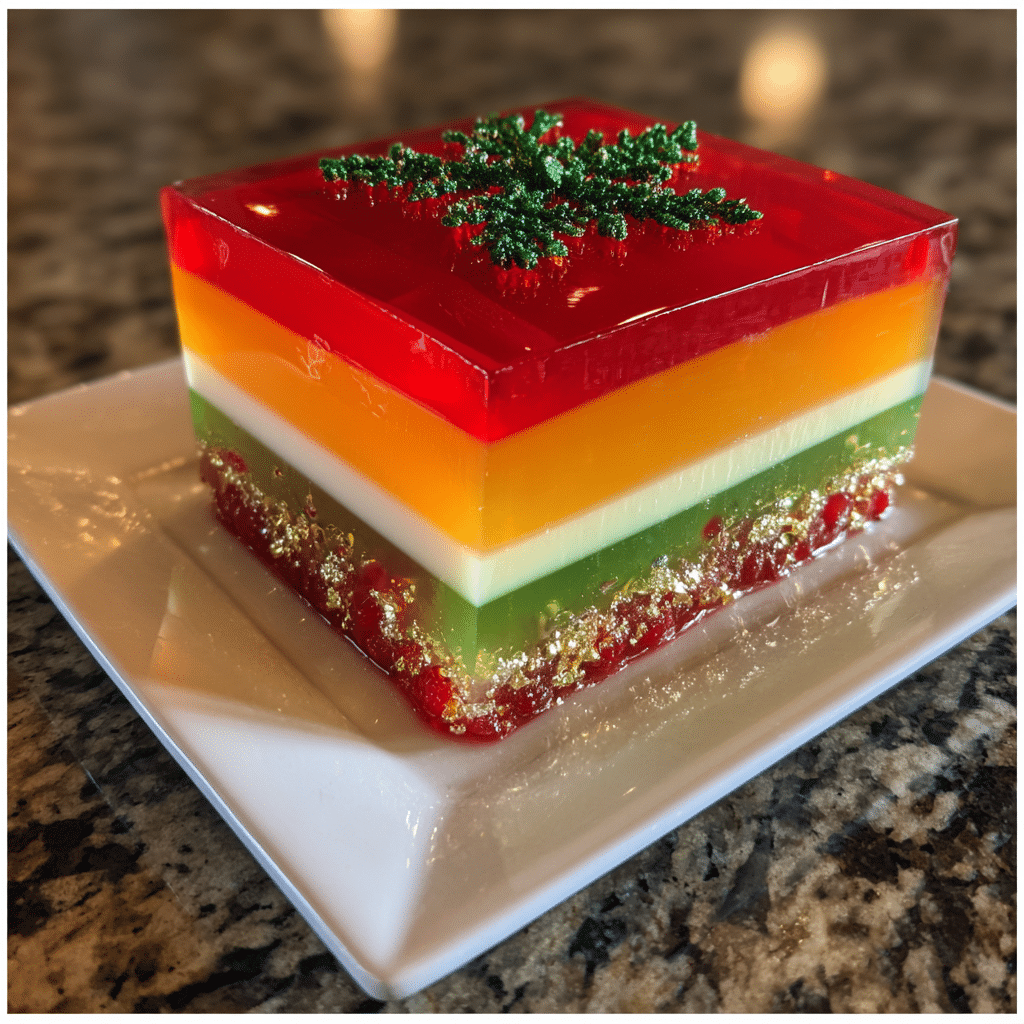
Rainbow Party Jello
Create a stunning rainbow effect by layering red, orange, yellow, green, blue, and purple jello with or without cream layers between. This version works beautifully for birthday parties, Pride celebrations, or spring gatherings. Use the same technique, just increase the number of layers and adjust timing accordingly.
Patriotic Red, White, and Blue
Perfect for Fourth of July, Memorial Day, or Labor Day celebrations. Layer cherry or strawberry (red), cream layers (white), and blue raspberry or berry blue (blue) for a festive American flag effect. Add fresh berries on top when serving for extra patriotic flair.
Halloween Orange and Black
Use orange jello and create “black” layers by mixing grape and cherry jello together for a deep purple-black color. Alternate with cream layers or skip them for bolder color contrast. Top with gummy worms or candy eyes for spooky presentation.
Easter Spring Pastel
Mix jello with extra water to create softer, pastel colors perfect for Easter. Use pink (cherry with extra water), yellow (lemon), and light green (lime with extra water). Layer with cream or alternate pastel colors for a soft, spring-inspired dessert.
Flavor Variations Comparison Table
| Holiday Theme | Layer Colors | Jello Flavors | Best Occasions |
|---|---|---|---|
| Christmas Classic | Red, White, Green | Cherry, Cream, Lime | Christmas parties, potlucks |
| Rainbow Celebration | All colors | Various fruit flavors | Birthdays, Pride, kids’ parties |
| Patriotic | Red, White, Blue | Strawberry, Cream, Blue raspberry | July 4th, Memorial Day |
| Halloween | Orange, Black, White | Orange, Grape-Cherry, Cream | Halloween parties |
| Easter Pastels | Pink, Yellow, Green | Light cherry, Lemon, Light lime | Easter brunches, spring showers |
Serving Suggestions for Easy Layered Christmas Jello
Serve this stunning Easy Layered Christmas Jello as a light, refreshing ending to heavy holiday meals. Cut into perfect squares and plate individually with a dollop of whipped cream on top. Present the whole pan family-style at casual gatherings, letting guests serve themselves. For elegant dinner parties, use cookie cutters to create festive shapes like stars, trees, or bells.
Pair with classic holiday cookies, gingerbread, or sugar cookies for a complete dessert table. Serve alongside eggnog cheesecake or peppermint bark for variety. For children’s parties, create a dessert bar with this jello, candy canes, and hot cocoa.
Top individual servings with fresh whipped cream, a sprinkle of crushed candy canes, or fresh mint leaves for garnish. Add fresh berries like strawberries and blueberries for extra color and nutrition. For adult gatherings, serve small portions as a palate cleanser between courses.
FAQs About Easy Layered Christmas Jello
Can I make this Layered Christmas Jello ahead of time?
Absolutely! This dessert is actually better when made 1-2 days ahead, allowing all layers to set completely firm. Prepare it up to 48 hours before your event and store covered in the refrigerator. The flavors meld beautifully and cutting becomes easier after full setting time. Just don’t cut into squares until shortly before serving to maintain moisture and prevent drying out.
Why are my jello layers mixing together instead of staying separate?
The most common cause is pouring hot liquid onto a not-fully-set layer, melting it and causing colors to blend. Always let each layer set until tacky (30-45 minutes) and cool new liquid to room temperature before pouring. Pouring too forcefully can also break through the previous layer, so pour gently over the back of a spoon for a diffused flow.
How do I get perfectly straight, even layers in my Layered Christmas Jello?
Ensure your refrigerator shelf is perfectly level before placing your pan inside. Use a measuring cup to pour the same amount of liquid for each colored layer, creating uniform thickness. Let the liquid settle naturally after pouring, don’t tilt or move the pan. Keep the pan in the same spot in the refrigerator throughout the entire process to prevent shifting.
Can I make this Layered Christmas Jello without the cream layers?
Yes! Simply alternate colored jello layers without cream for a bolder, more vibrant look. You’ll need less setting time between layers since colored jello sets faster. The result is equally stunning but with more intense color contrast. This version is also lower in calories and naturally dairy-free.
Is this Easy Layered Christmas Jello safe during pregnancy?
Yes, this dessert is completely safe for pregnant women. Jello contains no raw eggs, unpasteurized dairy, or other concerning ingredients. The gelatin is fully cooked/dissolved in boiling water, and sweetened condensed milk is shelf-stable and safe. Just ensure all utensils and dishes are clean to prevent any bacterial concerns.
How do I cut clean slices of Layered Christmas Jello?
Use a sharp knife dipped in hot water, wiping it clean between each cut. The heat helps the knife glide through cleanly without dragging or tearing layers. Cut in one smooth motion rather than sawing back and forth. For the cleanest cuts, chill thoroughly overnight so all layers are completely firm.
Can I make a sugar-free version of this Layered Christmas Jello?
Absolutely! Replace regular jello with sugar-free versions and use sugar-free sweetened condensed milk (or make cream layers with gelatin and milk with stevia). The setting time may be slightly different, so test with finger touch method. Sugar-free versions set slightly softer but taste just as delicious and look equally beautiful.
Conclusion
Ready to wow your holiday guests with this spectacular Easy Layered Christmas Jello? Clear that fridge space and get started! This festive dessert has already become a beloved tradition for over 5,000 families who discovered that impressive holiday desserts don’t require culinary degrees or hours of labor.
If you found this recipe helpful, we encourage you to share it with your network or save it for future use.
We’d be delighted to see your unique creations feel free to share your photos with us pinterest
Print
Layered Christmas Jello 5 Brilliant Tips for Perfect Layers
- Total Time: 5 hours (including setting time)
- Yield: 12–15 servings 1x
Description
Easy Layered Christmas Jello with beautiful red, white, and green layers perfect for holiday celebrations. Make-ahead dessert that serves a crowd and looks stunning on any table!
Ingredients
2 boxes (3 oz each) cherry or strawberry jello
2 boxes (3 oz each) lime jello
2 envelopes unflavored gelatin
1 can (14 oz) sweetened condensed milk
8 cups water (4 cups boiling, 4 cups cold) divided
Additional 2 cups water for cream layers (1 cup boiling, 1 cup cold)
Cooking spray (optional, for unmolding)
Whipped cream for serving (optional)
Fresh mint leaves for garnish (optional)
Instructions
1. Lightly spray a 9×13-inch glass baking dish with cooking spray if planning to unmold, or skip for serving from pan.
2. Prepare red layer: Mix 2 boxes cherry jello with 2 cups boiling water, whisk 2 minutes until dissolved.
3. Add 2 cups cold water to cherry mixture, stir well, and pour into prepared pan.
4. Refrigerate uncovered 30-45 minutes until set but slightly tacky to touch.
5. Prepare first cream layer: Sprinkle 1 envelope unflavored gelatin over 1 cup cold water, let bloom 5 minutes.
6. Add 1 cup boiling water to bloomed gelatin, whisk until dissolved, then add 7 oz sweetened condensed milk.
7. Let cream mixture cool to room temperature (10-15 minutes).
8. Gently pour cooled cream mixture over set red layer, pouring slowly over back of spoon.
9. Refrigerate 30-45 minutes until set but tacky.
10. Prepare green layer: Mix 2 boxes lime jello with 2 cups boiling water, whisk until dissolved, add 2 cups cold water.
11. Cool green mixture to room temperature, then pour gently over set cream layer.
12. Refrigerate 30-45 minutes until set but tacky.
13. Prepare second cream layer with remaining gelatin envelope, 1 cup cold water, 1 cup boiling water, and remaining condensed milk.
14. Cool and pour over green layer, refrigerate 30-45 minutes.
15. Optional final red layer: Mix 1 box cherry jello with 1 cup boiling water and 1 cup cold water, cool and pour over final cream layer.
16. Refrigerate entire dessert at least 4 hours or overnight until completely firm.
17. Cut into squares with hot knife, serve with whipped cream if desired.
Notes
Always let each layer set until tacky before adding the next to prevent blurred colors.
Cool each new liquid layer to room temperature before pouring to avoid melting previous layers.
Pour slowly over the back of a spoon to prevent breaking through set layers.
Make 1-2 days ahead for best results and easiest cutting.
Store covered in refrigerator for up to 5 days.
Do not freeze, jello becomes grainy and watery when thawed.
For cleaner cuts, dip knife in hot water and wipe clean between slices.
Sugar-free jello works perfectly but may set slightly softer.
Can omit cream layers for dairy-free version, just alternate colored layers.
- Prep Time: 30 minutes
- Cook Time: 0 minutes
- Category: Dessert
- Method: No-Bake/Refrigerated
- Cuisine: American
Nutrition
- Serving Size: 1 square (approximately 3×3 inches)
- Calories: 145
- Sugar: 24g
- Sodium: 85mg
- Fat: 2g
- Saturated Fat: 1g
- Unsaturated Fat: 1g
- Trans Fat: 0g
- Carbohydrates: 28g
- Fiber: 0g
- Protein: 3g
- Cholesterol: 8mg
Keywords: christmas jello, layered jello, holiday dessert, red and green jello, christmas dessert, make ahead dessert, party jello