
Tired of massive cheesecakes that tempt you for days or recipes that feed a crowd when you’re only cooking for two? This Mini Chocolate Cheesecake transforms the classic dessert into perfectly portioned individual servings that deliver restaurant-quality richness without the waste or week-long commitment. Hi there, I’m Simon, and throughout my culinary adventures with my incredible team Megan Carter, our pastry genius who’s mastered the delicate balance of creamy cheesecake filling, Jackson Reed, who brings precision to every temperature and timing detail, and Olivia Brooks, who makes each dessert look like it belongs in a patisserie window we’ve perfected this intimate dessert that proves you don’t need a springform pan or twelve guests to enjoy world-class cheesecake.
These aren’t just miniature versions of traditional cheesecake. They’re carefully crafted individual desserts with velvety chocolate filling, buttery graham cracker crust, and the perfect ratio of richness to portion size. Whether you’re planning a romantic dinner for two, celebrating an anniversary, treating yourself after a long week, or simply avoiding the temptation of leftover cheesecake staring at you from the fridge, these mini cheesecakes deliver decadence without excess. Each one bakes to silky perfection in under 30 minutes. In this comprehensive guide, I’ll walk you through ingredient selection, water bath technique, preventing cracks, flavor variations, and serving suggestions. Let’s create something special together.
Why This Mini Chocolate Cheesecake Recipe Works
This miniature cheesecake recipe succeeds where full-sized versions often disappoint because it combines three essential elements: perfect proportions, reliable technique, and impressive presentation. Here’s why this has become our go-to dessert for intimate occasions:
- Uses standard ingredients found in any grocery store—no specialty items or hard-to-find chocolate required
- No springform pan needed making it accessible even if you don’t have specialized baking equipment
- Bakes in just 25 minutes compared to 60-90 minutes for full-sized cheesecakes
- Individual portions eliminate guesswork about serving sizes and prevent overindulgence
- Water bath method ensures creamy texture without cracks or dry edges
- Rich chocolate flavor that satisfies without being overwhelmingly sweet
- Perfect for two people eliminating food waste and week-long temptation
- Impressive presentation that looks restaurant-quality with minimal effort
- Make-ahead friendly allowing you to prepare dessert hours or even a day in advance
Choosing the Right Ingredients for Mini Chocolate Cheesecake
The success of your mini cheesecakes depends entirely on ingredient quality. Since there are so few components, each one plays a starring role.
Best Ingredients for This Recipe
Cream Cheese: Full-fat cream cheese is non-negotiable for authentic cheesecake texture. Philadelphia is the gold standard, creating smooth, creamy filling without graininess. Store brands work but may have slightly different moisture content. Bring cream cheese to room temperature—this takes 1-2 hours at room temperature or 15 seconds in the microwave per block (unwrapped). Room temperature cream cheese blends smoothly without lumps.
Chocolate: High-quality semi-sweet or dark chocolate (60-70% cacao) provides the best flavor. Ghirardelli, Lindt, or Guittard chocolate chips work beautifully. Avoid chocolate chips with stabilizers if possible—bar chocolate chopped into small pieces melts more smoothly. For deeper chocolate flavor, use Dutch-process cocoa powder combined with melted chocolate.
Graham Crackers: Regular honey graham crackers create the classic sweet crust. Chocolate graham crackers intensify the chocolate experience. Crush them finely—large chunks create uneven crust that crumbles.
Sour Cream: Full-fat sour cream adds tangy richness that balances chocolate sweetness. Greek yogurt can substitute but creates a slightly denser texture. Don’t use low-fat versions—they make the filling grainy.
Eggs: One large egg at room temperature binds the filling and creates silky texture. Cold eggs straight from the fridge can curdle the mixture or create uneven texture.
Sugar: Granulated white sugar sweetens without adding color. Superfine sugar dissolves even more easily, creating ultra-smooth filling, but regular granulated works perfectly.
Buying Tips
Purchase cream cheese in blocks, not tubs or whipped versions. Tub cream cheese contains stabilizers and air that affect texture. Check the expiration date—fresher cream cheese has better flavor and consistency.
For chocolate, visit the baking aisle rather than the candy aisle. Baking chocolate is formulated to melt smoothly and has better flavor than candy bars. Buy a bar and chop it yourself rather than using chips—it melts more evenly.
Graham crackers should be fresh and crisp. Stale crackers have lost their honey flavor and won’t create a flavorful crust. Store them in an airtight container after opening to maintain freshness.
Substitutions
Cream Cheese: Mascarpone creates an even richer, more delicate cheesecake with Italian flair. Neufchâtel (reduced-fat cream cheese) works but creates a slightly less creamy result.
Chocolate: White chocolate creates an elegant vanilla variation. Milk chocolate makes a sweeter, milder version. Dark chocolate (85% cacao) appeals to sophisticated palates who prefer less sweetness.
Graham Cracker Crust: Oreo cookies (crushed, filling removed) create a cookies-and-cream base. Vanilla wafers or shortbread cookies offer a more delicate flavor. Gingersnap cookies add warm spice notes.
Sour Cream: Full-fat Greek yogurt provides tang with slightly different consistency. Crème fraîche creates French-inspired luxury. In a pinch, heavy cream works but lacks the characteristic tang.
Ingredients & Prep for Mini Chocolate Cheesecake
Precise preparation ensures your mini cheesecakes turn out perfectly every time. These recipes are unforgiving of shortcuts, so follow each step carefully.
Cheesecake Filling Essentials
For the Crust (Makes 2 servings):
- 1/4 cup graham cracker crumbs (about 2 full graham crackers)
- 1 tablespoon granulated sugar
- 1 1/2 tablespoons melted butter
- Pinch of salt
For the Chocolate Filling:
- 8 oz cream cheese (1 full block, room temperature)
- 1/4 cup granulated sugar
- 2 oz semi-sweet chocolate (melted and slightly cooled)
- 1 large egg (room temperature)
- 2 tablespoons sour cream
- 1 teaspoon vanilla extract
- 1 tablespoon unsweetened cocoa powder
- Pinch of salt
For Topping (Optional):
- 1/4 cup heavy cream (whipped with 1 tablespoon sugar)
- Chocolate shavings or cocoa powder for garnish
- Fresh raspberries or strawberries
Preparation Timeline
2-3 Hours Before Serving (or Day Before):
- Remove cream cheese and egg from refrigerator to reach room temperature (this is crucial).
- Preheat oven to 325°F and position rack in center.
- Prepare two 4-ounce ramekins or a muffin tin with 2 cups by lightly greasing with butter or cooking spray.
- Set a kettle of water to boil for the water bath.
Prep Steps:
- Melt chocolate in a microwave-safe bowl in 15-second intervals, stirring between each, until smooth. Let cool for 10 minutes.
- Crush graham crackers in a food processor or sealed plastic bag with a rolling pin until fine crumbs form.
- Prepare a larger baking pan that can hold your ramekins with at least 1 inch of space between them.
- Cut a long strip of aluminum foil to create a “sling” for easy ramekin removal (optional but helpful).
Essential Pantry Staples
Keep these basics stocked for spontaneous cheesecake making:
- Vanilla Extract: Pure extract provides depth that imitation lacks
- Unsweetened Cocoa Powder: Dutch-process creates darker color and milder flavor
- Cornstarch: Optional addition (1 teaspoon) prevents cracks
- Heavy Cream: For topping or adding to filling for extra richness
- Salt: Enhances chocolate flavor and balances sweetness
Step-by-Step Baking Instructions for Mini Chocolate Cheesecake
Follow these precise steps for perfectly creamy, crack-free mini cheesecakes that rival any bakery.
Pre-Baking Prep for Mini Chocolate Cheesecake
Step 1: Verify cream cheese is truly at room temperature it should be soft enough to easily indent with your finger but not melting or greasy. This typically takes 1-2 hours out of the refrigerator. Cold cream cheese creates lumps that never fully blend.
Step 2: Prepare your ramekins or muffin cups by lightly coating with butter or cooking spray. This ensures easy removal after baking. Place them in a larger baking dish that has at least 2-inch high sides.
Step 3: Boil water in a kettle or pot. You’ll need enough to fill the outer baking pan with 1 inch of water (about 3-4 cups). Hot water is essential for the water bath.
Step 4: Clear your workspace and gather all ingredients and equipment. Have your mixer, spatula, measuring cups, and bowls within reach. Organization prevents rushed steps that introduce air bubbles.
Making the Crust for Mini Chocolate Cheesecake
Step 1 – Mix Crust Ingredients: Combine graham cracker crumbs, sugar, melted butter, and salt in a small bowl. Stir with a fork until the mixture resembles wet sand—all crumbs should be evenly moistened. If it seems dry and won’t hold together when pressed, add another 1/2 tablespoon melted butter.
Step 2 – Press Into Ramekins: Divide the crust mixture evenly between two prepared ramekins (about 2 tablespoons each). Use the bottom of a small glass or measuring cup to press the crumbs firmly into an even layer covering the bottom. Press hard—loose crust crumbles when you cut the cheesecake.
Step 3 – Pre-Bake (Optional): For extra-crispy crust, bake the crusts alone at 325°F for 5 minutes. Cool slightly before adding filling. This step is optional but creates a firmer base that doesn’t get soggy.
Preparing the Filling for Mini Chocolate Cheesecake
Step 1 – Beat Cream Cheese: Beat room-temperature cream cheese in a large bowl with an electric mixer on medium speed for 2-3 minutes until completely smooth, light, and fluffy with no lumps. Stop and scrape down the sides of the bowl twice during mixing. This step is crucial—lumpy cream cheese creates grainy cheesecake.
Step 2 – Add Sugar: Add sugar to the cream cheese and beat on medium speed for 1-2 minutes until fully incorporated and smooth. The mixture should be pale and creamy.
Step 3 – Mix in Chocolate and Cocoa: Add melted (but cooled) chocolate, cocoa powder, and salt. Beat on low speed just until combined overmixing at this stage incorporates air bubbles that cause cracks. The mixture should be uniformly dark brown.
Step 4 – Add Egg and Dairy: Add the egg, sour cream, and vanilla extract. Beat on the lowest speed just until combined, about 30 seconds. The goal is smooth incorporation without whipping air into the batter. Scrape the bowl to ensure everything is mixed.
Step 5 – Remove Air Bubbles: Tap the bowl firmly on the counter 5-10 times to release any air bubbles. Let the batter rest for 2 minutes, then gently stir once with a spatula to eliminate remaining bubbles.
Water Bath Method for Mini Chocolate Cheesecake
Step 1 – Fill Ramekins: Divide the chocolate filling evenly between the two prepared ramekins, pouring over the crust. Fill each about 3/4 full, leaving 1/4 inch of space at the top. Smooth the tops with a small offset spatula or the back of a spoon.
Step 2 – Prepare Water Bath: Place the ramekin-filled baking dish on the pulled-out oven rack. Carefully pour hot water into the outer dish until it reaches halfway up the sides of the ramekins (about 1 inch deep). Don’t splash water into the filling.
Step 3 – Bake: Carefully slide the oven rack back in and close the door gently. Bake at 325°F for 22-28 minutes. The cheesecakes are done when the edges are set but the centers still jiggle slightly when gently shaken think Jell-O that’s almost set.
Doneness Check for Mini Chocolate Cheesecake
The perfect mini cheesecake has these characteristics: edges are puffed and set (no longer liquid), the center jiggles gently when the pan is tapped (about a 2-inch diameter circle of jiggle), and the surface looks matte rather than shiny/wet. An instant-read thermometer inserted in the center should read 150-155°F—higher temperatures create dry, cracked cheesecake. The residual heat will continue cooking as they cool.
Overbaked cheesecake has completely firm centers, a puffed surface that may crack, and edges that pull away from the ramekin. If you see cracks forming, remove immediately.
Cooling for Mini Chocolate Cheesecake
Step 1 – Cool in Water Bath: Turn off the oven and crack the door open about 2 inches. Let the cheesecakes sit in the cooling water bath for 15 minutes. This gentle temperature transition prevents thermal shock that causes cracks.
Step 2 – Remove from Water: Carefully remove the ramekins from the water bath using tongs or thick oven mitts. Place them on a wire rack to cool to room temperature, about 1 hour.
Step 3 – Refrigerate: Once completely cool, cover each ramekin tightly with plastic wrap and refrigerate for at least 4 hours or overnight. Cheesecake needs this chilling time to fully set and develop flavor. They’ll be soft and fragile if you try to serve them warm.
Step 4 – Serve: To serve in the ramekins, simply add toppings and serve with a spoon. To remove from ramekins, run a thin knife around the edge, place a plate on top, invert, and tap gently. The cheesecake should slide out. If it sticks, dip the bottom of the ramekin in hot water for 10 seconds and try again.
Pro Tips for Perfect Mini Chocolate Cheesecake
These expert techniques ensure your cheesecakes turn out bakery-perfect every time.
Avoiding Cracks and Dry Texture for Mini Chocolate Cheesecake
Temperature is Everything: Room temperature ingredients are essential. Cold cream cheese, eggs, or sour cream create lumps and uneven texture. Plan ahead and leave ingredients out for 1-2 hours before mixing.
Don’t Overmix: Once you add the egg, mix on the lowest speed just until combined. Overmixing incorporates air that expands during baking and causes cracks as it escapes.
Water Bath is Non-Negotiable: The steam from the water bath creates a moist environment that prevents the surface from drying out and cracking. Never skip this step.
Low and Slow: Baking at 325°F rather than 350°F or higher allows the cheesecake to cook gently and evenly. High heat causes edges to overcook while centers remain raw.
Don’t Overbake: Remove the cheesecakes when the centers still jiggle. They continue cooking as they cool. Overbaked cheesecake is dry, dense, and prone to cracking.
Cool Gradually: Sudden temperature changes cause cracks. Let cheesecakes cool in the turned-off oven with the door cracked, then at room temperature, before refrigerating.
Tool Recommendations for Mini Chocolate Cheesecake
- 4-Ounce Ramekins: Perfect size for individual servings. Ceramic ramekins distribute heat evenly.
- Electric Mixer: Stand mixer or hand mixer ensures smooth, lump-free filling. A whisk by hand works but requires more effort.
- Instant-Read Thermometer: Takes the guesswork out of doneness. Aim for 150-155°F in the center.
- Silicone Spatula: Essential for scraping bowls and folding without overmixing.
- Roasting Pan or Large Baking Dish: Holds the water bath. Must be large enough for ramekins with space between them.
- Fine Mesh Strainer: Optional but helpful for sifting cocoa powder to prevent lumps.
Storage & Reheating for Mini Chocolate Cheesecake
Refrigeration: Cover cooled cheesecakes tightly with plastic wrap and refrigerate for up to 5 days. The flavor actually improves on day 2-3 as it melds.
Freezing: Freeze completely cooled cheesecakes (without toppings) wrapped tightly in plastic wrap, then aluminum foil, for up to 2 months. Thaw overnight in the refrigerator before serving.
Serving Temperature: Cheesecake tastes best slightly chilled but not ice-cold. Remove from the refrigerator 15-20 minutes before serving to take the chill off.
Don’t Reheat: Cheesecake is meant to be served cold or at room temperature. Never microwave or reheat—it will break the custard structure and create a watery mess.
Flavor Variations for Mini Chocolate Cheesecake
Transform this basic chocolate recipe into endless variations that cater to different preferences and occasions.
Classic Variations for Mini Chocolate Cheesecake
Triple Chocolate: Add 2 tablespoons mini chocolate chips to the filling and top with chocolate ganache (2 oz chocolate melted with 3 tablespoons heavy cream). Garnish with more mini chips.
Chocolate Peanut Butter Swirl: Add 2 tablespoons peanut butter to half the filling, leaving the other half plain chocolate. Swirl together with a knife before baking for a marbled effect.
Mocha: Add 1 tablespoon instant espresso powder to the chocolate filling for coffee-enhanced chocolate flavor that appeals to coffee lovers.
Gourmet Twists for Mini Chocolate Cheesecake
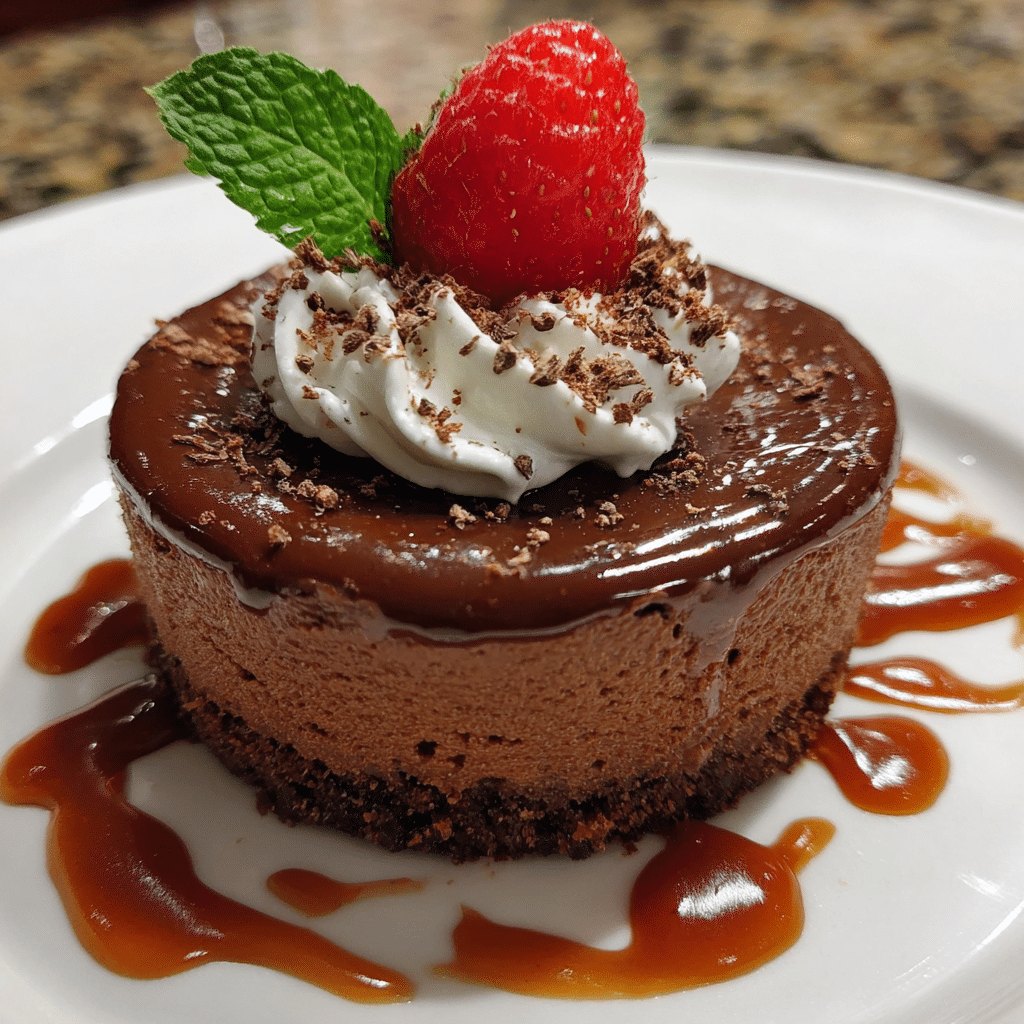
Salted Caramel Chocolate: Drizzle baked and cooled cheesecakes with salted caramel sauce and sprinkle with flaky sea salt. The sweet-salty combination is irresistible.
Chocolate Raspberry: Add 2 tablespoons seedless raspberry jam to the filling or swirl it on top before baking. Garnish with fresh raspberries.
Mint Chocolate: Add 1/2 teaspoon peppermint extract to the filling. Top with whipped cream and crushed Andes mints for a grasshopper pie effect.
Orange Chocolate: Add 1 tablespoon orange zest and 1/2 teaspoon orange extract to the filling. Top with candied orange peel for elegant sophistication.
Dietary-Friendly Mini Chocolate Cheesecake
Gluten-Free: Use gluten-free graham crackers or almond flour crust (1/4 cup almond flour + 1 tablespoon melted butter + 1 tablespoon sugar). The filling is naturally gluten-free.
Low-Sugar/Keto: Replace sugar with erythritol or monk fruit sweetener in a 1:1 ratio. Use sugar-free chocolate chips. The texture will be slightly different but still delicious.
Dairy-Free: Use vegan cream cheese (Kite Hill or Miyoko’s), coconut cream instead of sour cream, and dairy-free chocolate. The result is surprisingly similar to traditional cheesecake.
Mini Chocolate Cheesecake Variation Comparison Table
| Variation | Key Flavor | Sweetness Level | Difficulty | Best Occasion |
|---|---|---|---|---|
| Classic Chocolate | Rich dark chocolate | Moderately sweet | Easy | Any romantic dinner |
| Triple Chocolate | Intense chocolate | Very sweet | Easy | Chocolate lovers |
| Peanut Butter Swirl | Chocolate-peanut butter | Sweet with nutty notes | Medium | Casual date night |
| Mocha | Coffee-chocolate | Moderately sweet, sophisticated | Easy | After-dinner treat |
| Salted Caramel | Sweet-salty indulgence | Very sweet with salt balance | Medium | Special celebrations |
| Chocolate Raspberry | Fruity-chocolate | Balanced sweet-tart | Easy | Valentine’s Day |
| Mint Chocolate | Cool minty chocolate | Sweet with refreshing finish | Easy | Summer desserts |
| Orange Chocolate | Citrus-chocolate | Moderately sweet, aromatic | Medium | Elegant dinners |
Serving Suggestions for Mini Chocolate Cheesecake
Present your mini cheesecakes in ways that create restaurant-quality dessert experiences at home.
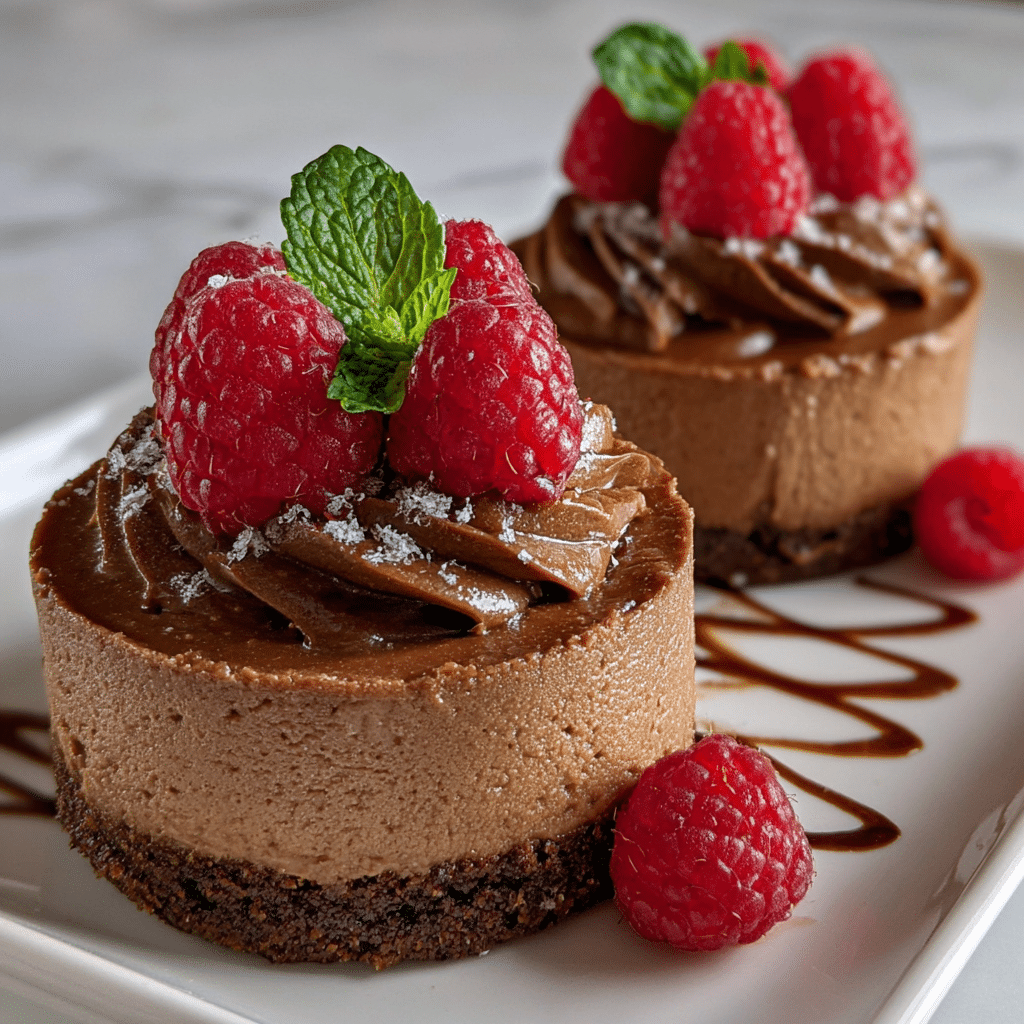
Romantic Plated Dessert: Serve each cheesecake on a white dessert plate. Drizzle with raspberry sauce in an artistic pattern, add a small quenelle of whipped cream, garnish with fresh mint, and dust the plate edge with cocoa powder. Add two fresh berries for color.
Rustic Charm: Serve directly in the ramekins topped with a generous dollop of whipped cream and chocolate shavings. Place each ramekin on a small plate with a long-handled dessert spoon.
Deconstructed Style: Remove cheesecakes from ramekins and slice each one in half. Fan the halves on a plate, add fresh berries, drizzle with chocolate sauce, and top with a mint sprig for modern presentation.
Topped Indulgence: Create a toppings bar with options like whipped cream, hot fudge, caramel sauce, fresh berries, chopped nuts, and chocolate shavings. Let each person customize their cheesecake.
Side Pairings:
- Fresh berries (strawberries, raspberries, blackberries)
- Whipped cream (lightly sweetened with vanilla)
- Caramel or chocolate sauce for drizzling
- Candied nuts (pecans or almonds)
- Fresh mint leaves for color and aroma
- Chocolate curls or shavings
- Berry compote (cooked berries with sugar)
Beverage Pairings:
- Espresso or strong coffee (the bitterness balances chocolate richness)
- Dessert tea (Earl Grey, chocolate mint, or berry blends)
- Champagne or sparkling cider for celebrations
- Port or dessert sherry for sophisticated pairings
- Hot chocolate for double chocolate indulgence
- Milk (classic comfort pairing)
FAQs About Mini Chocolate Cheesecake
Can I make these Mini Chocolate Cheesecakes without a water bath?
You can, but the results won’t be as good. Without the water bath’s gentle, moist heat, cheesecakes are more likely to crack, have dry edges, and develop uneven texture. If you must skip it, place a pan of water on the oven’s bottom rack to create steam, and bake at 300°F for slower, gentler cooking. Expect some cracks and slightly drier texture.
Why did my Mini Chocolate Cheesecake crack?
Common causes include overmixing (which incorporates air that expands and cracks), overbaking (cooking past the jiggly-center stage), temperature shock (cooling too quickly), or skipping the water bath. To prevent cracks: mix on low speed after adding eggs, remove from oven when centers still jiggle, cool gradually, and always use a water bath.
How do I know when my Mini Chocolate Cheesecake is done?
Look for these signs: edges are set and slightly puffed, the center (about 2-inch diameter) still jiggles gently when you tap the pan, and an instant-read thermometer reads 150-155°F in the center. The surface should look matte, not shiny/wet. Remember, they continue cooking as they cool, so slight underbaking is better than overbaking.
Can I double this Mini Chocolate Cheesecake recipe?
Absolutely! The recipe doubles, triples, or quadruples easily. Make 4, 6, or 12 mini cheesecakes using the same method. Just ensure your water bath pan is large enough to hold all ramekins with space between them. Baking time remains the same since the cheesecakes are still individual portions.
Are Mini Chocolate Cheesecakes safe during pregnancy?
Yes, as long as all ingredients are pasteurized and the cheesecake is fully baked. Most commercial cream cheese, sour cream, and eggs in the US are pasteurized. Baking to 150-155°F ensures the egg is fully cooked. If you have concerns, use pasteurized eggs or ask your healthcare provider.
Can I use a muffin tin instead of ramekins for Mini Chocolate Cheesecake?
Yes! Line muffin cups with cupcake liners or grease them well. The cheesecakes will be slightly smaller and shallower than ramekins, so reduce baking time to 18-22 minutes. The cupcake liners make removal easy just peel them away before serving.
Why is my Mini Chocolate Cheesecake grainy?
Graininess comes from cold cream cheese that wasn’t fully mixed, low-fat dairy products, or overheating chocolate. Solutions: ensure cream cheese is truly room temperature (soft to touch), use full-fat products, mix thoroughly until completely smooth, and melt chocolate gently without overheating.
How far ahead can I make Mini Chocolate Cheesecake?
Make them up to 3 days in advance they actually taste better after sitting for 24-48 hours as flavors meld. Store covered in the refrigerator. Add toppings (whipped cream, sauces, fruit) just before serving to prevent sogginess. For longer storage, freeze for up to 2 months.
Conclusion
Preheat your oven and treat yourself to these decadent Mini Chocolate Cheesecakes tonight! This recipe proves that intimate desserts for two can be just as impressive as full-sized creations without the waste or temptation of leftovers. The combination of rich chocolate filling, buttery crust, and perfectly creamy texture creates a restaurant-quality dessert in your own kitchen.
Print
Mini Chocolate Cheesecake 7 Secrets to Irresistible Perfection
- Total Time: 2 hrs 30 mins (includes chilling)
- Yield: 2 mini cheesecakes 1x
- Diet: Vegetarian
Description
A rich, creamy, and perfectly portioned mini chocolate cheesecake made just for two — the perfect small-batch dessert for chocolate lovers.
Ingredients
4 oz cream cheese, softened
2 tbsp granulated sugar
1 tbsp sour cream
1/2 tsp vanilla extract
1 large egg yolk
2 oz semi-sweet chocolate, melted and slightly cooled
2 chocolate sandwich cookies, crushed (for crust)
1 tbsp melted butter
Whipped cream or chocolate shavings for topping (optional)
Instructions
1. Preheat oven to 325°F (160°C). Line a muffin tin with two cupcake liners.
2. In a small bowl, combine crushed cookies and melted butter. Press the mixture firmly into the bottom of each liner to form the crust.
3. In a medium bowl, beat cream cheese and sugar until smooth and creamy.
4. Add sour cream, vanilla, and egg yolk; mix until fully combined.
5. Stir in melted chocolate until smooth.
6. Divide the batter evenly between the two crusts.
7. Bake for 18–20 minutes or until centers are set but slightly jiggly.
8. Cool completely at room temperature, then refrigerate for at least 2 hours before serving.
9. Top with whipped cream or chocolate shavings if desired.
Notes
You can substitute the chocolate sandwich cookies with graham crackers and 1 tsp cocoa powder for a lighter crust.
For an extra indulgent touch, drizzle with warm chocolate ganache before serving.
Store leftovers (if any!) covered in the fridge for up to 3 days.
- Prep Time: 10 mins
- Cook Time: 20 mins
- Category: Dessert
- Method: Baked
- Cuisine: American
Nutrition
- Serving Size: 1 mini cheesecake
- Calories: 310
- Sugar: 18g
- Sodium: 120mg
- Fat: 22g
- Saturated Fat: 12g
- Unsaturated Fat: 9g
- Trans Fat: 0g
- Carbohydrates: 24g
- Fiber: 1g
- Protein: 5g
- Cholesterol: 105mg
Keywords: mini cheesecake, chocolate dessert, small batch cheesecake, cheesecake for two