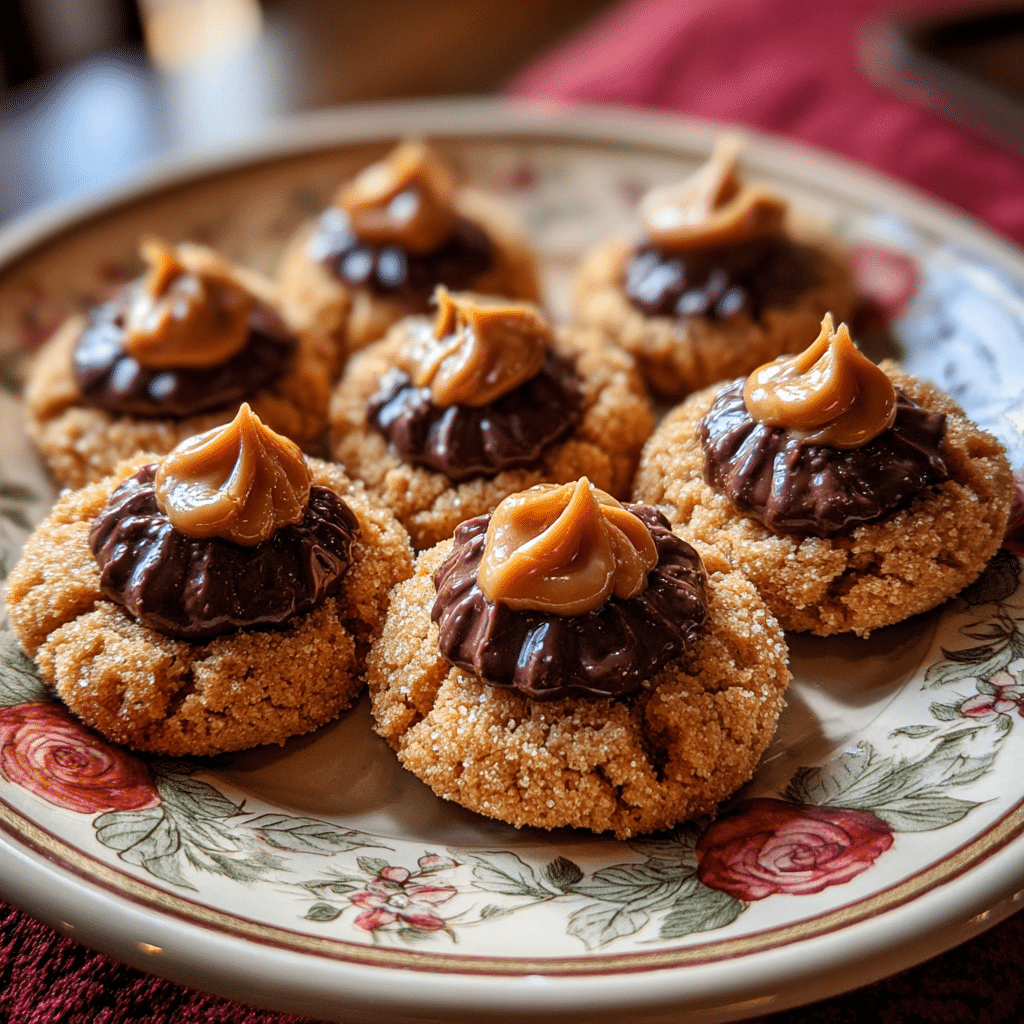
Tired of complicated cookie recipes with endless ingredient lists that take hours to prepare? Peanut Butter Blossoms simplify everything you love about classic holiday baking into just four simple ingredients delivering those iconic peanut butter cookies topped with chocolate kisses that everyone adores!
This recipe promises soft, chewy peanut butter cookies with crispy edges and that perfect chocolate center, ready in under 30 minutes from start to finish. Every bite delivers nostalgic comfort with minimal effort, making them ideal for last-minute holiday parties, cookie exchanges, or whenever a craving strikes.
Hi there! I’m Lisa, the heart and soul behind Recipesrealm, and these Peanut Butter Blossoms have become my most-requested cookie recipe. I discovered this simplified version during a particularly hectic December when I needed cookies for three different events in one week. Traditional recipes felt overwhelming with their long ingredient lists, so I experimented until I found the perfect minimalist approach. The result? Cookies so good that my neighbor’s kids now knock on my door asking if it’s “blossom baking day.” One batch turned into a weekly tradition that’s brought our whole street together!
In this comprehensive guide, you’ll discover everything needed to master these iconic cookies: ingredient selection tips, shaping techniques, the secret to that perfect texture, and answers to your most common cookie questions.
Why This Peanut Butter Blossoms Recipe Works
This Peanut Butter Blossoms recipe succeeds by stripping away unnecessary complications while preserving everything that makes these cookies special. It’s designed for convenience, maximum peanut butter flavor, and foolproof results every single time.
Here’s what makes it exceptional:
- Uses just 4 simple ingredients that you likely already have in your pantry
- Ready in only 25 minutes from mixing bowl to cooling rack
- No chilling required so you can bake immediately when the craving hits
- Makes 24 perfect cookies ideal for sharing or gifting
- Kid-friendly recipe that’s simple enough for young bakers to help
- Naturally gluten-free when using certified gluten-free ingredients
The secret lies in using prepared peanut butter cookie dough or a strategic combination of peanut butter, sugar, egg, and vanilla that creates the perfect texture without butter, flour, or complex measurements. The science works because peanut butter provides both fat and protein structure, while sugar ensures proper spread and caramelization.
Choosing the Right Ingredients for Peanut Butter Blossoms
Not all ingredients are created equal for these simple cookies. Your choices directly impact texture, flavor, and how well the chocolate kiss stays centered during baking.
Best Peanut Butter for This Recipe
Creamy conventional peanut butter is my top recommendation for Peanut Butter Blossoms. Brands like Jif, Skippy, or Peter Pan work perfectly because they contain added sugar and stabilizers that help cookies hold their shape. The slightly sweet flavor complements the chocolate kisses beautifully.
Natural peanut butter can work but requires adjustments. Natural varieties separate and contain only peanuts and salt, making cookies spread more and have grainier texture. If using natural peanut butter, stir it thoroughly and refrigerate the dough for 30 minutes before baking. You may also need to add 2-3 tablespoons of flour to prevent excessive spreading.
Avoid chunky peanut butter the peanut pieces disrupt the smooth texture and can cause cookies to crack unpredictably. Save chunky varieties for sandwiches and stick with creamy for baking.
Buying Tips for Peanut Butter Blossoms Ingredients
Purchase full-size Hershey’s Kisses rather than miniatures the classic size provides the perfect chocolate-to-cookie ratio and makes a more impressive presentation. Buy an extra bag because a few will mysteriously disappear during baking (quality control is important)!
For eggs, room temperature works best. Cold eggs don’t incorporate as smoothly into peanut butter, potentially creating lumpy dough. Set eggs on the counter 30 minutes before baking, or place them in warm water for 5 minutes.
Choose granulated white sugar over brown sugar for this recipe. White sugar creates the characteristic crackled surface and crispy edges, while brown sugar would make cookies too soft and cake-like.
Substitutions for Peanut Butter Blossoms
Almond butter creates a delicious variation with slightly sweeter, more delicate flavor—follow the same recipe exactly. Sunflower seed butter works for nut-free versions (cookies will have a slightly greenish tint from natural reactions with baking soda, but taste remains delicious). Cashew butter produces ultra-soft, almost melt-in-your-mouth cookies.
For chocolate topping alternatives, try Rolo candies for caramel-chocolate centers, Reese’s Miniatures for double peanut butter impact, or dark chocolate kisses for less-sweet sophistication. Chocolate stars or squares work if kisses aren’t available just press them in gently while cookies are still hot.
Ingredients & Prep for Peanut Butter Blossoms
Success with Peanut Butter Blossoms starts with proper ingredient prep and understanding the simple science behind this minimalist recipe.
Cookie Dough Prep Essentials
Temperature matters tremendously. Bring your egg to room temperature cold eggs create lumpy dough that doesn’t mix smoothly. Peanut butter should be at room temperature too, making it easier to stir and creating more uniform dough consistency.
Measure peanut butter correctly by packing it firmly into measuring cups, then leveling off with a knife. Too little peanut butter creates dry, crumbly cookies. Too much makes them spread excessively and turn greasy. Precision with this key ingredient ensures consistent results.
Peanut Butter Blossoms Ingredients
For the cookies:
- 1 cup creamy peanut butter (conventionally processed, not natural)
- 1 cup granulated white sugar, plus 1/4 cup for rolling
- 1 large egg, room temperature
- 1 teaspoon pure vanilla extract
For topping:
- 24 Hershey’s Kisses, unwrapped
Optional enhancements:
- 1/4 teaspoon salt (if using unsalted peanut butter)
- 1/2 teaspoon baking soda (for extra lift and chewiness makes 4.5 ingredients technically)
Pantry Staples
Beyond the main ingredients, keep parchment paper or silicone baking mats on hand they prevent sticking and ensure even baking. A small bowl of water for dipping your fork creates cleaner crisscross patterns. Quality vanilla extract (not imitation) makes a noticeable flavor difference in such a simple recipe.
Unwrap all Hershey’s Kisses before you start baking. Trying to unwrap them while cookies are cooling means you’ll miss the critical window for pressing them in while cookies are still soft enough to accommodate them.
Step-by-Step Cooking Instructions for Peanut Butter Blossoms

Follow these detailed steps to achieve perfect Peanut Butter Blossoms every single time. This is one of the most beginner-friendly cookie recipes you’ll ever make.
Pre-Cooking Prep for Peanut Butter Blossoms
Step 1: Preheat your oven to 350°F (175°C). Position racks in the upper and lower thirds of your oven for even baking if making multiple batches.
Step 2: Line two large baking sheets with parchment paper or silicone baking mats. Ungreased pans work too, but cookies may stick slightly.
Step 3: Unwrap all 24 Hershey’s Kisses and set them aside. This seems tedious but saves precious time later when you need to work quickly with hot cookies.
Step 4: Prepare your rolling sugar by placing 1/4 cup granulated sugar in a small, shallow bowl. Set aside.
Mixing Method for Peanut Butter Blossoms
Step 5: In a large mixing bowl, combine 1 cup peanut butter and 1 cup sugar. Using a sturdy wooden spoon or spatula, stir vigorously for 1-2 minutes until completely combined and slightly fluffy. The mixture should lighten slightly in color as you incorporate air.
Step 6: Add the room temperature egg and vanilla extract to the peanut butter mixture. Stir energetically for another 1-2 minutes until the dough becomes smooth, glossy, and uniform. You shouldn’t see any streaks of egg everything should be thoroughly incorporated. The dough will be thick and slightly sticky.
Step 7: Test the dough consistency by rolling a small amount between your palms. It should hold together without crumbling but feel slightly tacky. If it’s too sticky to handle, refrigerate for 10 minutes. If it’s dry and crumbly, add 1 teaspoon of water and mix again.
Shaping and Baking Peanut Butter Blossoms
Step 8: Scoop dough using a tablespoon or small cookie scoop (about 1 tablespoon of dough per cookie). Roll each portion between your palms to form smooth balls approximately 1 inch in diameter. Uniform size ensures even baking.
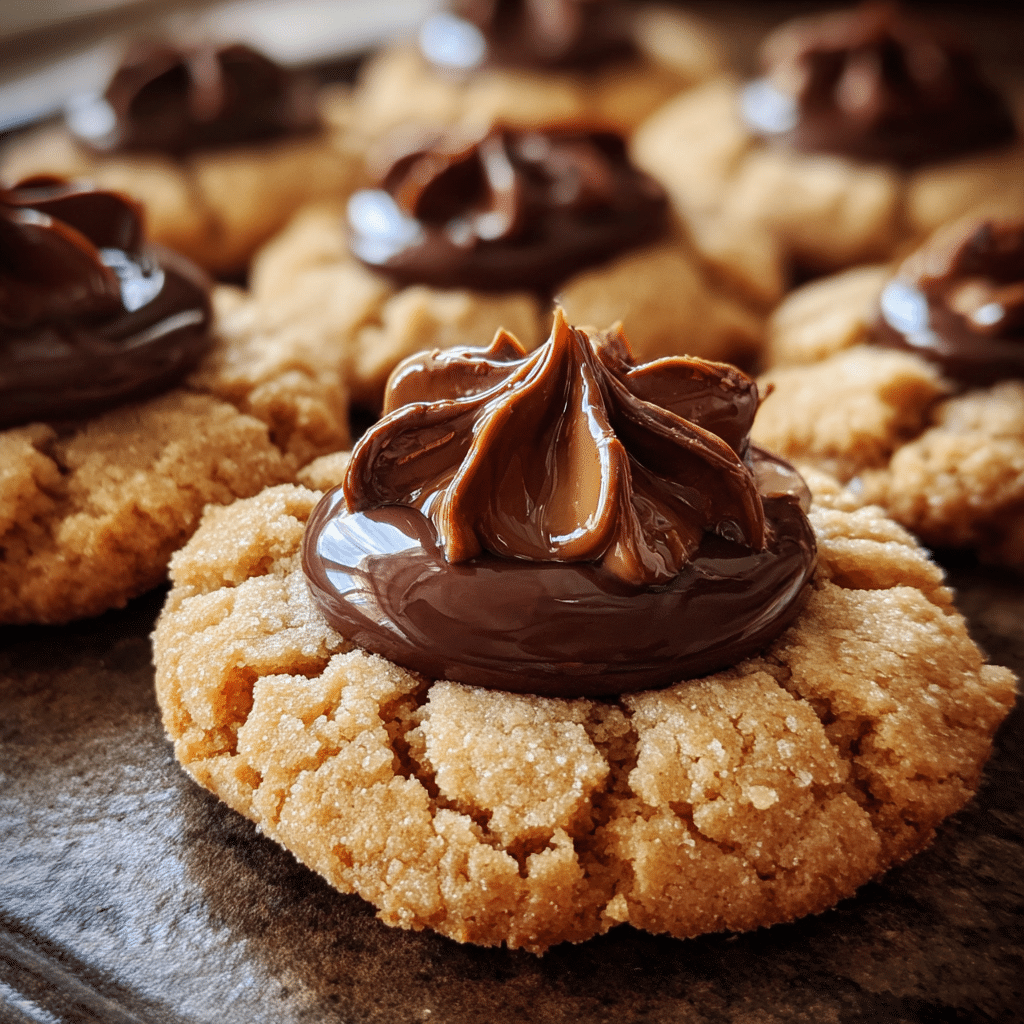
Step 9: Roll each dough ball in the reserved granulated sugar, coating completely. The sugar creates that signature sparkly, crackled exterior.
Step 10: Place sugared dough balls on prepared baking sheets, spacing them 2 inches apart (they spread slightly during baking). You should fit about 12 cookies per standard sheet.
Step 11: Using a fork, create a crisscross pattern on each cookie by pressing down gently in one direction, then rotating 90 degrees and pressing again. Dip the fork in water between cookies to prevent sticking. Press until cookies are about 1/2 inch thick don’t flatten them completely, or they’ll bake too crispy.
Step 12: Bake for 10-12 minutes until edges are set and just beginning to turn golden. Centers will look slightly underdone this is correct. Cookies continue cooking on hot pan after removal from oven.
Finishing Your Peanut Butter Blossoms
Step 13: Remove cookies from oven. Immediately (within 30 seconds) press one Hershey’s Kiss firmly into the center of each cookie, pushing down until the bottom of the kiss reaches the cookie surface. The chocolate will soften slightly but shouldn’t melt completely.
Step 14: Let cookies cool on the baking sheet for 5 minutes. During this time, the chocolate kiss sets and cookies firm up enough to transfer without breaking.
Step 15: Using a thin spatula, carefully transfer cookies to a wire cooling rack. Cool completely before storing about 30 minutes. The chocolate kiss needs to solidify fully, and cookies finish setting during this time.
Cooling and Storing Peanut Butter Blossoms
Step 16: Once completely cool, store Peanut Butter Blossoms in an airtight container at room temperature. Place parchment paper between layers to prevent kisses from sticking to cookies above them.
Step 17: These cookies taste best within 3-4 days but remain delicious for up to one week when properly stored. The texture changes slightly over time—edges soften while centers firm up, creating uniform chewiness throughout.
Pro Tips for Perfect Peanut Butter Blossoms
Master these expert techniques to elevate your Peanut Butter Blossoms from good to absolutely irresistible every single time.
Avoiding Flat or Crumbly Cookies with Your Peanut Butter Blossoms
Don’t overbake. Cookies should look slightly underdone when you remove them from the oven. They continue baking on the hot pan and firm up during cooling. Overbaked peanut butter cookies become rock-hard and lose their characteristic chewiness. Set a timer and check at 10 minutes you can always add 1-2 more minutes if needed.
Press kisses immediately. You have only about 30 seconds after removing cookies from the oven when they’re soft enough to accept the kiss but firm enough not to completely collapse. Work quickly, pressing one kiss per cookie across the entire pan. If cookies cool too much, return the pan to the warm oven for 30 seconds to soften.
Don’t skip the fork pattern. Beyond decoration, pressing with a fork flattens cookies to optimal thickness for even baking. Without this step, cookies remain too thick in the center and bake unevenly burnt edges with raw middles.
Tool Recommendations for Peanut Butter Blossoms Success
A cookie scoop (1-tablespoon size) ensures uniform cookies that bake evenly. Eyeballing measurements creates size variations that result in some burnt cookies and others undercooked. A $8 cookie scoop is one of the best baking investments you can make.
Parchment paper or silicone mats prevent sticking and promote even browning. They’re reusable (parchment for several batches, silicone indefinitely), making them economical and eco-friendly. Cookies slide off effortlessly without spatula wrestling.
A wire cooling rack allows air circulation underneath cookies, preventing soggy bottoms. Cooling cookies on the pan or plate traps steam, creating unpleasant texture. Wire racks cost under $10 and work for countless recipes beyond cookies.
Storage & Gifting Your Peanut Butter Blossoms
Room temperature storage: Place completely cooled cookies in an airtight container with parchment between layers. Store at room temperature for up to 1 week. Add a slice of bread to the container it keeps cookies soft by releasing moisture slowly (replace bread every 2 days).
Freezer storage: Freeze baked, cooled cookies in freezer bags or containers for up to 3 months. Separate layers with parchment paper. Thaw at room temperature for 20-30 minutes before serving. The chocolate may develop slight “bloom” (white coating) but this doesn’t affect taste.
Freeze dough option: Roll dough balls, coat in sugar, and freeze on a baking sheet until solid. Transfer to freezer bags. Bake directly from frozen, adding 2-3 extra minutes to baking time. Press kisses in immediately after baking as usual.
Gift presentation: Arrange cookies in clear cellophane bags tied with festive ribbon, or pack into decorative tins with tissue paper between layers. Include a small tag with storage instructions. These make perfect teacher gifts, neighbor treats, or cookie exchange contributions.
Flavor Variations for Peanut Butter Blossoms
Transform your Peanut Butter Blossoms into entirely new treats with these creative twists. Each variation maintains the simple four-ingredient base while delivering unique flavor profiles.
Chocolate Peanut Butter Blossoms
Add 3 tablespoons of unsweetened cocoa powder to the basic dough, mixing it with the peanut butter and sugar. Reduce peanut butter to 7/8 cup (just 2 tablespoons less) to compensate for the cocoa. Roll in granulated sugar as usual, or use chocolate sugar crystals for extra chocolate impact. Top with regular kisses or white chocolate kisses for beautiful contrast. These taste like peanut butter cups in cookie form!
Cinnamon-Spice Peanut Butter Blossoms
Mix 1 teaspoon ground cinnamon and 1/4 teaspoon nutmeg into the rolling sugar. This creates a snickerdoodle-meets-peanut-butter cookie that’s perfect for fall. Top with caramel-filled Hershey’s Kisses for extra decadence. The warm spices complement peanut butter’s richness beautifully without overwhelming it.
Almond Joy Peanut Butter Blossoms
Replace peanut butter with almond butter (same measurements). Add 1/2 cup sweetened shredded coconut to the dough, mixing thoroughly. Roll in granulated sugar and top with dark chocolate Hershey’s Kisses. These taste remarkably similar to Almond Joy candy bars a sophisticated twist on the classic.
Peanut Butter & Jelly Blossoms
Prepare cookies as directed, but instead of pressing a chocolate kiss into the center, use your thumb to create a deep indentation immediately after baking. Let cookies cool for 2 minutes, then fill each indentation with 1/4 teaspoon of your favorite jam or jelly. Strawberry, grape, and raspberry all work beautifully. This childhood favorite combination never gets old!
| Variation | Key Modifications | Best For | Difficulty |
|---|---|---|---|
| Chocolate PB | Add 3 tbsp cocoa, reduce PB slightly | Chocolate lovers, parties | Easy |
| Cinnamon-Spice | Mix cinnamon & nutmeg in rolling sugar | Fall/winter holidays | Easy |
| Almond Joy | Use almond butter, add coconut | Sophisticated gatherings | Easy |
| PB&J | Skip kiss, fill with jam after baking | Kids’ parties, lunchboxes | Easy |
| Salted Caramel | Top with salted caramel kisses, sprinkle sea salt | Gift giving, adult parties | Easy |
| S’mores | Add mini chocolate chips to dough, top with marshmallow | Summer gatherings, camping | Medium |
Serving Suggestions for Peanut Butter Blossoms
These Peanut Butter Blossoms shine at any occasion, from casual family nights to elegant holiday parties. Their nostalgic appeal makes them universally beloved.
Perfect occasion pairings: These cookies are iconic at Christmas cookie exchanges, but don’t limit them to December. They’re perfect for Valentine’s Day (use chocolate kisses with colored foil), birthday parties, bake sales, teacher appreciation gifts, or simple weeknight desserts. Pack them in school lunches they travel well without crumbling.
Beverage pairings: The rich peanut butter and sweet chocolate pair beautifully with cold milk—it’s the classic combination for good reason. For adults, try them with coffee (the slight bitterness balances sweetness), hot chocolate, or even a creamy chai latte. The spices in chai complement peanut butter surprisingly well.
Dessert board additions: Include Peanut Butter Blossoms on dessert charcuterie boards alongside brownies, chocolate covered strawberries, and other bite-sized treats. Their distinctive shape and chocolate topper add visual interest. They pair well with vanilla ice cream or chocolate mousse for plated desserts.
Presentation ideas: Stack cookies on a tiered serving platter for impressive height. Arrange them in a circular pattern on a large plate with the kisses creating a spiral design. For gifts, pack 6-8 cookies in clear bags tied with ribbons matching the kiss foil colors. Create a “cookie bouquet” by attaching cookies to wooden skewers (carefully) and arranging in a vase.
Serving temperature: These cookies taste delicious at room temperature (classic), slightly warm (microwave for 8-10 seconds to soften the chocolate slightly), or even chilled from the refrigerator (creates a firmer, almost candy-like texture). Experiment to find your preferred serving style!
FAQs About Peanut Butter Blossoms
Can I make Peanut Butter Blossoms without eggs?
Yes! Replace the egg with 1 tablespoon of ground flaxseed mixed with 3 tablespoons of water (let sit for 5 minutes to thicken) for vegan cookies. Alternatively, use 1/4 cup of unsweetened applesauce, though cookies will be slightly softer and cake-like. Commercial egg replacers also work following package directions for one egg.
Why do my Peanut Butter Blossoms spread too much?
Excessive spreading typically means your dough is too warm or you used natural peanut butter. Chill the dough for 20-30 minutes before baking. Ensure you’re using conventional peanut butter (Jif, Skippy) rather than natural varieties. Also check that you measured peanut butter correctly too much creates oily, flat cookies. Using a properly calibrated oven (check with an oven thermometer) prevents low-temperature spreading too.
Can I use chocolate chips instead of Hershey’s Kisses for Peanut Butter Blossoms?
While kisses are traditional and create the signature appearance, chocolate chips work in a pinch. Press 3-4 chocolate chips into each cookie’s center immediately after baking, arranging them in a flower pattern. The visual impact won’t be quite as dramatic, but flavor remains delicious. Chocolate squares (broken from bars) or chocolate stars also substitute nicely.
How do I prevent the chocolate kiss from sliding off my Peanut Butter Blossoms?
Press the kiss into the cookie within 30 seconds of removing the pan from the oven—this is the critical window when cookies are soft enough to accept the kiss but firm enough to support it. Press down firmly and hold for 2-3 seconds. If kisses still slide, your cookies may be overbaked (too hard) or you waited too long (cookies cooled and hardened). The chocolate bottom should sink slightly into the cookie.
Are Peanut Butter Blossoms gluten-free?
Yes! This recipe naturally contains no flour, making it gluten-free when you verify that your peanut butter, vanilla extract, and chocolate kisses are certified gluten-free. Most major brands are naturally gluten-free, but always check labels as manufacturing processes vary. This makes these cookies perfect for friends and family with celiac disease or gluten sensitivity.
Can I make Peanut Butter Blossoms ahead of time?
Absolutely! Baked cookies store well in airtight containers for up to one week. Alternatively, freeze baked cookies for up to 3 months. For ultimate freshness, freeze unbaked dough balls (sugar-coated) on a baking sheet, then transfer to freezer bags. Bake directly from frozen, adding 2-3 minutes to baking time, and press kisses in as usual. This lets you enjoy fresh-baked cookies anytime!
Why are my Peanut Butter Blossoms dry and crumbly?
Dry cookies usually result from overbaking or too little peanut butter. Remember, cookies should look slightly underdone when removed from the oven—they firm up during cooling. Also ensure you’re measuring peanut butter correctly by packing it firmly into measuring cups. Using natural peanut butter (which separates and has less oil incorporated) can also create drier cookies. Add a tablespoon of honey to the dough if yours seems too dry before baking.
What’s the best way to transport Peanut Butter Blossoms without damaging them?
Use a rigid container with a tight-fitting lid avoid flimsy plastic containers that flex and allow cookies to shift. Place parchment paper between layers and fill any empty space with crumpled parchment to prevent sliding. Keep the container level during transport. These cookies are actually quite sturdy compared to delicate cookies, but the chocolate kiss can break off if jostled too much. For maximum protection, transport them in a cooler bag during hot weather to prevent chocolate melting.
Conclusion
Preheat your oven and whip up a batch of these Peanut Butter Blossoms tonight! With just four ingredients and 25 minutes, you’ll have warm, nostalgic cookies that taste like childhood memories and holiday magic combined. The simplicity is what makes them special no complicated techniques or hard-to-find ingredients, just pure peanut butter and chocolate perfection.
Print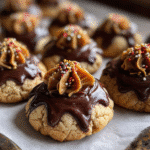
Peanut Butter Blossoms 4 Ingredients For Perfect Nostalgic Cookies Every Time
- Total Time: 25
- Yield: 24 1x
Description
These 4-Ingredient Peanut Butter Blossoms are the ultimate easy cookie recipe! Soft, chewy peanut butter cookies topped with iconic chocolate Hershey’s Kisses create nostalgic magic in just 25 minutes. No flour needed, naturally gluten-free, and perfect for holidays, cookie exchanges, or anytime you crave classic peanut butter and chocolate perfection. Simple enough for kids to help make!
Ingredients
1 cup creamy peanut butter (conventional style like Jif or Skippy)
1 cup granulated white sugar
1 large egg, room temperature
1 teaspoon pure vanilla extract
1/4 cup granulated sugar for rolling
24 Hershey’s Kisses, unwrapped
Instructions
1. Preheat oven to 350°F (175°C). Line two baking sheets with parchment paper.
2. Unwrap all 24 Hershey’s Kisses and set aside. Place 1/4 cup sugar in a small bowl for rolling.
3. In a large bowl, combine 1 cup peanut butter and 1 cup sugar. Stir vigorously for 1-2 minutes until fluffy and lightened in color.
4. Add egg and vanilla extract. Stir energetically for 1-2 minutes until dough is smooth, glossy, and completely uniform with no egg streaks visible.
5. Scoop dough using a tablespoon (about 1 tablespoon per cookie). Roll each portion between palms to form smooth 1-inch balls.
6. Roll each dough ball in the reserved sugar, coating completely.
7. Place sugared balls on prepared baking sheets, spacing 2 inches apart (about 12 per sheet).
8. Using a fork dipped in water, create a crisscross pattern by pressing down in one direction, rotating 90 degrees, and pressing again. Flatten to about 1/2 inch thick.
9. Bake for 10-12 minutes until edges are set and just beginning to turn golden. Centers will look slightly underdone.
10. Remove from oven. Immediately (within 30 seconds) press one Hershey’s Kiss firmly into the center of each cookie until the bottom reaches the cookie surface.
11. Let cookies cool on baking sheet for 5 minutes to firm up.
12. Using a thin spatula, transfer to wire cooling rack. Cool completely, about 30 minutes, before storing.
Notes
Use conventional peanut butter (Jif, Skippy) rather than natural varieties for best results. Natural peanut butter requires refrigerating dough for 30 minutes and may need 2-3 tablespoons of added flour.
Room temperature egg is crucial—cold eggs create lumpy dough. Set eggs out 30 minutes before baking or warm in a bowl of warm water for 5 minutes.
Don’t overbake—cookies should look slightly underdone when removed. They continue cooking on the hot pan.
Press chocolate kisses immediately after removing from oven while cookies are still soft enough to accept them.
Storage: Keep in airtight container at room temperature for up to 1 week. Place parchment between layers.
Freezing: Freeze baked cookies for up to 3 months, or freeze unbaked sugar-coated dough balls and bake directly from frozen (add 2-3 minutes to baking time).
Variations: Add 3 tablespoons cocoa for chocolate version, mix cinnamon in rolling sugar, or use almond butter for different flavor.
This recipe is naturally gluten-free when using certified gluten-free ingredients.
- Prep Time: 15
- Cook Time: 10
- Category: Dessert, Cookies
- Method: Baking
- Cuisine: American
Nutrition
- Serving Size: 1 cookie
- Calories: 110
- Sugar: 11g
- Sodium: 65mg
- Fat: 6g
- Saturated Fat: 2g
- Unsaturated Fat: 3.5g
- Trans Fat: 0g
- Carbohydrates: 13g
- Fiber: 1g
- Protein: 3g
- Cholesterol: 8mg
Keywords: peanut butter blossoms, 4 ingredient cookies, hershey kiss cookies, easy peanut butter cookies, gluten free cookies, holiday cookies, christmas cookies