
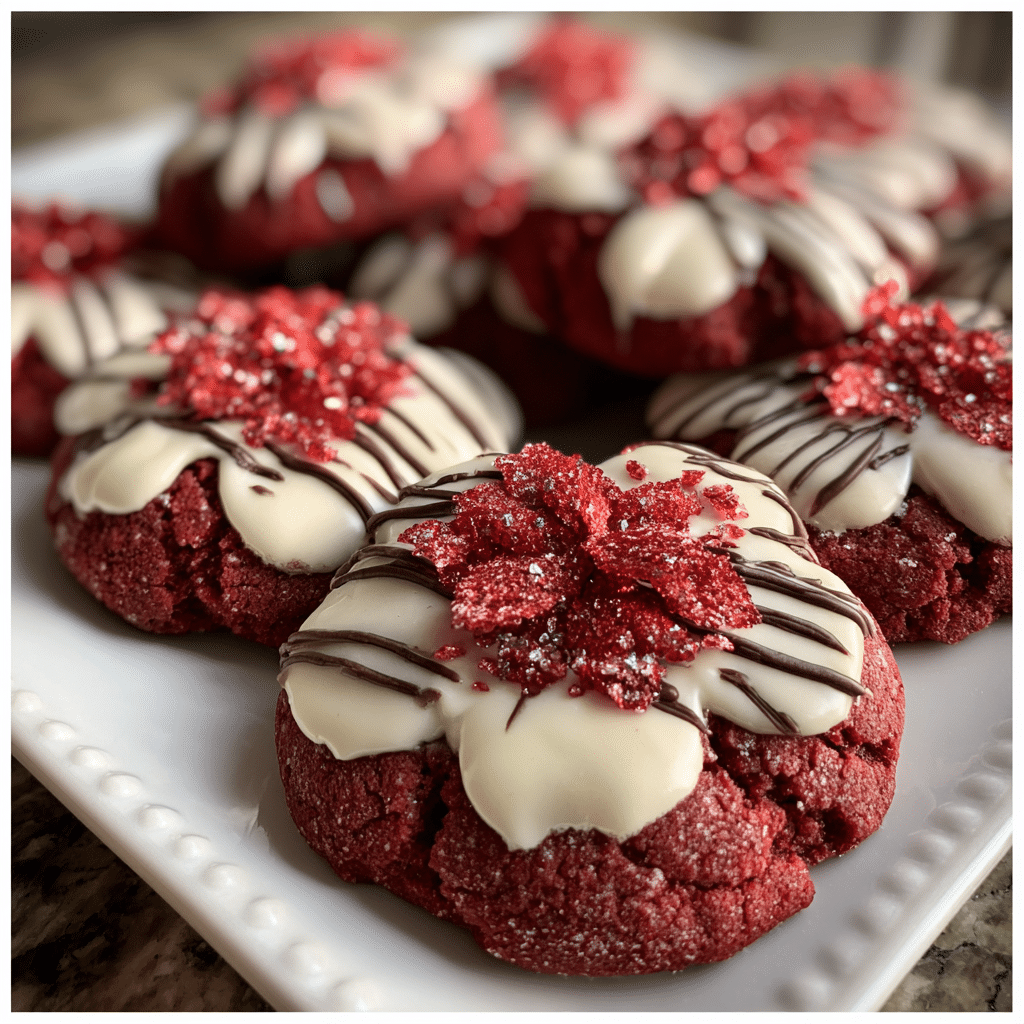
Hershey’s Red Velvet Blossoms Cookies are the perfect holiday treat that combines classic red velvet flavor with the iconic chocolate Kiss topper everyone loves. Tired of complicated cookie recipes that require obscure ingredients, multiple mixing bowls, and hours of your precious time? Or frustrated by red velvet desserts that taste artificial, turn out dry, or don’t have that signature tangy flavor?
These stunning cookies deliver bakery-quality results with minimal effort soft, chewy red velvet cookies rolled in sparkling sugar and crowned with a chocolate Kiss that melts slightly into the warm cookie. I’m Simon, and I’ll never forget the December afternoon when Megan Carter, my brilliant pastry expert, walked into our kitchen with the first batch of these beauties. The vibrant red color, the way the Kiss nestled perfectly into each cookie, and that first bite combining chocolate with tangy red velvet we knew immediately this recipe was special.
What makes Hershey’s Red Velvet Blossoms Cookies so irresistible isn’t just their eye-catching appearance or delicious flavor it’s how achievable they are for home bakers of any skill level. Using a cake mix shortcut (yes, really!) combined with a few key ingredients creates authentic red velvet taste without starting from scratch. The result is cookies that look impressive, taste amazing, and come together faster than you’d ever imagine.
In this comprehensive guide, I’ll share everything you need to know: selecting the right cake mix and chocolate Kisses, mastering the perfect cookie texture, achieving that gorgeous crackled sugar coating, troubleshooting common issues, creative flavor variations, and serving ideas that will make these your go-to recipe for every celebration. Whether you’re baking for Christmas cookie exchanges, Valentine’s Day, birthdays, or simply because Tuesday needs something special, these Hershey’s Red Velvet Blossoms Cookies will become your signature treat.
Why This Hershey’s Red Velvet Blossoms Cookies Recipe Works
These cookies have become a viral sensation on social media and at bake sales for excellent reasons. Here’s what makes Hershey’s Red Velvet Blossoms Cookies so consistently successful:
- Cake mix shortcut delivers authentic flavor: Using red velvet cake mix as the base provides that signature tangy, cocoa-tinged flavor without measuring a dozen ingredients or hunting for buttermilk
- Foolproof texture every time: The cake mix formula is scientifically developed for consistent results, eliminating the guesswork and ensuring soft, chewy cookies batch after batch
- Stunning visual impact with minimal effort: The vibrant red color and sparkling white sugar coating create professional bakery appearance that impresses everyone
- Ready in under 30 minutes: From mixing to pulling cookies from the oven takes less than half an hour—perfect for last-minute baking or busy holiday schedules
- Uses everyday ingredients: Eggs, oil, cake mix, and Hershey’s Kisses likely already in your pantry. No specialty extracts or hard-to-find items required
- Perfect for beginners: If you can crack an egg and stir, you can make these cookies. The simple technique builds confidence for novice bakers
- Endless customization potential: The base recipe adapts beautifully to different Kiss flavors, colored sugars, and creative variations for any occasion
- Make-ahead and freezer-friendly: Dough keeps refrigerated for three days or frozen for three months, making holiday prep stress-free and manageable
Choosing the Right Ingredients for Hershey’s Red Velvet Blossoms Cookies
The quality and type of ingredients you select directly impact the success of your Hershey’s Red Velvet Blossoms Cookies. Let’s break down what works best and why.
Best Cake Mix for This Recipe
Red velvet cake mix is the foundation, but not all mixes perform equally:
Duncan Hines Red Velvet Cake Mix is my top choice and what we use most often in our kitchen. It has the richest red color, the most authentic cocoa chocolate balance, and creates perfectly soft cookies. The 15.25-ounce box is the standard size for this recipe.
Betty Crocker Red Velvet Cake Mix runs a close second with slightly sweeter flavor and good color. The cookies turn out wonderfully, though the red is a touch less vibrant than Duncan Hines.
Store brands vary in quality. Some work perfectly while others have artificial flavor or pale color. Read reviews or ask your local baking group for recommendations on specific store brands in your area.
What to avoid: “Super moist” or “pudding in the mix” varieties alter the cookie texture, making them cakey rather than chewy. Stick with standard cake mix formulations.
Size matters: Most cake mixes come in 15.25-16.5 ounce boxes. This recipe is designed for standard 15.25-ounce boxes. If using larger boxes, the proportions still work but you may get 2-3 extra cookies.
Selecting Perfect Chocolate Kisses
Hershey’s Milk Chocolate Kisses are the classic choice and what gives these cookies their iconic look:
Quantity needed: One 10-12 ounce bag contains approximately 60-70 Kisses, enough for this recipe which makes about 48 cookies. Buy two bags to have extras some always break, and you’ll want to taste-test.
Freshness check: Chocolate Kisses can develop white bloom or taste stale if old. Check for smooth, glossy surfaces. Avoid packages with visible chocolate bloom (white coating) or that feel soft when squeezed.
Unwrapping strategy: This is tedious but necessary. Unwrap all Kisses before baking and keep them in a bowl nearby. Trying to unwrap while cookies are hot leads to burnt fingers and misshapen cookies.
Storage: Keep unwrapped Kisses in a cool, dry place. Summer heat can soften them, making them harder to handle. Refrigerate in hot weather, but bring to room temperature before using.
Kiss Flavor Variations for Hershey’s Red Velvet Blossoms Cookies
While classic milk chocolate is traditional, these alternatives create exciting variations:
- Hershey’s Hugs (white chocolate with milk chocolate stripes): Creates beautiful contrast against red cookies and adds sweet, creamy flavor
- Dark chocolate Kisses: More sophisticated, less sweet perfect for adult palates
- Caramel-filled Kisses: The caramel center melts slightly, creating gooey pockets of deliciousness
- Candy cane Kisses: Seasonal option that adds minty freshness perfect for Christmas
- Cherry Kisses: Double the fruity flavor for Valentine’s Day or summer celebrations
- Strawberry Kisses: Pink on red creates beautiful monochromatic presentation
- Sugar cookie Kisses: The white color pops against red and adds vanilla notes
Buying and Prep Tips
When shopping for Hershey’s Red Velvet Blossoms Cookies ingredients, keep these guidelines in mind:
Check cake mix dates: Even sealed cake mixes lose leavening power over time. Use mixes within 6 months of purchase and check best-by dates when buying.
Buy extra Kisses: They’re always useful for other recipes, snacking, or decorating. Having extras prevents mid-recipe panic if you drop one or need to remake a cookie.
Oil type matters: Vegetable oil or canola oil works best. Their neutral flavor lets the red velvet shine. Avoid olive oil or coconut oil their strong flavors interfere.
Room temperature eggs: Remove eggs from the refrigerator 30 minutes before baking. Room temperature eggs incorporate more smoothly into the batter, creating better texture.
Sugar for rolling: Granulated white sugar is classic, creating sparkly, crackled exteriors. Sanding sugar (coarser crystal) creates more dramatic sparkle but costs more.
Ingredients & Prep for Hershey’s Red Velvet Blossoms Cookies
Simplicity is the magic of this recipe. Minimal ingredients and straightforward prep mean you’re never more than 30 minutes from fresh-baked cookies.
Cookie Dough Essentials
Proper preparation prevents problems and ensures success:
Measure accurately: While cake mix cookies are forgiving, accurate measurements of oil and eggs ensure consistent results. Use liquid measuring cups for oil, not dry measuring cups.
Don’t overmix: Once you add wet ingredients to cake mix, stir just until combined. Overmixing develops gluten from the cake mix flour, creating tough cookies instead of tender ones.
Chill the dough briefly: After mixing, refrigerate dough for 15-20 minutes. This firms it up, making rolling in sugar easier and preventing excessive spreading during baking.
Preheat properly: Always preheat your oven to full temperature before baking. Cookies baked in an oven that’s still heating spread incorrectly and don’t set properly.
Main Ingredients List
For the Cookie Dough:
- 1 box (15.25 oz) red velvet cake mix
- 2 large eggs, room temperature
- 1/3 cup vegetable oil or canola oil
- 1 teaspoon vanilla extract
For Rolling and Topping:
- 1/2 cup granulated white sugar (for rolling)
- 48-50 Hershey’s Milk Chocolate Kisses, unwrapped
Optional Enhancements:
- 1 teaspoon red gel food coloring (for more vibrant color)
- 1/4 teaspoon almond extract (adds complexity)
- 2 tablespoons cocoa powder (deepens chocolate notes)
Pantry Staples and Equipment
Having these items ready makes the process seamless:
Quality vanilla extract: Pure vanilla enhances the red velvet flavor. While imitation vanilla works, pure extract tastes noticeably better in simple recipes like this.
Fresh eggs: Check eggs before using. Fresh eggs have thick whites and high, round yolks. Old eggs spread thin and affect cookie texture.
Neutral oil: Vegetable, canola, or light olive oil work perfectly. Their neutral flavors don’t compete with red velvet. Measure precisely too much oil makes cookies greasy and flat.
Sugar for coating: Regular granulated white sugar creates classic sparkle. For special occasions, try sanding sugar (larger crystals, more sparkle) or even red sanding sugar for monochromatic drama.
Essential equipment needed:
- Large mixing bowl
- Whisk or electric mixer (hand mixer or stand mixer)
- Measuring cups and spoons
- Baking sheets (at least 2)
- Parchment paper or silicone baking mats
- Cookie scoop (1-tablespoon size for uniform cookies)
- Small bowl for rolling sugar
- Wire cooling rack
- Oven thermometer (optional but helpful)
Step-by-Step Instructions for Hershey’s Red Velvet Blossoms Cookies
Follow these detailed steps for picture-perfect cookies every single time. Even first-time bakers will find success with this straightforward process.
Pre-Baking Prep for Hershey’s Red Velvet Blossoms Cookies
Set yourself up for smooth, stress-free baking:
- Preheat your oven to 350°F (175°C). Position racks in the upper and lower thirds of the oven for even baking of multiple sheets. Let the oven fully preheat for at least 15 minutes.
- Line your baking sheets with parchment paper or silicone baking mats. This prevents sticking and promotes even browning. Ungreased sheets work too, but parchment makes cleanup effortless.
- Unwrap all Kisses before starting. Place them in a bowl near your workspace. This tedious task is much easier done now than with hot cookies waiting. Count to ensure you have 48-50 Kisses.
- Organize your ingredients in the order you’ll use them. Having everything measured and ready (mise en place) prevents mistakes and makes the process flow smoothly.
- Bring eggs to room temperature if you haven’t already. Quick method: place whole eggs in a bowl of warm (not hot) water for 5-10 minutes.
Mixing Method for Hershey’s Red Velvet Blossoms Cookies
The mixing technique is simple but crucial for perfect texture:
- Combine dry ingredients: Pour the entire box of red velvet cake mix into a large mixing bowl. If adding optional cocoa powder for deeper flavor, whisk it into the dry mix now.
- Add wet ingredients: Create a well in the center of the cake mix. Add eggs, oil, and vanilla extract to the well.
- Mix until just combined: Using a sturdy spoon or electric mixer on low speed, stir wet ingredients into the cake mix. Mix just until no dry streaks remain about 1-2 minutes. The dough will be thick, sticky, and vibrant red.
- Don’t overmix: Stop as soon as ingredients are incorporated. Overmixing creates tough cookies. The dough should look uniform but still somewhat rough not smooth like frosting.
- Chill the dough: Cover the bowl and refrigerate for 15-20 minutes. Chilled dough is easier to handle, rolls better in sugar, and produces cookies with better texture and less spread.
- Prepare rolling sugar: While dough chills, pour granulated sugar into a small shallow bowl. This makes rolling easier and cleaner.
Shaping and Coating Hershey’s Red Velvet Blossoms Cookies
The rolling technique creates that beautiful sparkly exterior:
- Portion the dough: Remove chilled dough from refrigerator. Using a 1-tablespoon cookie scoop or spoon, scoop out dough and roll between your palms into smooth balls about 1 inch in diameter. Uniform size ensures even baking.
- Roll in sugar: Drop each dough ball into the bowl of granulated sugar. Roll around until completely coated on all sides. The sugar coating creates those gorgeous cracks during baking.
- Arrange on baking sheets: Place sugar-coated dough balls on prepared baking sheets, spacing them about 2 inches apart. These cookies spread moderately, so adequate spacing prevents merging.
- Don’t flatten: Unlike some cookie recipes, don’t press these down before baking. They’ll spread and flatten naturally in the oven, creating the perfect shape for Kiss placement.
- Work in batches: If your baking sheets can’t fit all cookies at once, that’s fine. Keep remaining dough covered in the refrigerator while the first batch bakes.
Baking Process for Hershey’s Red Velvet Blossoms Cookies
Timing and temperature are everything for perfect texture:
- Bake the first batch: Place one or two baking sheets in the preheated oven. Bake for 8-10 minutes. The exact time depends on your oven and desired texture.
- Watch for doneness signs: Cookies are done when edges are set and tops look slightly dry with beautiful cracks. Centers should still look soft they’ll firm up during cooling. Don’t wait for completely firm centers or you’ll get hard cookies.
- Timing guide:
- 8 minutes: Very soft, chewy cookies (my preference)
- 9 minutes: Soft with slight chew
- 10 minutes: Firmer, more structured cookies
- 11+ minutes: Risk of dryness; avoid unless you prefer very crisp cookies
- Rotate for even baking: If baking two sheets simultaneously, rotate their positions (swap racks and turn 180°) halfway through baking. This compensates for oven hot spots.
- Don’t overbake: Remember, cookies continue baking on the hot sheet after removal from the oven. What looks slightly underdone now will be perfect in 5 minutes.
Adding Kisses to Hershey’s Red Velvet Blossoms Cookies
The signature finishing touch that makes these cookies iconic:
- Work quickly: Remove baking sheet from oven. Immediately (within 10-15 seconds) press one unwrapped Kiss into the center of each hot cookie. The cookie should still be very soft.
- Press firmly but gently: Push the Kiss down until the bottom is flush with or slightly below the cookie surface. The Kiss should sink in, creating that classic look. The heat softens the Kiss bottom slightly, helping it adhere.
- Act fast: You have about 30-60 seconds while cookies are hot enough to accept the Kiss properly. Work your way across the entire sheet quickly. If cookies cool too much, the Kiss won’t press in correctly.
- Don’t worry about cracks: The sugar coating will crack more as you press the Kiss—this is normal and adds to the beautiful, rustic appearance.
- Let the Kisses set: Don’t touch the Kisses after pressing them in. As cookies cool, the Kiss bottoms will firm up and lock into place.
Cooling and Setting Hershey’s Red Velvet Blossoms Cookies
Proper cooling is essential for perfect texture and Kiss stability:
Cool on the sheet first: Let cookies rest on the baking sheet for 5 minutes after adding Kisses. This allows them to set up enough to move without breaking apart.
Transfer to cooling rack: After 5 minutes, use a thin spatula to carefully transfer cookies to a wire cooling rack. The Kisses should be set enough that they don’t slide off, but still soft in the center.
Complete cooling: Let cookies cool completely on the rack about 20-30 minutes. As they cool, the texture perfects and the Kiss fully sets. Eating them warm is tempting but the texture improves with cooling.
Kiss stability: The chocolate Kiss will feel soft for the first 10-15 minutes but will firm up as it cools. Don’t stack or package cookies until Kisses are completely hard again.
Pro Tips for Perfect Hershey’s Red Velvet Blossoms Cookies
After countless batches, these insider tricks guarantee bakery-quality results every time.
Avoiding Common Mistakes with Hershey’s Red Velvet Blossoms Cookies
Problem: Cookies spread too much and become flat
This creates thin, crispy cookies instead of soft, chewy ones:
- Solution: Chill the dough for at least 15-20 minutes before baking. Warm dough spreads excessively. If your kitchen is hot, chill for 30 minutes.
- Solution: Don’t add extra oil beyond the recipe amount. Too much fat causes excessive spreading.
- Solution: Ensure oven is fully preheated to 350°F. Cookies baked at too low a temperature spread before setting.
- Solution: Use fresh cake mix. Old cake mix with expired leavening can cause spreading issues.
Problem: Cookies turn out dry and cakey
The texture should be soft and chewy, not dry:
- Solution: Don’t overbake. Remove cookies when centers still look slightly soft. They finish cooking on the hot pan after removal.
- Solution: Measure oil accurately. Too little oil creates dry cookies. Use liquid measuring cups and measure at eye level.
- Solution: Don’t overmix the dough. Excessive mixing develops gluten, creating cakey texture. Mix just until combined.
- Solution: Store properly. Cookies dry out if left uncovered. Always store in airtight containers.
Problem: Kisses slide off or don’t stick
The Kiss should nestle perfectly into each warm cookie:
- Solution: Press Kisses immediately after removing cookies from oven. Wait even 30 seconds and cookies may be too cool.
- Solution: Press firmly enough that Kiss bottom sinks into the cookie. A Kiss just balanced on top will fall off.
- Solution: Don’t move cookies until Kisses set. Jostling while Kisses are soft causes them to slide.
Problem: Pale, anemic-looking red color
These should be vibrant, eye-catching red:
- Solution: Choose Duncan Hines or Betty Crocker brands—they have the best color. Store brands can be pale.
- Solution: Add 1 teaspoon of red gel food coloring to the dough if you want more intensity. Gel works better than liquid.
- Solution: Don’t overbake. Extended baking dulls the red color. Remove promptly at 8-10 minutes.
Essential Tool Recommendations for Hershey’s Red Velvet Blossoms Cookies
The right equipment makes this easy recipe even easier:
Cookie scoop: A 1-tablespoon spring-loaded scoop creates perfectly uniform cookies that bake evenly. The OXO brand is reliable and affordable ($10-15). Uniform size is crucial for consistent baking.
Parchment paper or silicone mats: These prevent sticking and make cleanup effortless. Silicone mats are reusable and eco-friendly (about $15 for two). Parchment paper is disposable but convenient.
Wire cooling racks: Essential for proper air circulation during cooling. Cooling on solid surfaces traps steam and creates soggy bottoms. Invest in two racks ($15-20 for a set).
Oven thermometer: Many ovens run 25°F hotter or cooler than the dial indicates. A $10 thermometer ensures accuracy, preventing over or underbaking.
Stand or hand mixer: While not essential (a sturdy spoon works), a mixer makes incorporating ingredients easier and faster. Hand mixers start around $20; stand mixers around $200.
Storage & Freezing Hershey’s Red Velvet Blossoms Cookies
Maximize your batch with proper storage techniques:
Room temperature storage: Store completely cooled cookies in an airtight container at room temperature for up to 1 week. Place parchment paper between layers to prevent Kisses from sticking together.
Extended freshness: Add a slice of bread to the container. The cookies absorb moisture from the bread, staying soft longer. Replace the bread slice every 2-3 days.
Refrigerating: Not necessary and actually not recommended. Refrigeration can make cookies slightly firmer. Room temperature storage is ideal.
Freezing baked cookies: Freeze completely cooled cookies in a single layer on a baking sheet until solid (about 1 hour). Transfer to freezer bags or airtight containers. Freeze for up to 3 months. Thaw at room temperature for 30 minutes before serving.
Freezing cookie dough: Roll dough into balls, coat in sugar, freeze on baking sheet until solid, then transfer to freezer bags. Freeze for up to 3 months. Bake directly from frozen, adding 1-2 minutes to baking time. Press Kisses immediately after removing from oven.
Make-ahead dough: Prepare dough and refrigerate in an airtight container for up to 3 days. Bring to cool room temperature before rolling and baking for best results.
Flavor Variations for Hershey’s Red Velvet Blossoms Cookies
The classic version is perfection, but these variations create exciting twists on Hershey’s Red Velvet Blossoms Cookies for different occasions.
Seasonal and Holiday Variations
Adapt these cookies for every celebration throughout the year:
Valentine’s Day version: Use strawberry-flavored Kisses or pink and red swirled Kisses. Roll dough in pink sanding sugar instead of white for romantic shimmer. Add 1/4 teaspoon almond extract to the dough for extra dimension.
Christmas cookies: Use candy cane Kisses for minty freshness. Roll in red and green sugar mixed together, or alternate some cookies in red sugar, some in green. Add 1/2 teaspoon peppermint extract to complement the candy cane Kisses.
Easter treats: Use pastel-colored Kisses (if available seasonally) or regular Kisses. Roll dough in pastel-colored sanding sugars pink, yellow, blue, and lavender create beautiful spring presentation.
Halloween spooky cookies: Keep the red velvet base but use orange Kisses or chocolate Kisses with orange wrappers. Roll in orange sanding sugar for festive flair. These look amazing at Halloween parties.
Chocolate Lover’s Variations
For serious chocolate enthusiasts, these amplify the chocolate factor:
Double chocolate blossoms: Add 1/4 cup cocoa powder to the dry cake mix before adding wet ingredients. This deepens the chocolate flavor significantly. Use dark chocolate Kisses for ultimate richness.
White chocolate red velvet: Use white chocolate Kisses or Hershey’s Hugs instead of milk chocolate. The contrast of white chocolate against deep red cookies is stunning and delicious.
Chocolate chip red velvet: Fold 1/2 cup mini chocolate chips into the dough after mixing. This adds extra chocolate pockets throughout. Still top with Kisses for the classic look.
Cookies and cream: Crush 6 Oreo cookies into fine crumbs and fold into the dough. The cookies and cream flavor with red velvet is unexpected and addictive.
Creative Flavor Combinations Table
| Variation | Cake Mix | Kiss Flavor | Sugar Coating | Flavor Notes |
|---|---|---|---|---|
| Classic Hershey’s Red Velvet Blossoms Cookies | Red velvet | Milk chocolate | White granulated | Traditional, universally loved, perfect balance |
| Peppermint Red Velvet | Red velvet + 1/2 tsp peppermint extract | Candy cane Kisses | White or crushed candy cane pieces | Refreshing, festive, perfect for Christmas |
| Strawberry Kiss Cookies | Strawberry cake mix | Strawberry or milk chocolate Kisses | Pink sanding sugar | Fruity, sweet, beautiful for Valentine’s Day |
| Lemon Blossoms | Lemon cake mix | White chocolate Kisses | White or yellow sugar | Bright, tangy, perfect for spring/summer |
| Funfetti Celebration | Funfetti cake mix | Any Kiss flavor | Rainbow nonpareils instead of sugar | Fun, festive, kid-friendly for birthdays |
| Chocolate Lover’s Dream | Devil’s food cake mix | Dark chocolate Kisses | White sugar with cocoa powder mixed in | Rich, intense, for serious chocolate fans |
| Salted Caramel | Yellow cake mix | Caramel-filled Kisses | Sugar with sea salt flakes | Sweet-salty perfection, sophisticated |
| Cookies & Cream | Red velvet + crushed Oreos | Cookies and cream Kisses | Oreo crumb “sugar” coating | Nostalgic, fun, unique texture |
Global-Inspired Twists
Give your Hershey’s Red Velvet Blossoms Cookies international flair:
Mexican chocolate: Add 1 teaspoon cinnamon and 1/4 teaspoon cayenne pepper to the cake mix. Use dark chocolate Kisses. Roll in cinnamon sugar (1/2 cup sugar + 1 tablespoon cinnamon) instead of plain sugar. The heat balances perfectly with chocolate.
Italian amaretti style: Replace vanilla extract with 1 teaspoon almond extract. Use chocolate or cherry Kisses. Roll in powdered sugar instead of granulated for a softer, more elegant appearance.
French chocolate: Add 1 tablespoon instant espresso powder to the cake mix for sophisticated mocha flavor. Use dark chocolate Kisses. The coffee enhances chocolate beautifully.
Serving Suggestions for Hershey’s Red Velvet Blossoms Cookies
Transform Hershey’s Red Velvet Blossoms Cookies from a simple treat into a memorable experience with creative presentation and pairing ideas.
Perfect Beverage Pairings
These cookies pair beautifully with various drinks:
Classic milk: Cold whole milk is the traditional pairing. The richness complements red velvet’s tang and cuts through the sweetness. Provide small glasses for dunking.
Coffee: Hot coffee balances the sweet cookies beautifully. The bitterness contrasts with chocolate and red velvet flavors. Try with vanilla lattes or mochas for extra indulgence.
Hot chocolate: Create the ultimate chocolate experience by pairing with rich hot cocoa topped with whipped cream. The double chocolate is decadent and perfect for cold weather.
Tea service: Serve with Earl Grey or English Breakfast tea for an elegant afternoon tea presentation. The tea’s tannins cleanse the palate between cookies.
Dessert cocktails: For adults, pair with chocolate martinis, Irish coffee, or sweet dessert wines. The cookies complement without overwhelming boozy flavors.
Presentation Ideas for Special Occasions
Elevate your Hershey’s Red Velvet Blossoms Cookies presentation:
Cookie exchange packaging: Layer cookies in clear cellophane bags, tied with festive ribbon. Include a recipe card so recipients can make their own batch.
Dessert charcuterie board: Arrange cookies alongside brownies, chocolate-covered strawberries, and other sweet treats. Add fresh berries and mint for color contrast.
Gift tins: Pack cookies in decorative tins lined with parchment or wax paper. Layer with parchment between rows to prevent sticking. These make beautiful hostess gifts.
Cookie tower centerpiece: Stack cookies pyramid-style on a cake stand for dramatic presentation at parties. The red color creates beautiful visual impact.
Individual servings: Wrap 2-3 cookies in clear cellophane tied with ribbon for party favors, place settings, or grab-and-go treats.
Accompaniment Suggestions
Build a complete dessert experience around these cookies:
Ice cream sandwiches: Sandwich vanilla or cream cheese ice cream between two cookies (without the Kisses). Roll the edges in sprinkles or mini chocolate chips. Freeze for an hour before serving.
Dessert platter: Serve alongside complementary desserts like cream cheese frosting for dipping, fresh strawberries, chocolate truffles, and red velvet cake bites.
Coffee bar pairing: Create a coffee station with these cookies, offering various coffee drinks, flavored syrups, whipped cream, and chocolate shavings. Guests customize their own coffee-cookie combination.
Milk flight: Offer three small glasses of different milk types—whole milk, chocolate milk, and strawberry milk for a fun tasting experience with the cookies.
FAQs About Hershey’s Red Velvet Blossoms Cookies
Can I make Hershey’s Red Velvet Blossoms Cookies without eggs?
Yes, though texture will differ slightly:
Flax eggs: Mix 2 tablespoons ground flaxseed with 6 tablespoons water. Let sit for 5 minutes until gel-like. Use in place of 2 eggs. Cookies will be slightly denser but still delicious.
Commercial egg replacer: Products like Bob’s Red Mill Egg Replacer work well. Follow package directions to replace 2 eggs. Results are very close to the original.
Applesauce: Use 1/2 cup unsweetened applesauce to replace 2 eggs. This creates softer, cake-like cookies—different texture but still tasty. Reduce oil slightly (to 1/4 cup) to compensate for applesauce moisture.
Aquafaba: Use 6 tablespoons (liquid from canned chickpeas) to replace 2 eggs. Whip slightly before adding. Creates surprisingly similar texture to eggs.
Note: Vegan versions work but the Kiss must also be vegan. Most Hershey’s Kisses contain milk, so look for dairy-free chocolate alternatives shaped similarly.
Why do my Hershey’s Red Velvet Blossoms Cookies crack excessively?
Some cracking is normal and beautiful, but excessive cracking can indicate issues:
Natural cracking: The sugar coating naturally cracks during baking, creating the characteristic crackled appearance. This is desirable and shows proper technique.
Excessive cracking causes:
- Oven too hot: Baking above 350°F causes rapid expansion and excessive cracking. Verify temperature with an oven thermometer.
- Dough too warm: If dough isn’t chilled before baking, it spreads too quickly, creating cracks. Always refrigerate dough 15-20 minutes.
- Too much leavening: Old or improperly stored cake mix can have uneven leavening, causing irregular cracking.
Preventing excessive cracking: Chill dough thoroughly, ensure accurate oven temperature, and use fresh cake mix. Some cracking is expected and adds to the rustic charm.
Can I use different cake mix flavors for this recipe?
Absolutely! The technique works with virtually any cake mix:
Chocolate cake mix: Creates rich, fudgy cookies. Use milk chocolate or dark chocolate Kisses.
Strawberry cake mix: Makes pink cookies with fruity flavor. Use strawberry or white chocolate Kisses.
Lemon cake mix: Creates bright, tangy cookies perfect for spring. Pair with white chocolate Kisses.
Funfetti cake mix: The sprinkles in the mix create colorful, festive cookies. Use any Kiss flavor.
Devil’s food cake mix: Extra-chocolatey, dark, and rich. Perfect for chocolate lovers.
Yellow or vanilla cake mix: Classic sugar cookie flavor that pairs with any Kiss variety.
Technique stays the same: Regardless of cake mix flavor, use the same measurements and baking instructions. The base recipe is universal.
How do I prevent the Kisses from melting into Hershey’s Red Velvet Blossoms Cookies?
The Kiss should soften slightly but maintain its shape:
Timing is crucial: Press Kisses into cookies immediately after removing from the oven while cookies are hot. The heat softens the Kiss bottom, helping it adhere, but shouldn’t melt it completely.
Don’t return to oven: Once Kisses are pressed in, don’t put cookies back in the oven. The Kiss will melt.
Work quickly: Press all Kisses within 30-60 seconds of removing the baking sheet from the oven.
Room temperature Kisses: Don’t use Kisses straight from the refrigerator—they’re too cold and won’t adhere properly. Room temperature Kisses work best.
Proper baking time: Overbaked, extremely hot cookies can melt Kisses too much. Bake just until edges set (8-10 minutes) for optimal temperature.
Cooling: The Kiss will feel soft initially but firms up as cookies cool. This is normal and desirable.
Are Hershey’s Red Velvet Blossoms Cookies safe during pregnancy?
Yes, when made with properly handled ingredients:
Fully cooked eggs: The baking process cooks eggs thoroughly, eliminating any salmonella risk. Cookies baked at 350°F for 8-10 minutes are completely safe.
No raw dough: Avoid tasting raw cookie dough due to raw egg content. Once baked, cookies are perfectly safe.
Quality ingredients: Use fresh, properly stored eggs and cake mix. Check expiration dates.
Chocolate is fine: The amount of chocolate in these cookies is minimal and completely safe during pregnancy. The caffeine content in one or two cookies is negligible.
Food coloring: The red food coloring in cake mix is FDA-approved and safe in the amounts used in baking.
Bottom line: Fully baked Hershey’s Red Velvet Blossoms Cookies are safe and can be enjoyed during pregnancy. Just avoid the unbaked dough.
Can I make Hershey’s Red Velvet Blossoms Cookies gluten-free?
Yes, with one simple substitution:
Gluten-free cake mix: Replace regular red velvet cake mix with gluten-free red velvet cake mix. Several brands make gluten-free versions:
- King Arthur Baking gluten-free cake mixes
- Simple Mills cake mixes (also grain-free)
- Bob’s Red Mill gluten-free cake mixes
Same technique: Use identical measurements and baking instructions. The cookies may be slightly more delicate, so handle gently.
Verify all ingredients: Ensure the Kisses are gluten-free (most Hershey’s products are, but always check labels). Verify oil and vanilla extract are certified gluten-free if celiac disease is a concern.
Texture notes: Gluten-free versions are slightly more crumbly but still delicious. Let cookies cool completely before moving them they firm up as they cool.
Cross-contamination: If severe celiac disease is a concern, ensure all equipment and surfaces are thoroughly cleaned to prevent cross-contamination from other baking.
Conclusion
These Hershey’s Red Velvet Blossoms Cookies have earned their place as a beloved classic for excellent reasons they’re stunning to look at, irresistibly delicious to eat, and remarkably simple to make. The combination of tangy red velvet, sweet chocolate Kisses, and that gorgeous sparkling sugar coating creates something truly special that brings joy to every occasion, from holiday cookie exchanges to casual Tuesday afternoons.
Print
Hershey’s Red Velvet Blossoms Cookies 4 Secrets to Perfection
- Total Time: 45
- Yield: 48 cookies 1x
- Diet: Vegetarian
Description
These stunning Hershey’s Red Velvet Blossoms Cookies use a simple cake mix shortcut to create bakery-quality cookies in under 30 minutes. Soft, chewy red velvet cookies are rolled in sparkling sugar and topped with a chocolate Kiss for the perfect sweet treat. The vibrant red color and classic flavor make them ideal for Valentine’s Day, Christmas, birthdays, or any celebration.
Ingredients
1 box (15.25 oz) red velvet cake mix
2 large eggs, room temperature
1/3 cup vegetable oil or canola oil
1 teaspoon vanilla extract
1/2 cup granulated white sugar (for rolling)
48–50 Hershey’s Milk Chocolate Kisses, unwrapped
Optional: 1 teaspoon red gel food coloring for more vibrant color
Optional: 1/4 teaspoon almond extract
Instructions
1. Preheat oven to 350°F (175°C). Line baking sheets with parchment paper or silicone baking mats.
2. Unwrap all Hershey’s Kisses and set aside in a bowl.
3. In a large mixing bowl, combine red velvet cake mix, eggs, vegetable oil, and vanilla extract.
4. Stir with a sturdy spoon or mix with electric mixer on low speed until just combined, about 1-2 minutes. Don’t overmix.
5. Cover bowl and refrigerate dough for 15-20 minutes to firm up.
6. Pour granulated sugar into a small shallow bowl.
7. Remove chilled dough from refrigerator. Using a 1-tablespoon cookie scoop or spoon, scoop dough and roll between palms into 1-inch balls.
8. Roll each dough ball in sugar until completely coated. Place on prepared baking sheets 2 inches apart.
9. Bake for 8-10 minutes. Cookies are done when edges are set and tops look slightly dry with cracks. Centers should still appear soft.
10. Remove from oven. Immediately press one unwrapped Hershey’s Kiss into the center of each hot cookie, pushing down until bottom is flush with cookie surface.
11. Let cookies cool on baking sheet for 5 minutes.
12. Transfer to wire cooling rack and cool completely, about 20-30 minutes.
13. Store in airtight container at room temperature for up to 1 week.
Notes
Chill the dough for at least 15 minutes—this prevents excessive spreading and makes rolling easier.
Don’t overbake! Remove cookies when centers still look soft. They continue cooking on the hot pan.
Press Kisses immediately after removing cookies from oven—waiting even 30 seconds can make them harder to press in.
For more intense red color, add 1 teaspoon red gel food coloring to the dough.
Cookie dough can be refrigerated for up to 3 days or frozen for up to 3 months.
Bake frozen dough balls directly from freezer, adding 1-2 minutes to baking time.
Duncan Hines or Betty Crocker cake mix brands provide the best color and flavor.
Store cookies with parchment paper between layers to prevent Kisses from sticking together.
- Prep Time: 15
- Cook Time: 10
- Category: Dessert, Cookies
- Method: Baking
- Cuisine: American
Nutrition
- Serving Size: 1 cookie
- Calories: 95
- Sugar: 12g
- Sodium: 85mg
- Fat: 4g
- Saturated Fat: 1.5g
- Unsaturated Fat: 2g
- Trans Fat: 0g
- Carbohydrates: 14g
- Fiber: 0.5g
- Protein: 1g
- Cholesterol: 10mg
Keywords: red velvet cookies, hershey kiss cookies, cake mix cookies, blossom cookies, easy cookies, holiday cookies, valentine cookies